|
|
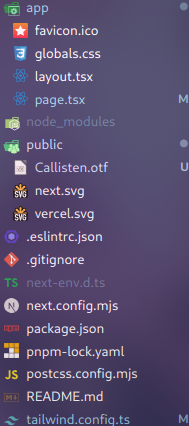
Custom fonts are widely used for distinguishing websites, maintaining consistent user experience across various OS and browsers. However, there are many bottlenecks with using custom fonts. We will learn about optimizing fonts for better performance and user experience in Next.js, the most widely used React meta-framework in the world. PrerequisitesThese are the following topics that we are going to discuss, also we will see the ways to optimize the fonts: Setting up the Next.js projectStep 1: Now it’s time to get started with coding. We will be using pnpm and TypeScript for this demo but it is completely optional. Use the following command to initialise a new Next.js project in you desired directory #npm Step 2: Start the dev server with the following command #npm Dependencies:"dependencies": { Project structure:Adding fontsNow apply it to HTML element using one of the following ways: Using className: <body className={crimsonPro.className}>{children}</body> Using style: <body className={crimsonPro.style}>{children}</body> Google FontsWhen using with [Tex]next/font[/Tex] package, no requests are made to Google as fonts are automatically self hosted. Step 1: Go to Google Fonts and select a font that you like. Next.js team suggests using variable fonts as it improves performance of the website. Step 2: Import the desired font from [Tex]next/font/google[/Tex]. For example, we are importing Crimson Pro font which is a variable font. import { Crimson_Pro } from "next/font/google" Step 3: Create a new instance of the font, which you have chosen. Important options include: As previously discussed, variable fonts do need to specify weight and style. import { Crimson_Pro } from "next/font/google" For non-variable fonts, you will need to specify weight: import { Roboto } from "next/font/google"; Step 4: Now apply it to HTML element using the one of the methods we have discussed before. Finally your root layout.tsx file should look like this: Output:  Local FontsFirst you have to download a custom font if one is not present in your computer. You can go to any reputable website to download it. For the below example I am using Callisten font from dafont website. You can use the link below to get the same: https://www.dafont.com/callisten.font After downloading the font. Copy the file and paste it in the public folder of your Next.js project. In Linux, you can following command to move the file to desired location. mv path/to/file path/to/project/public Now you can follow the below steps. Step 1: Import [Tex]next/font/local[/Tex] and specify the src of your local font file. import localFont from 'next/font/local' Step 2: Create a instance. Remember to specify src of the font file. Here is a example: const callisten = localFont({ Step 3: Now add the font to HTML elements. Here is a example of using of local fonts in root layout.tsx. Output:  With Tailwind CSS[Tex]next/font[/Tex] can define CSS variables which can be used with Tailwind CSS. Step 1: First define the CSS variable in instance. import localFont from "next/font/local"; Step 2: Add font to HTML element using following: <body className={`${roboto.variable} ${callisten.variable}`}> Step 3: Modify Tailwind config file import type { Config } from "tailwindcss"; Step 4: Use font-callisten and font-roboto in Tailwind classes. To see this in effect, modify the root page.tsx file. Output:  output ConclusionWe have learnt about Fonts and their negative impact on website. We have learnt ways to to optimize front in Next.js using [Tex]next/font[/Tex] package. We have used this package to optimize fonts with Google fonts and local fonts. I have also learnt to use fonts with Tailwind CSS using CSS variables. |
Reffered: https://www.geeksforgeeks.org
| ReactJS |
Type: | Geek |
Category: | Coding |
Sub Category: | Tutorial |
Uploaded by: | Admin |
Views: | 41 |