|
|
PyTorch is a freely available machine learning library that can be imported and used inside the code for performing machine learning operations based on requirements. The front-end api is written in Python and the tensor operations are implemented using C++. It is developed by Facebook’s AI Research Lab (FAIR). It is easy to use, adaptive (provides flexibility) and most importantly it poses dynamic computation graph capability (providing graphs based on the input in run time at that instant).
Overview of Vertex AIVertes AI is a service which is provided by Google Cloud Platform (GCP) which allow developers to deploy the machine learning model , to build the machine learning model and most importantly to scale it up very conveniently. It comprises of various tools and services that a developer can access and can efficiently manage the the machine learning model from building the model to deployment of the model to scaling of the model everything can be done inside the service provided by Vertex AI. Terminologies related to Vertex AIModel Artifact :- when a machine learning model produce files and data in the training process it is known as Model Artifact . It is required because without this Artifact the model after the training phase cannot be deployed in the production or it cannot be used. Vertex AI Model Registry :- It basically acts as a overall container (repository) for storing and managing the various type of machine learning model and developers can access it throughout the development phase. Google Cloud Storage (GCS) :- This is also a service provided by the google in which it offers a scalable storage option to store data on demand basis and charge accordingly. It can handle a huge volume of data also as it is scalable and efficient. Containerization :- It means that the dependencies and the application are packed into a container and this container performs in all possible computing environment which assure that it should perform same regardless of the its deployment environment. Model Endpoint :- It is basically a dedicated URL or network location which can be accessed and can be use for making prediction for the deployed machine learning model. It plays a important role as it help in sending data to the model and receiving result from it which a client can do by accessing the endpoints. Installation of the required libraryLet’s add the required libraries to the requirements.txt file. Flask==3.0.3 By using the pip install command one can install the libraries mentioned in the requirements.tx file. The command is as follows: pip install -r requirements.txtSince we are dockerizing the application, we will mention the above installation command in the Dockerfile. Implementation of the PyTorch modelLet’s implement a Pytorch model by applying a linear transformation to the incoming data. We can make use of one nn.Lienar model, one of the fundamental component of PyTorch. The code is as follows: The nn.Linear applies a linear transformation to input data using weight and biases. The module takes two parameters called Let’s try a sample prediction before we save the model. Output Linear(in_features=10, out_features=1, bias=True)Here we have iniatialzed a linear Pytorch model. Now let’s create a random input data of same matrix and make the prediction Output [[-0.26785045862197876]]So our model works fine. Next we can save our model so that our flask application can load it and make prediction. Saving the PyTorch modelThe model can be saved by using the following code Flask Application and Pytorch ModelAs a next step, we need to create a flask application and load the Pytorch model. Finally, one can make predictions using the model by invoking a REST API. Create a Flask ApplicationLet’s create a directory called ‘app’. Inside ‘app’ folder we can create a main.py file. The file contains the code to create flask application. The main.py file is as follows:
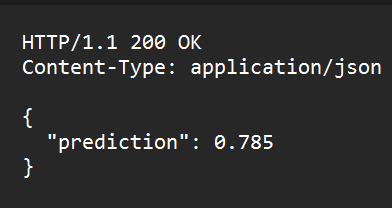
Here we created a basic structure needed for a FLASK application. Now the predict() method does nothing. To make it functional we need to load our Pytorch model and make predictions when the user invokes the REST API (‘/predict’). Also, we created a health monitoring API, which is used to check the health of the deployed model. The /health route is mentioned while creating the endpoint in the GCP Vertex AI. Loading the Pytorch model in FlaskTo load the Pytorch model, it is necessary to mention the linear module in our Flask application. The code is as follows: Here we created a linear Pytorch model and loaded the saved Pytorch model. Now we can construct the predict() method. The complete code is as follows: Dockerizing the Flask ApplicationTo dockerize the flask application, it is necessary to create a docker file with necessary installation and running commands. Creation of a DockerfileYou need to create a Dockerfile in the same folder where ‘app’ directory is mentioned. The commands in the Dockerfile is as follows. FROM python:3.9-slim Now we need to build a docker conatiner based on the above docker file. Before that lets check the directory structure. The directory structure is as follows: app The app directory contains our flask based python code (main.py) and the Pytorch model (model.pth). Build a Docker ContainerTo build a docker container you need to execute the command below: docker build -t flask-torch-docker .The above command will execute the Dockerfile and build a docker named ‘flask-torch-docker’ Run a Docker ContainerLet’s run the ‘flask-torch-docker’ docker using below command docker run -it -p 8080:8080 flask-torch-dockerTesting a Docker Container LocallyIt can be tested by using the curl command, below is the mentioned code. curl -X POST http://localhost:8080/predict \ Output { "prediction": 0.785}The command prompt screenshot is as follows: Push the dockerized flask image (Pytorch model) to GCPIn the above steps we created a Pytorch model using Flask, dockerized it and ensured that the dockerized application is working locally. Now it’s time to move to the crucial step, which is deploying the Pytorch model on Vertex AI. In this article we will deploy our dockerized image to the Google Cloud Registry (container) and then later deploy the container to VertexAI. As a first step we need to set up Google Cloud Environment Setting up Google Cloud EnvironmentTo set up google cloud environment, the user needs to create an account or sign in through the google account and add the payment details and after that user have the access to Google Cloud CLI (for managing the resources and services ). You can create a Google cloud project and install the gcloud CLI. Now we can focus on how to push our dockerised image to Google Cloud Registry (GCR). Steps to push dockerized image to GCRLet’s look at the steps to push the dockerized image to GCR. The steps are as follows: Step 1: Initializing the google cloud SDK (software development kit ) gcloud initStep 2: Setting up Docker to authenticate requests to GCR (Google Cloud Registry) using the gcloud command-line tool gcloud auth configure-dockerStep 3: Building the Docker image docker build -t flask-torch-docker:latest .Step 4: Add your GCP project ID and the preferred region to the Docker image docker tag flask-torch-docker:latest gcr.io/your-project-id/flask-torch-docker:latestIn the above command replace the your-project-id with the project ID of your system. You can use the below command to get all the project IDs. gcloud projects listThe above command will list the project IDs from where you can choose and replace it there and run the command. Step 5: Pushing the Docker image to GCR (Google Cloud Registry ) docker push gcr.io/your-project-id/flask-torch-docker:latestSame in the above command replace the project ID of your system in place of your-project-id.  The pushed image can be checked under the Artifact Registry Deploying the GCP container to Vertex AINow we have deployed our dockerized Py torch model to the Google Cloud Registry, which acts as a container. Next step is to deploy the container to Vertex AI. You can login in to your google cloud account and search for Vertex AI. The page is as shown below:  This is the home page of Vertex AI , after this you can click on enable all APIs below. Import the Model Using Model RegistryTo import the model, you can choose the model registry functionality from Vertex AI. The model registry page is as follows:  After clicking on the model registry Here user can create a new model for registry or can import the model model from container registry or artifact registry. In this article we will deploy the model by importing the container from artifact registry and provide necessary model setting details. The steps are as follows: Step 1: Create new model and provide appropriate name and region Here we create a new model (for existing model, you can update the version) and provide a name and appropriate region. Step 2: Import an existing custom container  import custom container from artifact registry Here we choose the option to import the existing custom conatiner from artifact registry and browse the container from artifact registry, which has the dockerized Pytorch model (flask application). Step 3: Provide Model Setting details  setting details You can set the prediction route as /predict and port as 8080 (as mentioned in dockerized flask app). For Health route you can mention it as “/health”. Step 4: Click the ‘Import model’ to create the model in the Model Registry Finally, one can click the Import model to create the model in the Model Registry. Define the endpoint and Deploy the ModelIn the above steps, we created a model in the model registry. Now we need to define the endpoint and deploy the model. In the Model Registry we have the option to Deploy the endpoint. Select the Endpoints from navigation menu and the click on create and then configure it. Step 1: Enter the model name and select the region After clicking on Deploy End-Points. Step 2: Mention details in Model Settings In the Model Setting first set the Traffic split.  Then set the number of computing node and click on Done at the bottom side Here we set the traffic split and also set the number of computing node. Step 3: Deploy the model After configuring the necessary endpoint details you can deploy the model by clicking on ‘DEPLOY TO ENDPOINT’. 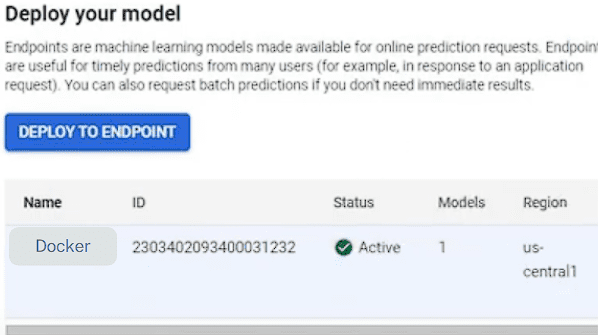 After deploying the model it will be displayed After creating the endpoints click on deploy then select the model name and configure the rest setting according to the requirement and click on deploy. Testing the Endpoints and Monitoring the ModelFor testing the Endpoints you can use the following curl command. curl -X POST https://<your-endpoint-url>/predict \ Here replace the “your-endpoint-URL” with your system endpoint URL and then run the command it will return a JSON output. { For monitoring the Deployed model user can navigate to deploy and use and there choose monitoring and the following page will appear where user can monitor the deployed model and also can configure the monitoring according to the user convenience .  After clicking on monitoring  Monitoring the Deployed Model. Additional features of Vertex AI
Applications
|
Reffered: https://www.geeksforgeeks.org
| Blogathon |
Type: | Geek |
Category: | Coding |
Sub Category: | Tutorial |
Uploaded by: | Admin |
Views: | 16 |