
|
|
Selenium is a suite of open-source tools and libraries used for automating web browsers. It enables users to write and execute scripts that interact with web elements, mimicking user actions such as clicking buttons, filling out forms, and navigating through web pages. Selenium supports multiple programming languages and can be integrated with various testing frameworks, making it versatile for functional testing and cross-browser testing of web applications. Prerequisites for configuring Selenium in EclipseFollowing are the prerequisits to configure selenium in eclipse with Java: 1. Install JavaInstalling Java involves downloading the JDK (Java Development Kit) Development Kit depending on whether you’re using Windows, Linux, or macOS from Oracle. Verify the installation by checking Java -version in the command line to ensure Java is correctly installed and accessible. Install Java 2. Install Eclipse IDEEclipse is an integrated development environment (IDE) for computer programming. You can write java program using eclipse IDE. You can install eclipse from official website of eclipse i.e https://www.eclipse.org/downloads/packages/installer.  Install Eclipse IDE 3. Install SeleniumDownload Selenium Java bindings from Selenium Downloads and add the JAR files to your project. 4. Install Browser Driver:Download the relevant Browser Driver:
Place these driver files in a directory that is part of your system’s PATH. This ensures that you can run these drivers from any command-line prompt. 5. Install Java Language Bindings
How to Configure Selenium in Eclipse with JavaFollowing are the steps to Configure Selenium in Eclipse: Step 1: Open EclipseStart Eclipse by double-clicking the eclipse.exe file in your download directory. Step 2: Set Up a Workspace in Eclipse (Select a directory as workspace)Create a workspace, for example, C:\horje, which will serve as a directory to store all your test scripts. Open this workspace in Eclipse.  Set Up Directory Step 3: Create a New Java ProjectNavigate to File > New > Java Project to create a new project. Enter a name for your project. 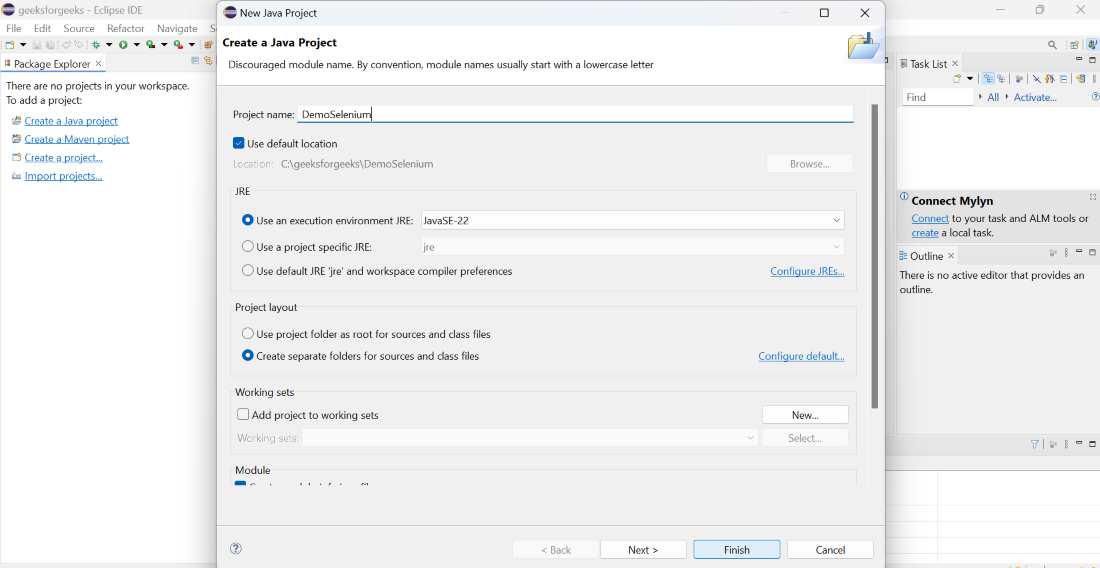 Create a New Java Project Step 4: Create a PackageInside the src folder, create a new package by right-clicking on it and selecting New > Package. Name this package (e.g., com.horje). 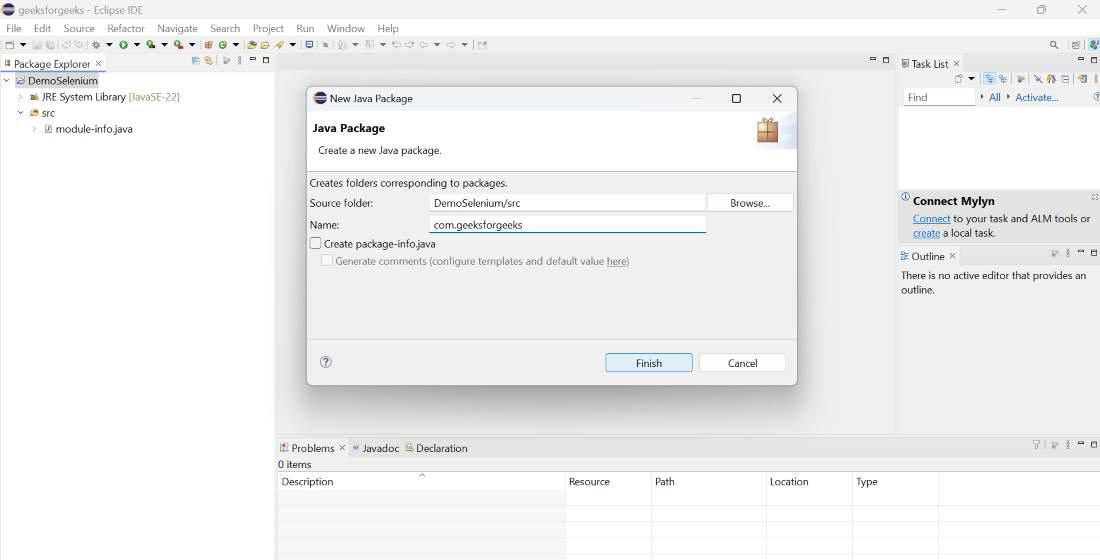 Create a Package Step 5: Create a ClassThen, create a new class within this package by right-clicking on the package name and selecting New > Class.  Create a Class Step 5: Include Selenium JARs in the Project
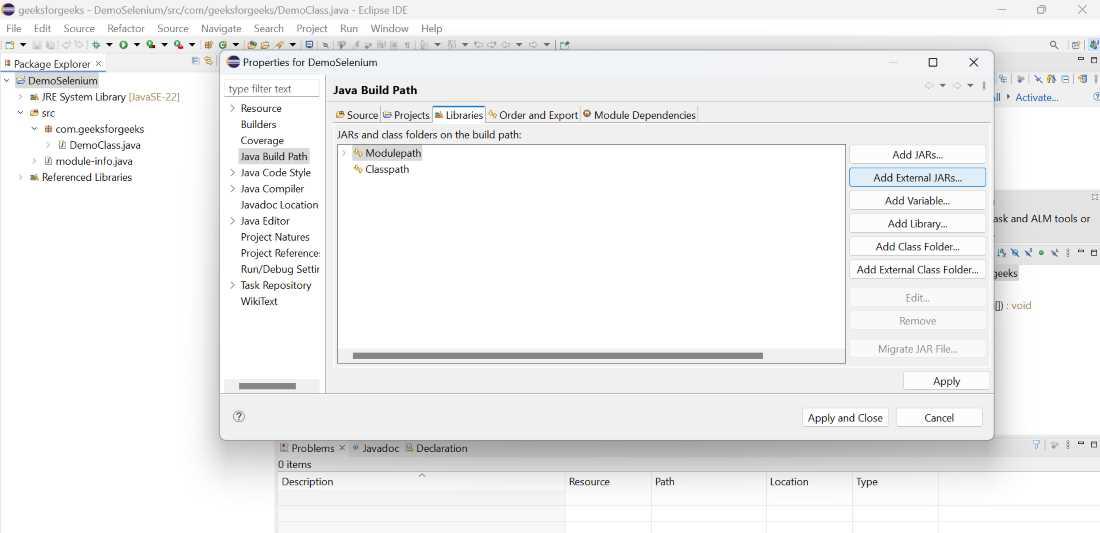 Include Selenium JARs in the Project
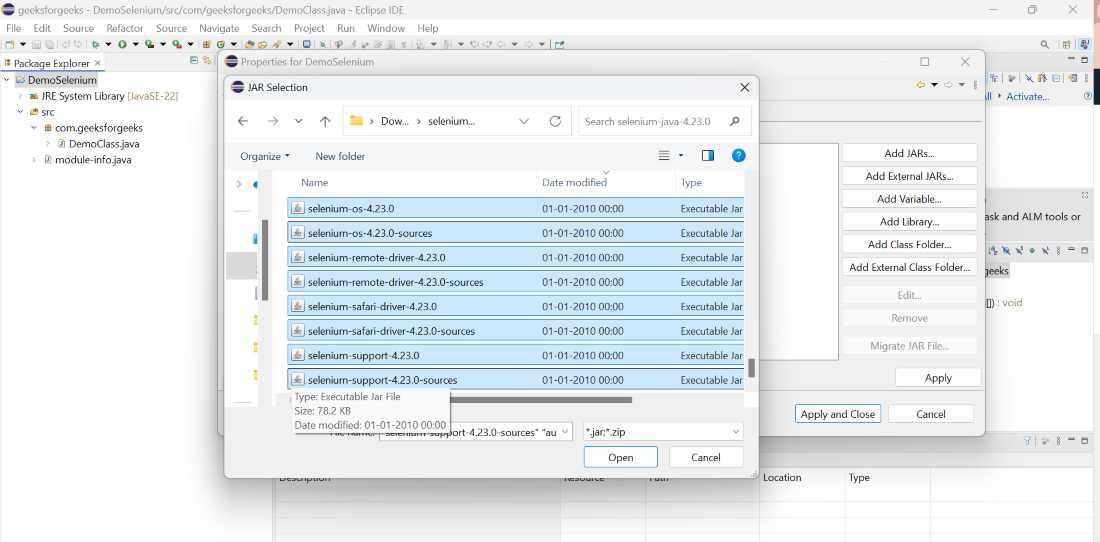 Add External Jars From Downloads
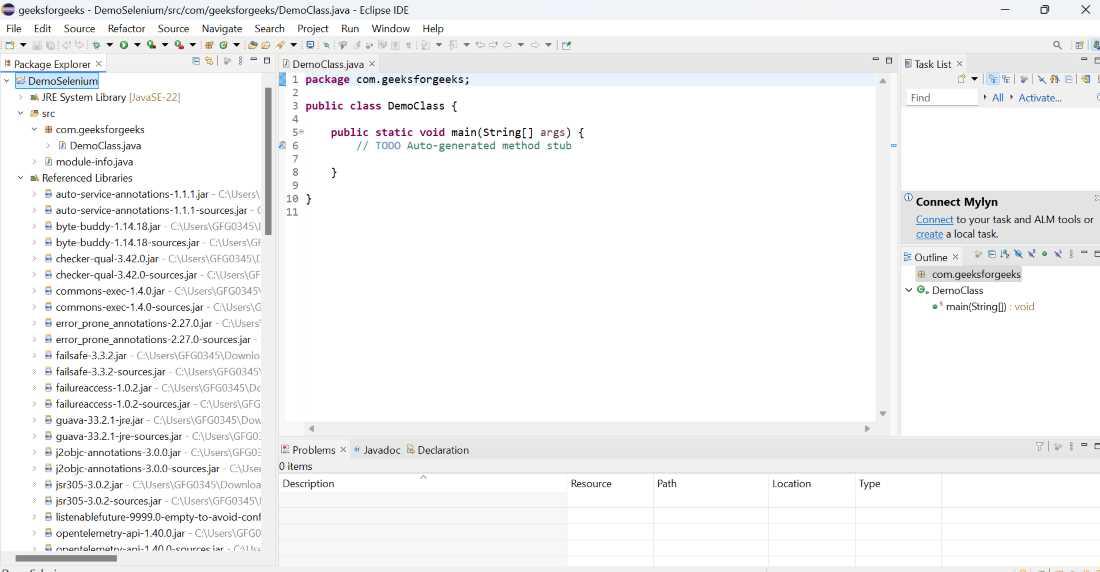 After Adding External Jars These steps will integrate Selenium WebDriver with Eclipse, allowing you to write and run test scripts. Related Posts:ConclusionBy following the steps outlined above, you will have successfully configured Selenium WebDriver with Eclipse. This setup allows you to create, organize, and run automated test scripts efficiently. With Selenium integrated into your Eclipse IDE, you can now leverage its powerful features for cross-browser testing, ensuring your web applications perform reliably across different environments. |
Reffered: https://www.geeksforgeeks.org
| Automation Testing |
Type: | Geek |
Category: | Coding |
Sub Category: | Tutorial |
Uploaded by: | Admin |
Views: | 17 |