|
|
NestJS is a Node.js framework for building efficient, reliable, and scalable server-side applications. One of its core concepts is the use of controllers. Controllers in NestJS are responsible for handling incoming requests, processing them, and returning responses to the client. In this article, we will learn more about Controllers in NestJS. What is a Controller?In the context of NestJS, a controller is a class decorated with the @Controller() decorator. It is designed to handle specific routes within an application. Controllers are responsible for accepting incoming requests, invoking the appropriate service methods, and sending the response back to the client. They act as an intermediate between the client and the service layer. Creating a ControllerTo create a controller in NestJS, you need to define a class and decorate it with the @Controller() decorator. Here’s a basic example: import { Controller, Get } from '@nestjs/common';
@Controller('cats')
export class CatsController {
@Get()
findAll(): string {
return 'This action returns all cats';
}
}In this example, the CatsController is created to handle requests to the /cats route. The @Get() decorator maps HTTP GET requests to the findAll method. Route HandlersRoute handlers in NestJS are methods within a controller that are decorated with route-specific decorators like @Get(), @Post(), @Put(), @Delete(), and @Patch(). These decorators define the HTTP method and the route to which the handler will respond. Here’s an example demonstrating various route handlers: import { Controller, Get, Post, Put, Delete, Param, Body } from '@nestjs/common';
@Controller('cats')
export class CatsController {
@Get()
findAll(): string {
return 'This action returns all cats';
}
@Get(':id')
findOne(@Param('id') id: string): string {
return `This action returns cat #${id}`;
}
@Post()
create(@Body() createCatDto: any): string {
return 'This action adds a new cat';
}
@Put(':id')
update(@Param('id') id: string, @Body() updateCatDto: any): string {
return `This action updates a cat #${id}`;
}
@Delete(':id')
remove(@Param('id') id: string): string {
return `This action removes a cat #${id}`;
}
}In this example, the CatsController has handlers for different HTTP methods and routes. The @Param() and @Body() decorators are used to extract route parameters and request bodies, respectively. Dependency InjectionNestJS utilizes dependency injection to manage dependencies within an application. Controllers can inject services and other providers using the constructor. This allows for cleaner and more maintainable code. import { Controller, Get } from '@nestjs/common';
import { CatsService } from './cats.service';
@Controller('cats')
export class CatsController {
constructor(private readonly catsService: CatsService) { }
@Get()
findAll(): string {
return this.catsService.findAll();
}
}In this example, the CatsController injects the CatsService through its constructor. This allows the controller to delegate the business logic to the service. Handling RequestsNestJS controllers can handle various types of requests, including:
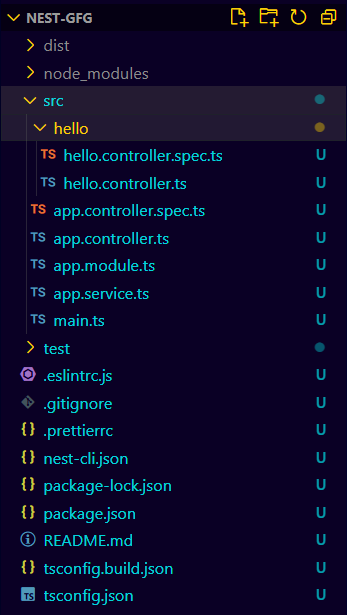
Middleware and GuardsControllers can also utilize middleware and guards to handle authentication, logging, and other cross-cutting concerns. Middleware is applied to routes to perform actions before the route handler is invoked. Guards determine whether a request should be handled by a route based on custom logic. import { Controller, Get, UseGuards } from '@nestjs/common'; In this example, the AuthGuard is applied to the CatsController, ensuring that all requests to this controller are authenticated. Steps to Implement Controllers in NextJSStep 1: Setup a Nest.js ProjectFirst, ensure you have Node.js and npm installed. Then, install the Nest CLI if you haven’t already: npm install -g @nestjs/cliStep 2: Create a new NestJS project:nest new nest-gfgStep 3: Navigate to the project directory:cd nest-gfgStep 4: Creating a Simple ControllerGenerate a new controller using the Nest CLI: nest generate controller helloThis will create a new controller file under the src/hello directory. Folder StructureFolder Structure Dependencies"dependencies": {
"@nestjs/common": "^10.0.0",
"@nestjs/core": "^10.0.0",
"@nestjs/mongoose": "^10.0.10",
"@nestjs/platform-express": "^10.0.0",
"dotenv": "^16.4.5",
"mongoose": "^8.5.1",
"reflect-metadata": "^0.2.0",
"rxjs": "^7.8.1"
}Example: Implementing the Controller To start the application run the following command. npm run startOutput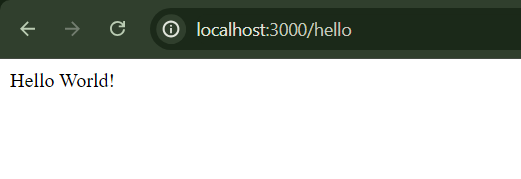 Controllers in NestJS |
Reffered: https://www.geeksforgeeks.org
| Web Technologies |
Type: | Geek |
Category: | Coding |
Sub Category: | Tutorial |
Uploaded by: | Admin |
Views: | 17 |