.webp)
|
|
Numerous WordPress websites run on Apache servers, yet this doesn’t need to be the situation, to make your own WordPress website, you can likewise involve NGINX as your web server all things considered. one of the advantages is that NGINX servers are by and large viewed as especially lean since they have low equipment necessities and scarcely need any memory. Simultaneously, the web server can deal with a ton of traffic. This makes NGINX a decent Apache alternative for WordPress. Prerequisites:Prior to understanding how we can introduce WordPress with NGINX, it is important to understand the various frameworks which are being used :
Now that we have a basic understanding about each of the framework and language that is being used, we can begin installing wordpress with NGINX. How to install WordPress with NGINX?Installing the WordPress within NGINX, there are not many methods, so following only one method that can help to easily install WordPress within NGINX is important. following are the steps to install WordPress with NGINX: Step 1: Update the terminal:First it is required to update the terminal with the names of new packages along with its newer versions, for this type following command in the terminal: sudo apt update
this will update the terminal with latest packages and it will be easier to install newer software. sudo apt update. Step 2: Install PHP, MySQL and NGINX and unzip it:Next step is to download and install the various packages required for installing wordpress in NGINX server, for this run the following command in the terminal: sudo apt install php-fpm php-mysql mysql-server nginx unzip
This will give output similar to the image below: 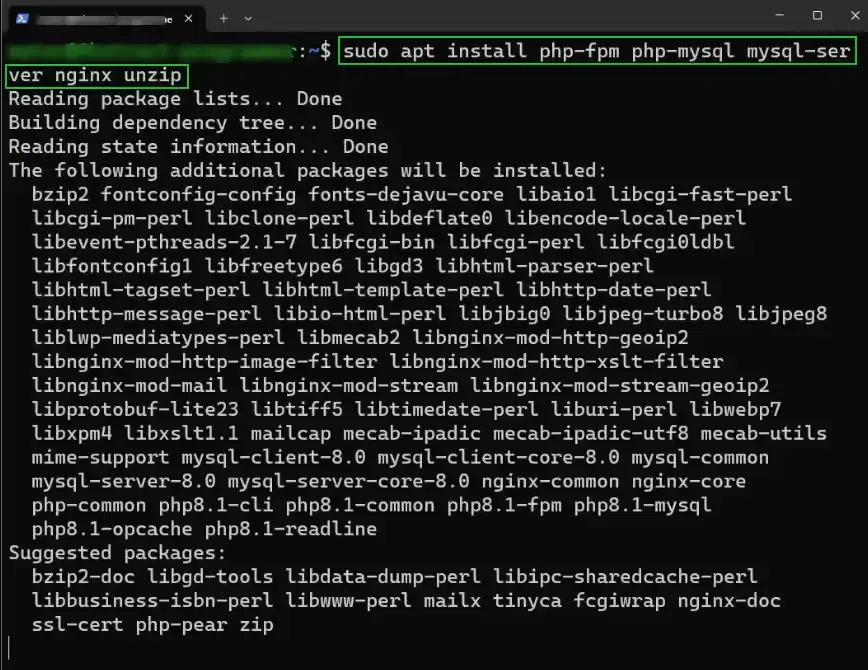 sudo apt install php-fpm php-mysql mysql-server nginx unzip. Step 3: Find PHP sock file:Next step is to find the sock file for the PHP, sock files are used for the purpose of communication between files, for this after following the above step, type following command in the terminal: cd /var/run/php/
after entering inside the /var/run/php/ folder type ls to see the list of available files and ph8.1-fpm.sock will be available in the list.  cd /var/run/php/ Step 4: sudo rm default file:After making sure the sock file is available next step is to enter the nginx folder and open the default file, for this type following command in the terminal: cd /etc/nginx/sites-available/
after this type ls and now default should be available in the terminal, after this type sudo rm default and then type sudo nano default to open the file in text editor: 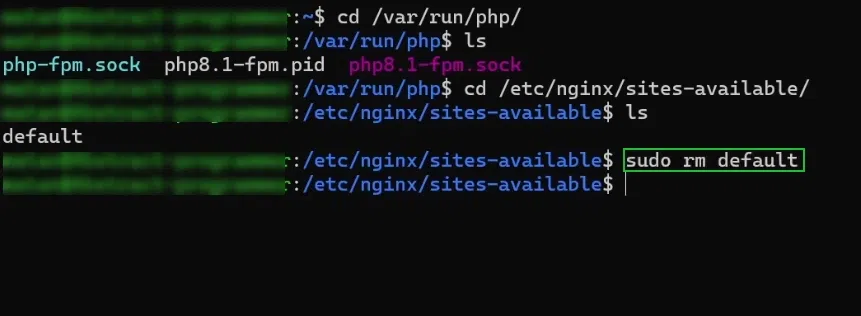 cd /etc/nginx/sites-available/ Step 5: Add code for default file:Next step is to add the code for the default file so that the server can function properly, for this type following code in the text editor: server { This will look something almost identical to the picture below, add the code, save it and leave the text manager.  code for default file. Step 6: Restart the nginx service:Now restart the nginx service by using the following command: sudo systemctl restart nginx.service
restart the help and open the HTML organizer and check for the index.nginx-debian.html file, for this type following code in terminal: cd /var/www/html/index.nginx-debian.html
this is also displayed in the image below:  Restart the nginx service. Step 7: Download wordpress using wget:Download the most recent version of the wordpress to install into the NGINX by entering following command into the terminal: sudo wget https://wordpress.org/latest.zip
This is also shown in the image below:  sudo wget https://wordpress.org/latest.zip Step 8: Unzip the downloaded wordpress zip file:Once the file has been downloaded using the above step, it is now required to unzip the file, for this type following command in the terminal: sudo unzip latest.zip
This will unzip the zip file that contains the wordpress.  sudo unzip latest.zip Step 9: Bypass assigned disk quota:Now the next step required is to bypass the assigned disk quota for this the chown command can be used, type the following command in the terminal and it will bypass it: sudo chown -R www-data:www-data*
This is also displayed in the image below:  sudo chown -R www-data:www-data* Step 10: Find server IP address:After the above step is completed it is important to find the IP address so that the NGINX server can be opened in the browser, for this run the following command: ip a
This is a command that will show the IP address used for the global scope, copy it and open in any browser to run the nginx server. 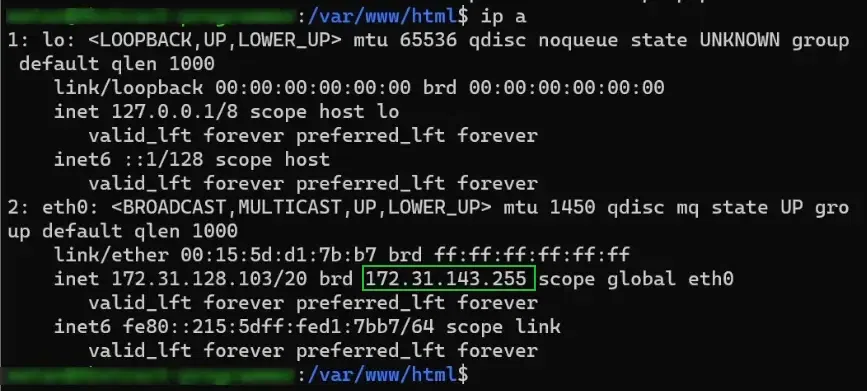 ip a Step 11: MySQL Installation:As the wordpress requires the MySQL database to connect and function it is required to setup the MySQL using terminal, for this run the following command: sudo mysql_secure_installation
Output:  sudo mysql_secure_installation Step 12: Create database:Next step is to create the database, copy the commands mentioned in the image below one by one to create the database so that it can be connected to the wordpress. 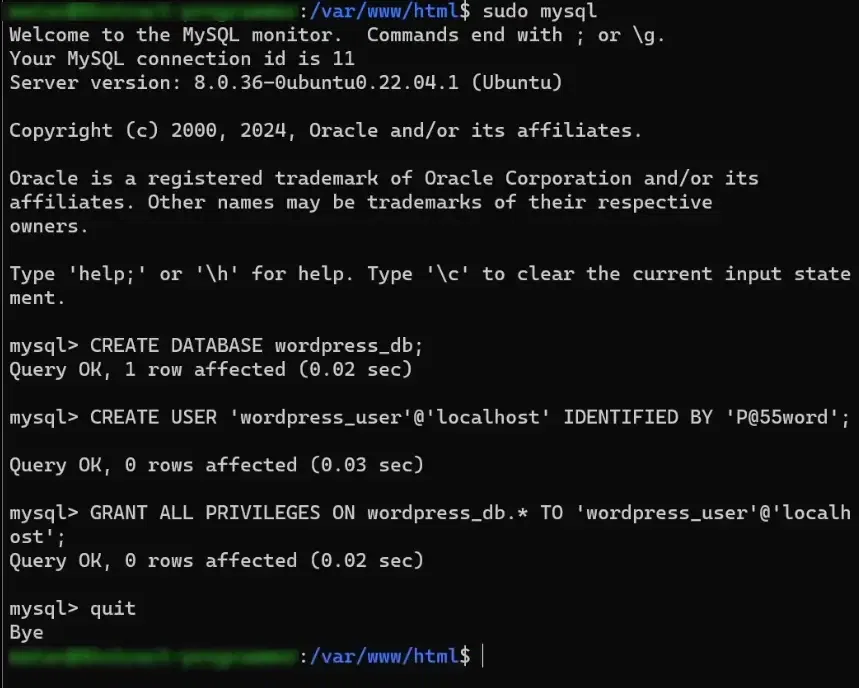 Create database. Step 13: Connect the database to wordpress:Once the database is created successfully open the IP address that was obtained from the “ip a” command and paste it in any browser, then enter the database details to connect the wordpress to the database as mentioned in the image below.  Connect the database to wordpress. That is it, after this click on the submit button and the wordpress is installed in the NGINX server. ConclusionNGINX can be used for hosting the wordpress locally within the system and with the help of services such as PHP, MySQL we can easily setup and connect the database to the wordpress system as well, this article can be helpful to understand how to install the wordpress with NGINX. FAQsHow to install WordPress on Ubuntu with Nginx?
Do I need Nginx for WordPress?
How to install WordPress using Nginx?
|
Reffered: https://www.geeksforgeeks.org
| Linux Unix |
Type: | Geek |
Category: | Coding |
Sub Category: | Tutorial |
Uploaded by: | Admin |
Views: | 21 |