
|
|
Bugzilla is the defect tracking tool where we have to track the bugs and issues related to software products, websites, etc. We can report the bugs including the summary, attachment, and description of the bug, and also we update our bug status. Suppose if the bug is not fixed we have to change the bug status to “not fixed”.In this article, we will cover a brief explanation of the bugzilla. Table of Content
What is Bugzilla?Bugzilla as the name suggests “bug” that is a bug tracking tool where we track our bugs and issues that we have reported related to website functionality not working or any other software-related problems. Bugzilla is written in PERL and the database used is MySQL. It provides various features such as advanced search options, email notifications, and many more. In the next part, we will discuss how to log in to bugzilla and how to report the bug. Steps to log in to BugzillaHere is the step-by-step guide to logging to bugzilla- Step 1: Open your favourite browser and paste the Bugzilla official website link https://bugzilla.mozilla.org/ in your browser. Bugzilla offiicial Page Step 2: If you have not created your account then click “New Account” Otherwise click the log-in button if you already created the account and enter the email address and password.  Click the Log in option Creating a Bug-report in BugzillaHere are the step by step guide to creating a bug report in bugzilla is follows: Step 1: After login, you have to click the “New Bug” to create a new bug report. 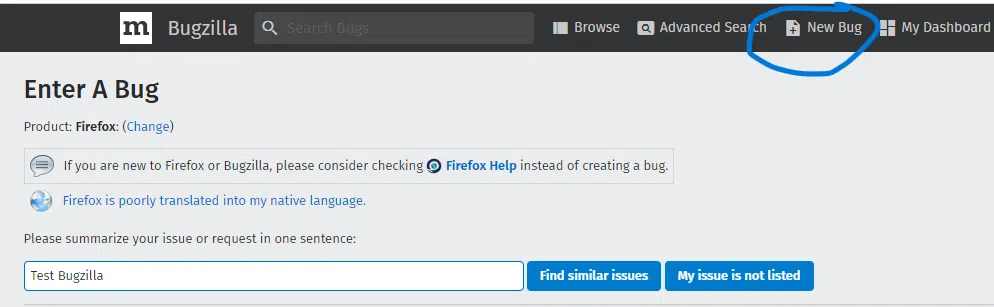 Click the New bug option Step 2: After that, we have to “select the product”. We select firefox as a product. you can choose any of them according to your needs.  Select the product Step 3: After that, we write the details of the bug such as a summary, description of the bug, and many more. Here is the attached screenshot.  Enter your bug details 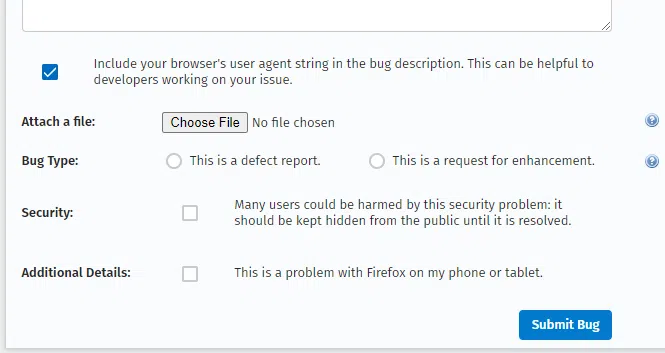 bug details Here are the break down of some of the important terms present in the screenshot-
Step 4: After filling in the bug details, then click the submit button to submit our bug. Below the screenshot that represents our bug is successfully reported. 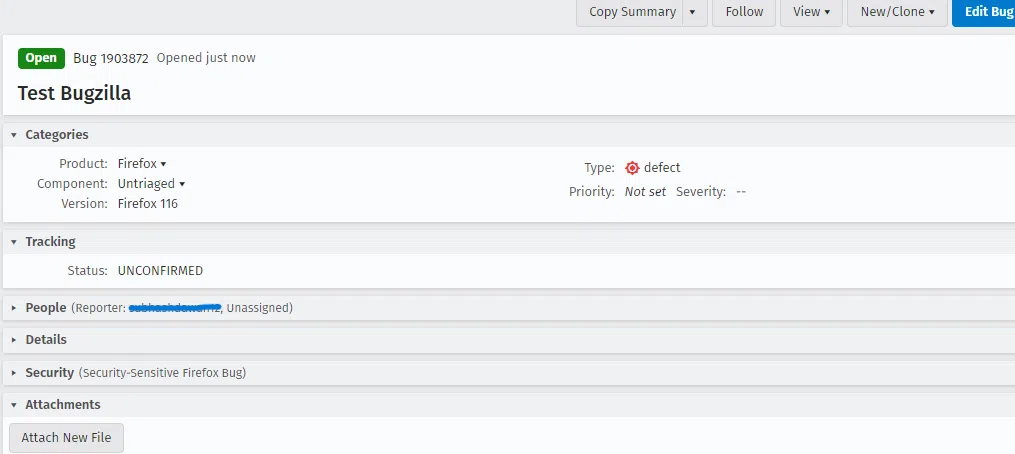 Bug reported successfully Create Graphical Reports in BugzillaGraphical reports represent bug information in pie charts, line graphs, and the bar charts. Here is the step-by-step guide to generating graphical reports in Bugzilla- Step 1: Click the “Reports” menu present in the My Dashboard. 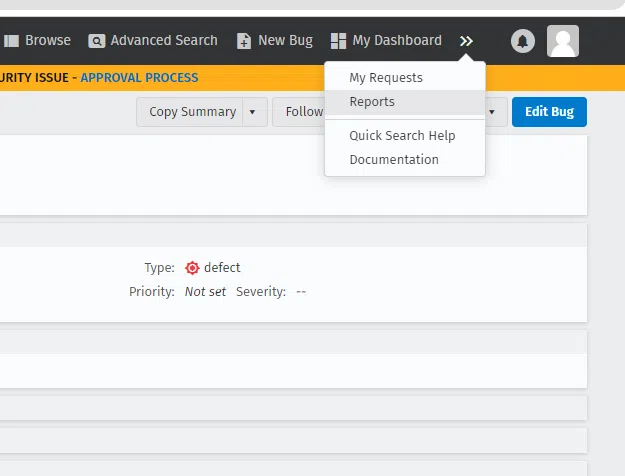 Click the Reports option Step 2: After that in the Current State section, click Graphical Reports to create a graph based on the bug.  Click the Graphical reports menu Step 3: After clicking the graphical reports, we have to plot the line graph between Assignee as a vertical axis and priority as a horizontal axis.  Graph Arrangements Step 4: Click the Generate Report button to plot the line graph between Assign and priority.  Line graph plotted between Asignee and priority Browse FunctionHere are the step by step guide of browse function are follows Step 1: Click the browse function that is available at the bugzilla main page.  Click the Browse menu Step 2: After that, we have to select the product as we selected previously i.e Firefox and after that we have to select the component that we used while filling the bug details.We used untriaged as a component.  Select a component Step 3: After clicking untriaged component, we have to see our reported bug.  reported bugs Step 4: After clicking the “Test Bugzilla” we have to see our bug details. How to use Simple search option in BugzillaHere are the step by step guide to use simple search option in bugzilla- Step 1: Click the Advanced Search menu and we see four search options available instant search, simple search, advanced search and google search.  Advanced Search menu Step 2: After that click the Simple search option and select the status, product, and words. Status are two types open and closed. If we want to see open bugs in that case we have to select open otherwise closed. For the product we have used Firefox so we select that and words represent a keyword of our bug, we use Test Bugzilla as a keyword of our bug.  Click the Simple search menu Step 3: After clicking the search button, we have to see our open bug.  See our open bugs How to add or remove a column to default search screenHere are the step by step guide to add or remove a column – Step 1: Click the Change column option. Click the My Dashboard menu and after that click “My Bugs” where you found your reported bugs then you found change columns menu. .png) click My Bugs .png) Click Change Columns Step 2: After that, we see that the two options available are the “Available column” and “Selected column”. So, we select priority in the available column and click the arrow “->” to go to priority in the Selected column. .png) priority in the available column .png) Click the “->” arrow button to insert Priority in Selected Columns Step 3: After that, we clicked the Change Columns button, and we saw that the priority option was previously not available when we checked our bug but now after changing the column, it’s available. .png) After changing columns Priority column is available How to use Advanced Search in BugzillaHere are the step by step guide to use advanced search in bugzilla- Step 1: Click the Advanced Search option and after write the summary of our bug that we used previously when we reported our bug. .png) Click the Advanced Search Step 2: After clicking the Search button, we have to see our bug. .png) See our bug How to use preferences in BugZillaPreferences present in Bugzilla are General preferences, Email preferences, and Saved search preferences. In preferences, we first have to click the preferences option. .png) General preferences After selecting preferences we have to see various preferences-
.png) Click the General Prefrences .png) General Preferences Email preferencesIn Email preferences, we have to enable or disable the email notifications. If we enable the email notifications, we have to receive the bug-related information. We see in fig 3a when we click enable all bugmail we see that all fields checked with blue tick and in fig 3b when we click disable all bugmail we see that all the field are unchecked.  Email Preference  Email Preference Saved Search preferencesWhen we click the saved search we see our reported bugs. When we click the run option we have to see our reported bug. In the search section, you have to see your reported bug with the keyword name.  Click the Run  Bug run and open successfully ConclusionTracking, reporting bugs and issues will be easily possible with the Bugzilla tool. It provides a collaborative environment where we interact with our clients or employees. We easily report our bugs in Bugzilla and also set the deadline for the bugs when they will be resolved. As we already covered how to login in to bugzilla and how to report the bugs you can go through the steps that we provided. Frequently Asked Questions On Bugzilla toolWhich companies used bugzilla for bug tracking?
Is it mandatory to install a Bugzilla in your system for bug tracking?
What are the advantages of Bugzilla?
|
Reffered: https://www.geeksforgeeks.org
| Software Testing |
| Related |
|---|
| |
| |
| |
| |
| |
Type: | Geek |
Category: | Coding |
Sub Category: | Tutorial |
Uploaded by: | Admin |
Views: | 18 |