
|
|
As we know, there are three main ways to access and manage AWS services, AWS CLI (command line interface), the AWS Management Console, and the AWS SDK(Software (software kit). Here we are working with the first tool, which is AWS CLI (command line interface) which is basically used for interacting with AWS Resources through scripting and automation functionality of the AWS CLI. In this article, we are deep-diving into working with DynamoDB through AWS CLI and we know that AWS DynamoDB is a managed NoSQL database service that is serverless, AWS and we use it when we have large amounts of data and need to read/write frequently. Key PointsBefore we start to explore our main topic, we just need to understand some of the following points:
Step-by-step guidance to use AWS CLI for DynamoDBBefore starting, Make sure that you have an AWS Account with the needed permission to manage DynamoDB resources and AWS CLI installed and configured on your system. Note: When you work with the Windows command prompt, some syntax issues come up. We should write “ instead of ” and \” instead of “. For example, “{\”: year\”:{“N”:”2023″}}”. Step 1: Configuring AWS CLI
aws configure
After that you enter some necessary information such as,
IAM PermissionsIf you want to manage the DynamoDB resources using AWS CLI, first check that the IAM user or role has the following permissions:
Creating and attaching custom IAM Policyaws iam create-policy \ Attach the policy to your IAM user or roleaws iam attach-user-policy Step 2: Creating a DynamoDB TableHere, we use the create-table command for DynamoDB table creation. Here, I create a movie table with a primary composed of year and title in the below example. aws dynamodb create-table You can check the result in the AWS Command Line interface by using the command given above. Picture 2.1: You can check the result in the AWS Command Line interface by using the command given above. 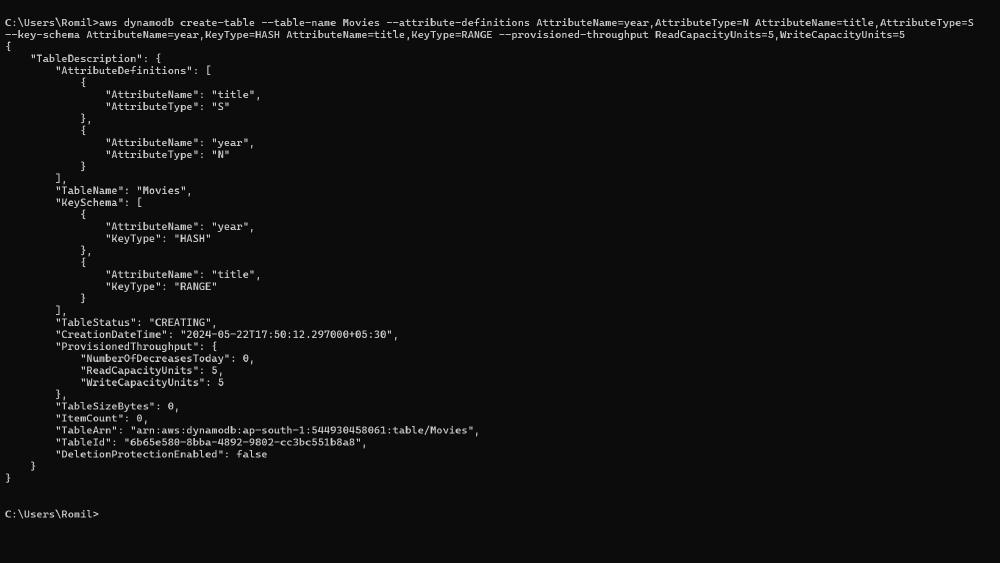 Picture 2.1 Picture 2.2: You can check the result in the AWS Management Console by using the command given above. 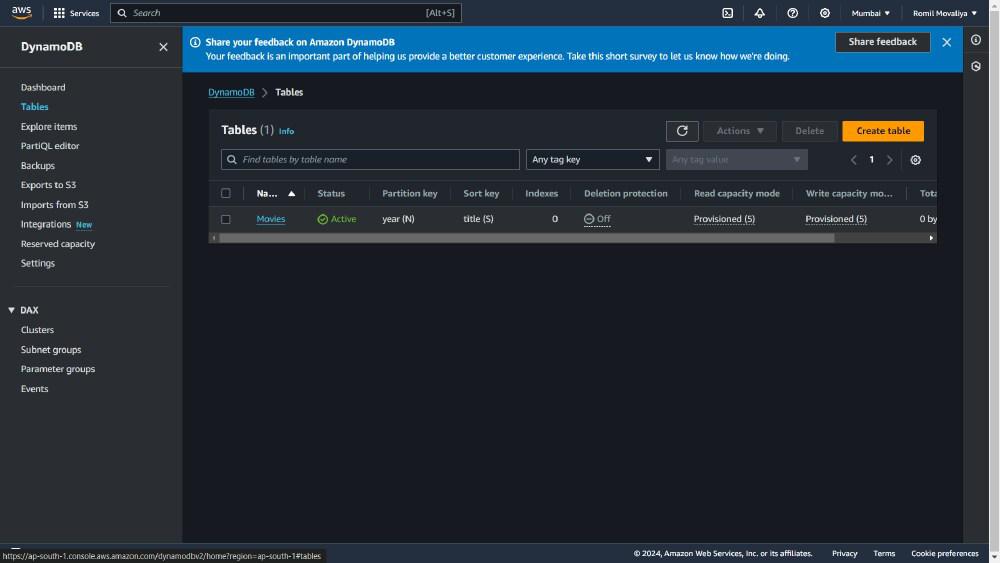 Picture 2.2 Step 3: Inserting Data into the TableHere, we use the put-item command to put an item into the table. In the below example, it shows that a movie record is being inserted. aws dynamodb put-item Picture 3.1: You can check the result in the AWS Command Line interface by using the command given above.  Picture 3.1 Picture 3.2: You can check the result in the AWS Management Console by using the command given above. 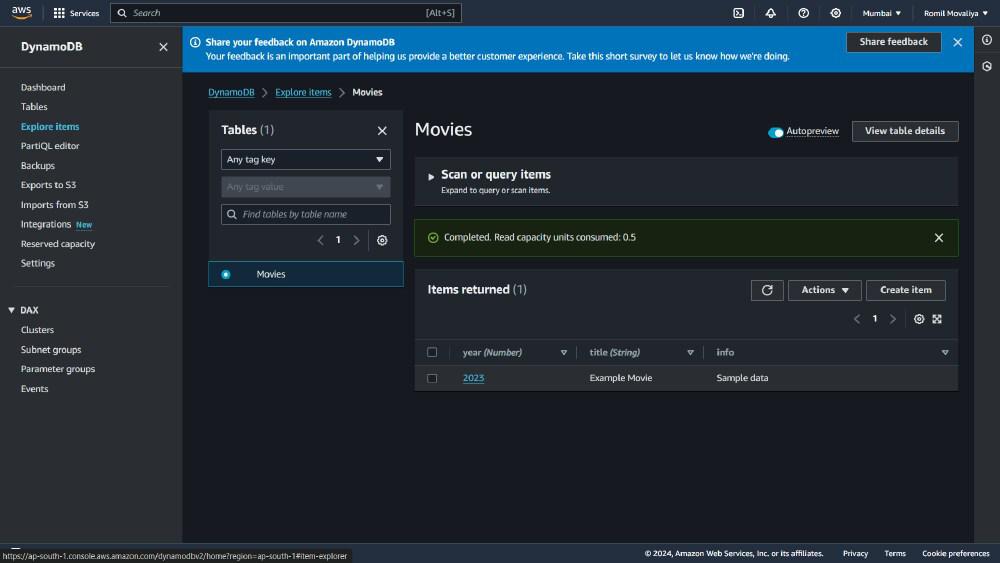 Picture 3.2 Step 4: Querying Data from the TableHere, we use the query command to query data in the table. In the below example, it basically shows that it retrieves all movies that were released in 2023. aws dynamodb query Picture 4.1: You can check the result in the AWS Command Line interface by using the command given above. Note: When you work with the Windows command prompt, some syntax issues come up. In the above command ‘year‘, you need to change ‘#yr’ because year is a reserved keyword in DynamoDB. and We Should write ” ” Instead of ‘ ‘ and \” Instead of “ . For example, “{\”:year\”:{“N”:”2023″}}”. 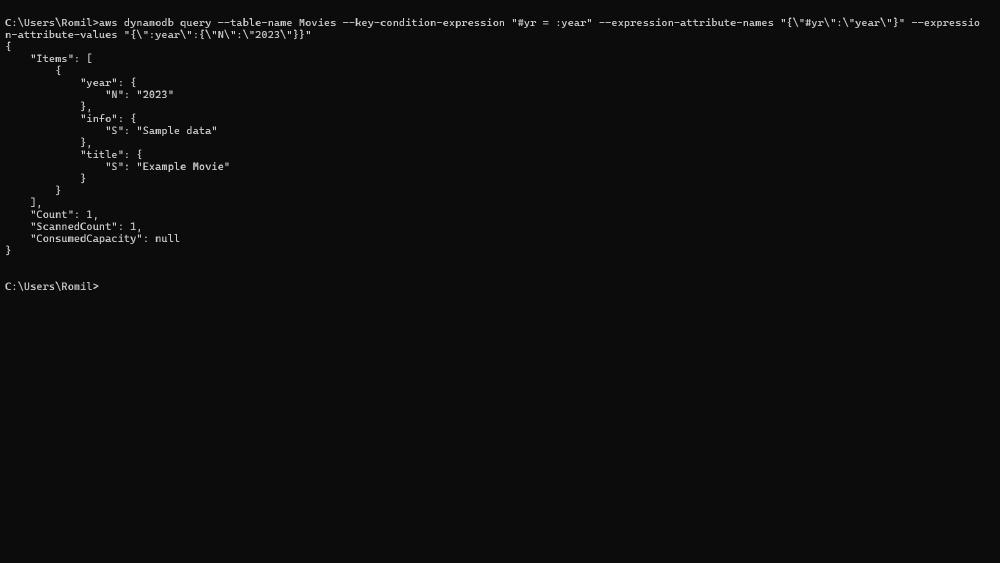 Picture 4.1 Picture 4.2: You can check the result in the AWS Management Console by using the command given above. 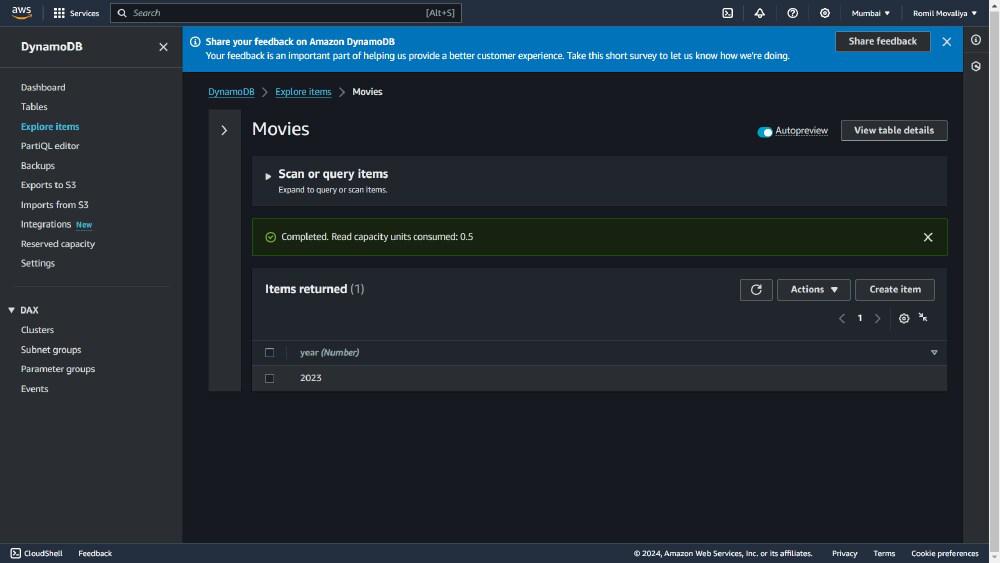 Picture 4.2 Step 5: Updating DataHere, we use the update-item command to update existing item into the table. In the below example, it shows that updates the info attribute for a specific movie. aws dynamodb update-item Picture 5.1: You can check the result in the AWS Command Line interface by using the command given above. 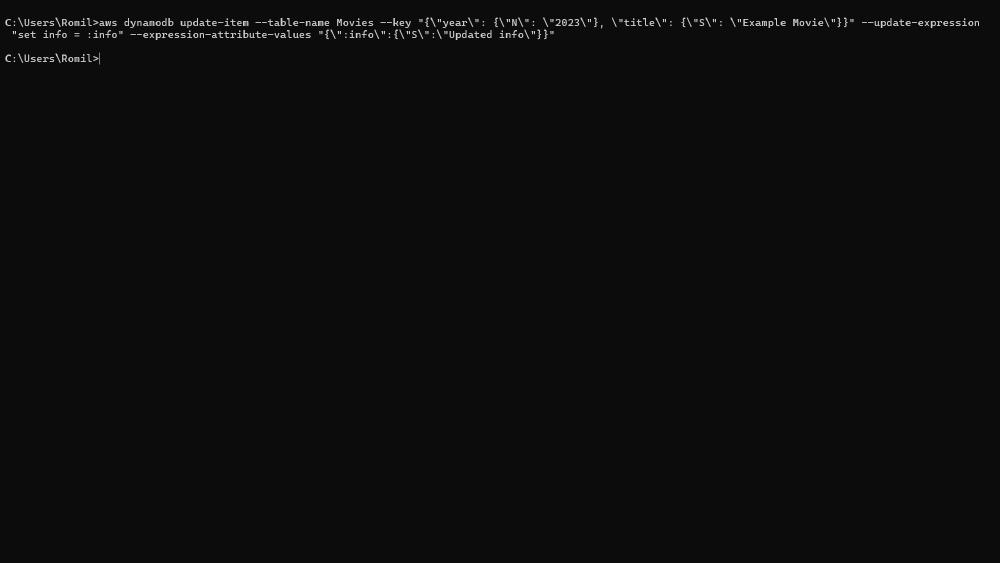 Picture 5.1 Picture 5.2: You can check the result in the AWS Management Console by using the command given above. 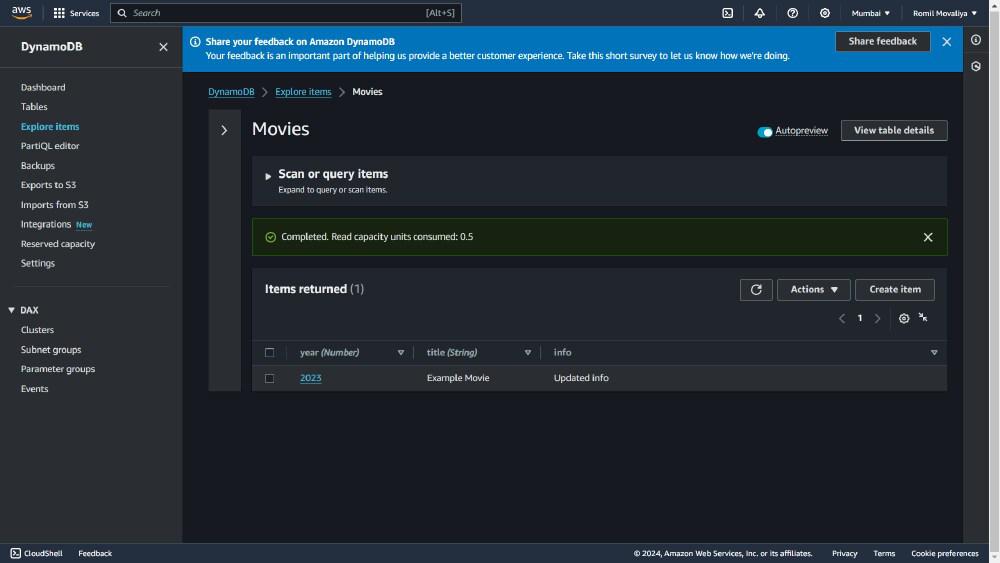 Picture 5.2 Step 6: Deleting DataHere, we use the delete-item command to delete an item from the table. In the below example, it shows that it deletes a specific movie record. aws dynamodb delete-item Picture 6.1: You can check the result in the AWS Command Line interface by using the command given above. 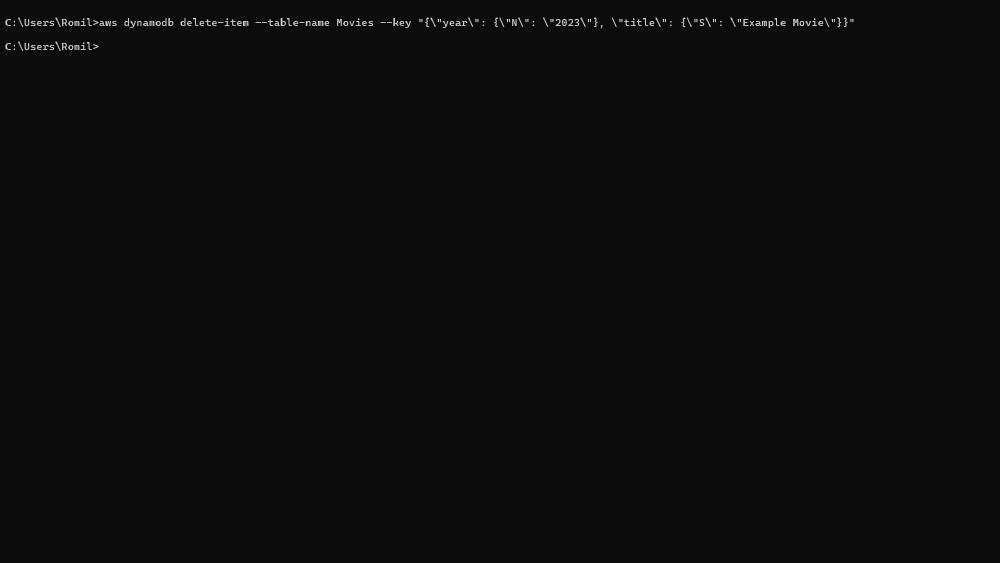 Picture 6.1 Picture 6.2: You can check the result in the AWS Management Console by using the command given above.  Picture 6.2 Step 7: Deleting a TableHere, we use the delete-table command, which deletes a table. aws dynamodb delete-table Picture 7.1: You can check the result in the AWS Command Line interface by using the command given above.  Picture 7.1 Picture 7.2: You can check the result in the AWS Management Console by using the command given above. 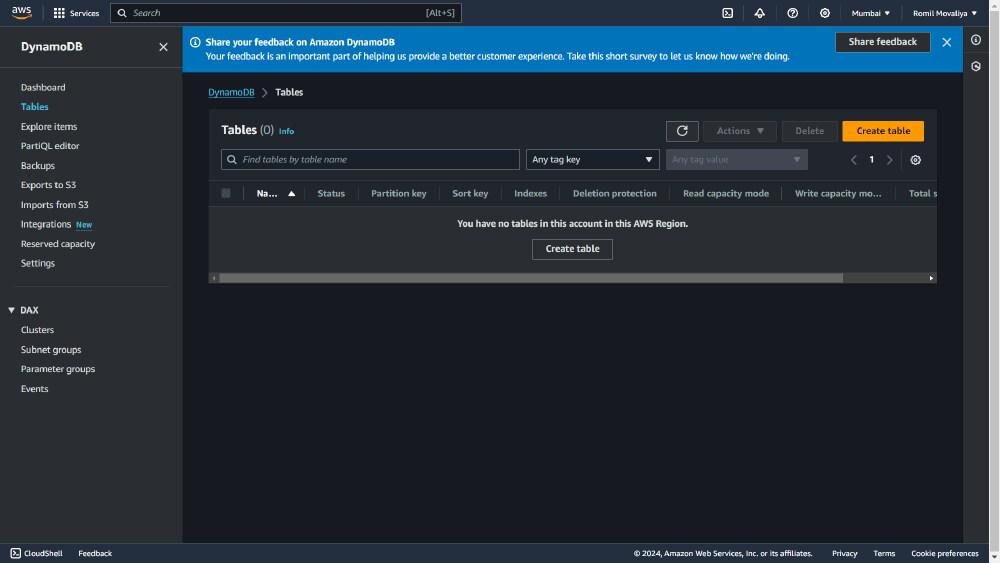 Picture 7.2 ConclusionUsing the AWS CLI to manage DynamoDB objects allows for efficient automation and scripting of database operations. This guide covered important operations such as creating tables, inserting data, querying, updating and deleting data. AWS CLI increases performance and stability, especially for highly managed data with frequent read/write operations. The benefits of these commands simplify operations and help maintain robust, scalable, and reliable applications in a server-less environment. AWS CLI and AWS DynamoDB – FAQsWhy we are using AWS DynamoDB?
How much charge AWS DynamoDB takes?
When we use the AWS Management console instead of the AWS CLI?
In the first step of configuration, is the output format mandatory?
|
Reffered: https://www.geeksforgeeks.org
| Amazon Web Services |
Type: | Geek |
Category: | Coding |
Sub Category: | Tutorial |
Uploaded by: | Admin |
Views: | 19 |