|
The Circuit Breaker pattern is the design pattern used in modern software development to prevent the service from repeatedly trying to execute the operation that is likely to fail cases of the application. It can be particularly useful in microservices architecture where the services often depend on each other and failures can propagate through the system. The Circuit Breaker Pattern can help improve the resiliency and fault tolerance of the application by providing a way to handle and recover from failures gracefully.
The main concept behind the Circuit Breaker pattern is to wrap the potentially failing operation in the circuit breaker object. This object can monitor the number of failures that occur when the operation is called. If the number of failures exceeds a certain threshold then the circuit breaker trips and opens, preventing further calls to the operation. Instead, the circuit breaker trips and opens, preventing further calls to the exception depending on the configuration. After the specified amount of time, the circuit breaker will enter the half-open state. It can allow a single call to the operation to determine if it has recovered. If calls succeed then the circuit breaker closes and normal operation resumes. If the call fails then the circuit breakers reopen and the process repeats the application.
Key Terminologies:- Circuit Breaker: The design pattern can be used to detect failures and encapsulate the logic of the preventing the failure from constantly recurring during the maintenance, temporary external system failure or unexpected system difficulties of the application.
- Open State: The state in which the circuit breakers can be prevents the operations from being executed the failure threshold has been reached.
- Closed State: The normal state of circuit breaker where the operations are allowed to execute. It can monitors the success and failure of the operations in this state.
- Failure Rate Threshold: The percentage of the failed requests at which the circuit breaker will open.
- Wait Duration: The period the circuit breaker can be waits the transitioning from the open state to half-open state to test if operation has recovered.
- Fallback: The method that can be invoked if circuit breaker is open. It can allowing you can provide the alternative response or behavior when the primary operation fails.
- Sliding Window: The period during which the circuit breaker monitors the success and failure of the operations to determine if the failure rate threshold has been reached.
Implementation of Circuit Breaker Pattern in Spring WebFlux- This implementation of the Circuit Breaker pattern in Spring WebFlux using Resilience4J enhances the application’s resilience by encapsulating potentially failing operations.
- It configures a Circuit Breaker with a timeout using CircuitBreakerConfig and TimeLimiterConfig.
- The HelloController defines a reactive endpoint (“/hello”) that demonstrates handling random failures gracefully.
- By running and testing the application, developers can observe how Circuit Breakers manage failures, ensuring stability even during unpredictable conditions in a Spring Reactive environment.
Below are the implementation steps of Circuit Breaker Pattern in Spring WebFlux.
Step 1: Create Spring Reactive ProjectWe will create the Spring reactive project using spring Initializr and on creating the project, add the following dependencies into the project.
Dependencies:- Spring Reactive Web
- Circuit Breakers and Resilience
- Lombok
- Spring DevTools
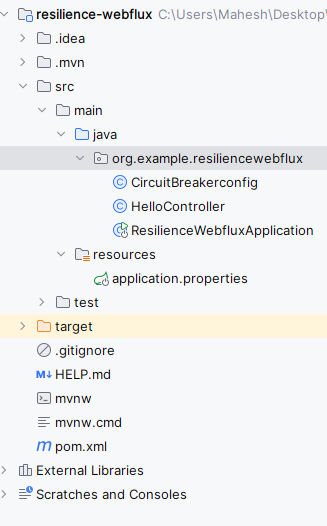
Once create the Spring Reactive project then the file structure will look like the below image:
Step 2: Application PropertiesOpen the application.properties file and add the configuration of the circuit breakers of the project.
spring.application.name=resilience-webflux
resilience4j.circuitbreaker.instances.default.registerHealthIndicator=true
management.endpoints.web.exposure.include=circuitbreakers
Step 3: Create the CircuitBreakerConfig classWe will now create the CircuitBreakerConfig class to configure the Circuit Breaker of the spring reactive application.
Go to src > main > java > org.example.resiliencewebflux > CircuitBreakerConfig and put the below code.
Java
package org.example.resiliencewebflux;

import io.github.resilience4j.circuitbreaker.CircuitBreakerConfig;
import io.github.resilience4j.timelimiter.TimeLimiterConfig;
import org.springframework.cloud.circuitbreaker.resilience4j.Resilience4JCircuitBreakerFactory;
import org.springframework.cloud.client.circuitbreaker.Customizer;
import org.springframework.context.annotation.Bean;
import org.springframework.context.annotation.Configuration;

import java.time.Duration;

@Configuration
public class CircuitBreakerconfig {

    /**
     * Customizer bean for configuring a Circuit Breaker named "slow".
     * Configures CircuitBreakerConfig with default settings and a TimeLimiterConfig with a 2-second timeout.
     *
     * @return Customizer for Resilience4JCircuitBreakerFactory
     */
    @Bean
    public Customizer<Resilience4JCircuitBreakerFactory> slowCustomizer() {
        return factory -> factory.configure(builder ->
                        builder.circuitBreakerConfig(CircuitBreakerConfig.ofDefaults())
                                .timeLimiterConfig(TimeLimiterConfig.custom().timeoutDuration(Duration.ofSeconds(2)).build()),
                "slow");
    }

}
Step 4: Create the HelloController classNow, we will create the HelloController class to define the REST endpoint that uses the Circuit Breaker of the application.
Go to src > main > java > org.example.resiliencewebflux > HelloController and put the below code.
Java
package org.example.resiliencewebflux;

import org.springframework.web.bind.annotation.GetMapping;
import org.springframework.web.bind.annotation.RestController;
import reactor.core.publisher.Mono;

@RestController
class HelloController {

    /**
     * GET endpoint mapped to "/hello" that returns a Mono<String>.
     * This endpoint demonstrates the Circuit Breaker pattern with a random failure scenario.
     *
     * @return Mono<String> with either "Hello, World!" or an error message
     */
    @GetMapping("/hello")
    public Mono<String> hello() {
        return Mono.fromSupplier(() -> {
            if (Math.random() < 0.5) {
                throw new RuntimeException("Random failure!");
            }
            return "Hello, World!";
        });
    }
}
Step 5: Main ClassNo changes are required into the main class.
Java
package org.example.resiliencewebflux;

import org.springframework.boot.SpringApplication;
import org.springframework.boot.autoconfigure.SpringBootApplication;

@SpringBootApplication
public class ResilienceWebfluxApplication {

    public static void main(String[] args) {
        SpringApplication.run(ResilienceWebfluxApplication.class, args);
    }

}
pom.xml:
XML
<?xml version="1.0" encoding="UTF-8"?>
<project xmlns="http://maven.apache.org/POM/4.0.0" xmlns:xsi="http://www.w3.org/2001/XMLSchema-instance"
         xsi:schemaLocation="http://maven.apache.org/POM/4.0.0 https://maven.apache.org/xsd/maven-4.0.0.xsd">
    <modelVersion>4.0.0</modelVersion>
    <parent>
        <groupId>org.springframework.boot</groupId>
        <artifactId>spring-boot-starter-parent</artifactId>
        <version>3.3.0</version>
        <relativePath/> <!-- lookup parent from repository -->
    </parent>
    <groupId>org.example</groupId>
    <artifactId>resilience-webflux</artifactId>
    <version>0.0.1-SNAPSHOT</version>
    <name>resilience-webflux</name>
    <description>resilience-webflux</description>
    <properties>
        <java.version>17</java.version>
        <spring-cloud.version>2023.0.2</spring-cloud.version>
    </properties>
    <dependencies>
        <dependency>
            <groupId>org.springframework.boot</groupId>
            <artifactId>spring-boot-starter-webflux</artifactId>
        </dependency>
        <dependency>
            <groupId>org.springframework.cloud</groupId>
            <artifactId>spring-cloud-starter-circuitbreaker-reactor-resilience4j</artifactId>
        </dependency>

        <dependency>
            <groupId>org.springframework.boot</groupId>
            <artifactId>spring-boot-devtools</artifactId>
            <scope>runtime</scope>
            <optional>true</optional>
        </dependency>
        <dependency>
            <groupId>org.projectlombok</groupId>
            <artifactId>lombok</artifactId>
            <optional>true</optional>
        </dependency>
        <dependency>
            <groupId>org.springframework.boot</groupId>
            <artifactId>spring-boot-starter-test</artifactId>
            <scope>test</scope>
        </dependency>
        <dependency>
            <groupId>io.projectreactor</groupId>
            <artifactId>reactor-test</artifactId>
            <scope>test</scope>
        </dependency>
    </dependencies>
    <dependencyManagement>
        <dependencies>
            <dependency>
                <groupId>org.springframework.cloud</groupId>
                <artifactId>spring-cloud-dependencies</artifactId>
                <version>${spring-cloud.version}</version>
                <type>pom</type>
                <scope>import</scope>
            </dependency>
        </dependencies>
    </dependencyManagement>

    <build>
        <plugins>
            <plugin>
                <groupId>org.springframework.boot</groupId>
                <artifactId>spring-boot-maven-plugin</artifactId>
                <configuration>
                    <excludes>
                        <exclude>
                            <groupId>org.projectlombok</groupId>
                            <artifactId>lombok</artifactId>
                        </exclude>
                    </excludes>
                </configuration>
            </plugin>
        </plugins>
    </build>

</project>
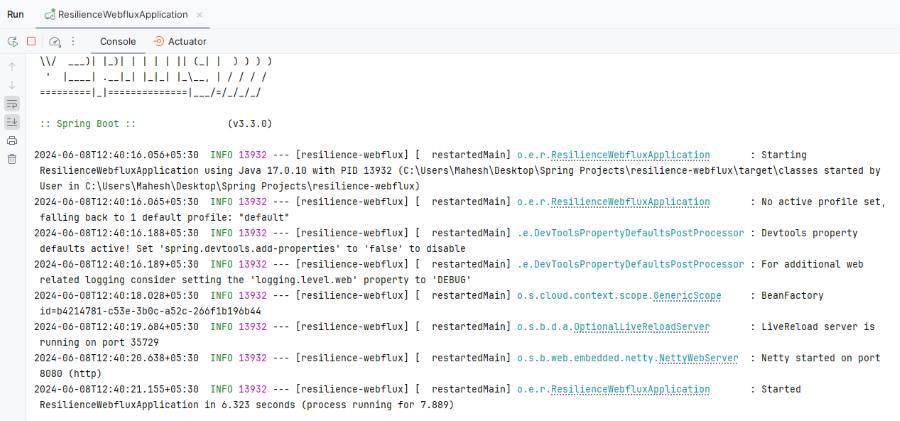
Step 6: Run the applicationWe will run the application and it will start at port 8080.
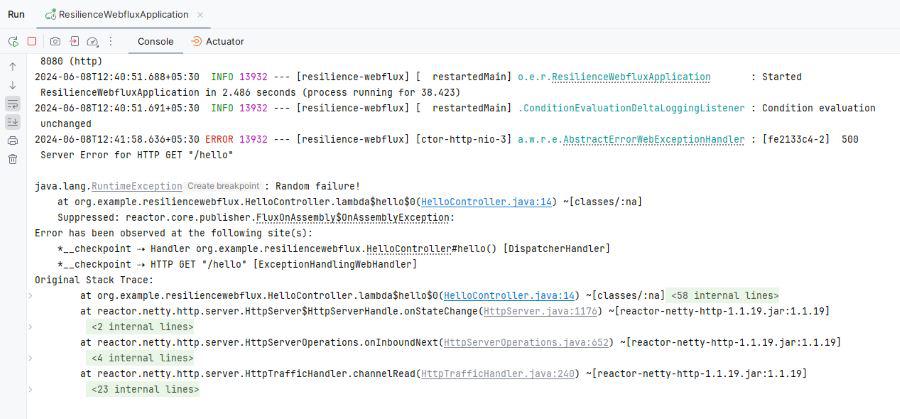
Step 7: Testing the EndpointsGET http://localhost:8080/hello Output:
If Request fails then it will show the error logs into the Spring debug logs of the application. In that case, Circuit Breaker can handle the situation of the Spring reactive application.
 This example demonstrates the circuit breakers pattern in Spring WebFlux of the Spring Reactive project.
|