|
Below are the steps for Creating a Simple Android Application to Add Two Numbers
Note: Similarly, Android App to subtract, multiply and divide numbers can be made by making minor changes in the Kotlin and XML code.
Step-by-Step Implementation of Application to Add Two Numbers in AndroidStep 1: Opening/Creating a New ProjectTo create a new project in Android Studio please refer to How to Create/Start a New Project in Android Studio.
Note: Select Kotlin as the programming language.
By default, there will be two files activity_main.xml and MainActivity.kt.
Step 2: Now go to the activity_main.xml file and Add elements to the layoutHere, we are using constrainLayout in our application where we will be using Constraints and Chaining concepts.
Navigate to activity_main.xml file: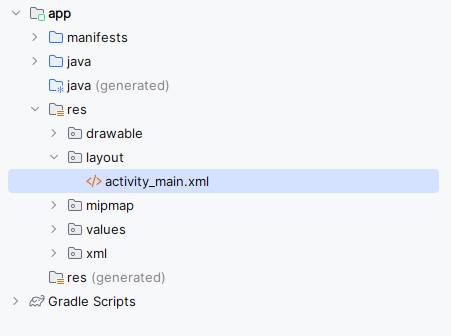 Complete code of layout xml file is mentioned below:
XML
<?xml version="1.0" encoding="utf-8"?>
<androidx.constraintlayout.widget.ConstraintLayout xmlns:android="http://schemas.android.com/apk/res/android"
    xmlns:app="http://schemas.android.com/apk/res-auto"
    xmlns:tools="http://schemas.android.com/tools"
    android:id="@+id/main"
    android:layout_width="match_parent"
    android:layout_height="match_parent"
    tools:context=".MainActivity">

    <TextView
        android:id="@+id/textView1"
        android:layout_width="150dp"
        android:layout_height="48dp"
        android:layout_marginStart="10dp"
        android:layout_marginTop="52dp"
        android:gravity="center_vertical"
        android:text="@string/first_textView"
        android:textSize="16sp"
        app:layout_constraintEnd_toStartOf="@+id/first_number"
        app:layout_constraintStart_toStartOf="parent"
        app:layout_constraintTop_toTopOf="parent" />

    <EditText
        android:id="@+id/first_number"
        android:layout_width="150dp"
        android:layout_height="48dp"
        android:layout_marginTop="52dp"
        android:ems="10"
        android:hint="@string/first_number_hint"
        android:inputType="number"
        android:textSize="16sp"
        app:layout_constraintEnd_toEndOf="parent"
        app:layout_constraintStart_toEndOf="@+id/textView1"
        app:layout_constraintTop_toTopOf="parent" />

    <TextView
        android:id="@+id/textView2"
        android:layout_width="150dp"
        android:layout_height="48dp"
        android:layout_marginStart="10dp"
        android:layout_marginTop="8dp"
        android:gravity="center_vertical"
        android:text="@string/second_textView"
        android:textSize="16sp"
        app:layout_constraintEnd_toStartOf="@+id/second_number"
        app:layout_constraintStart_toStartOf="parent"
        app:layout_constraintTop_toBottomOf="@+id/textView1" />

    <EditText
        android:id="@+id/second_number"
        android:layout_width="175dp"
        android:layout_height="48dp"
        android:layout_marginTop="4dp"
        android:layout_marginEnd="10dp"
        android:ems="10"
        android:hint="@string/second_number_hint"
        android:inputType="number"
        android:textSize="16sp"
        app:layout_constraintEnd_toEndOf="parent"
        app:layout_constraintStart_toEndOf="@+id/textView2"
        app:layout_constraintTop_toBottomOf="@+id/first_number" />

    <Button
        android:id="@+id/button"
        android:layout_width="139dp"
        android:layout_height="57dp"
        android:layout_marginTop="84dp"
        android:text="@string/Button_value"
        app:layout_constraintEnd_toEndOf="parent"
        app:layout_constraintStart_toStartOf="parent"
        app:layout_constraintTop_toBottomOf="@+id/textView2" />


    <TextView
        android:id="@+id/result"
        android:layout_width="150dp"
        android:layout_height="40dp"
        android:layout_marginTop="88dp"
        android:gravity="center"
        android:text="@string/result"
        android:textSize="16sp"
        android:visibility="gone"
        app:layout_constraintBottom_toBottomOf="parent"
        app:layout_constraintEnd_toStartOf="@+id/result_value"
        app:layout_constraintStart_toStartOf="parent"
        app:layout_constraintTop_toBottomOf="@+id/button"
        app:layout_constraintVertical_bias="0.006" />

    <TextView
        android:id="@+id/result_value"
        android:layout_width="150dp"
        android:layout_height="40dp"
        android:gravity="center"
        android:textSize="16sp"
        android:visibility="gone"
        app:layout_constraintEnd_toEndOf="parent"
        app:layout_constraintStart_toEndOf="@+id/result"
        app:layout_constraintTop_toTopOf="@+id/result" />

</androidx.constraintlayout.widget.ConstraintLayout>
After Complete layout xml file it will be shown as given below :
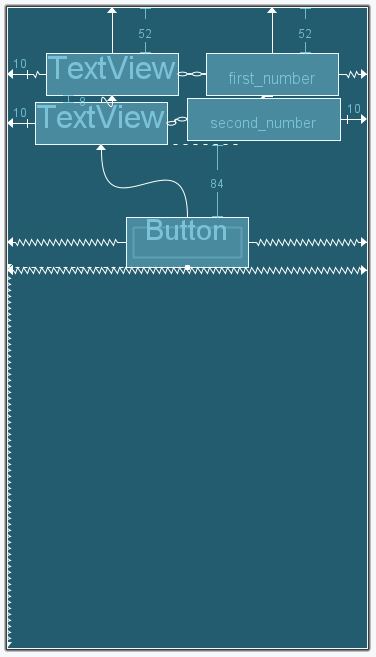 Note: The Layout of Android Application differ for all. Although the elements will be same for all.
Step 3: Now, open up the activity kotlin file. Navigate to MainActivity.kt file is mentioned below: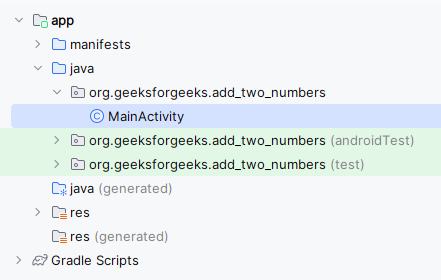 Step 4: Changes are done in kotlin MainActivity file
- Declare a few variables and the values entered in the Text Views can be read by using an id which we have set in the XML code above.
- Add the click listener to the Add button.
- When the Add button has been clicked, add the values and store them in the sum variable.
- To show the output in the result text view, set the sum in the TextView.
Complete code of layout xml file and java file is given below.
MainActivity.kt
package org.horje.add_two_numbers

import android.R
import android.os.Bundle
import android.view.View
import android.widget.Button
import android.widget.EditText
import android.widget.TextView
import androidx.appcompat.app.AppCompatActivity

class MainActivity : AppCompatActivity() {
    // Variables
    var number1: EditText? = null
    var number2: EditText? = null
    var Add_button: Button? = null
    var temp: TextView? = null
    var result: TextView? = null
    var ans: Int = 0

    override fun onCreate(savedInstanceState: Bundle?) {
        super.onCreate(savedInstanceState)
        setContentView(R.layout.activity_main)

        // Assiging the values to variables
        number1 = findViewById<View>(R.id.first_number) as EditText
        number2 = findViewById<View>(R.id.second_number) as EditText
        Add_button = findViewById<View>(R.id.button) as Button
        result = findViewById<View>(R.id.result_value) as TextView
        temp = findViewById<View>(R.id.result) as TextView

        Add_button!!.setOnClickListener {
            val num1 = number1!!.text.toString().toDouble()
            val num2 = number2!!.text.toString().toDouble()
            // add both number and store it to sum
            val sum = num1 + num2
            // set it ot result textviewe
            result!!.text = sum.toString()

            temp!!.visibility = View.VISIBLE
            result!!.visibility = View.VISIBLE
        }
    }
}
Output: 
|