
|
|
In software development, flexibility and portability are important. Suppose you’ve built a perfect application in a Docker container on your development machine and now you need to move this same setup to a colleague’s machine or a production server. How do you ensure your application, and all its dependencies and config, moves without a hitch? The answer is in exporting and importing Docker containers and images. This post will walk you through the steps to export and import Docker containers and images so you can move your work across environments. Whether you’re sharing with a team, moving to a new server, or just backing up your containers, you must master these techniques. Let’s get started and learn how to make your Dockerized applications as portable as possible. Key TerminologiesDockerDocker is an open-source platform designed to automate the deployment of applications as lightweight, portable containers that run virtually anywhere. Docker is a platform that uses containerization to streamline software development. Docker ImageA Docker image is a read-only template used to create containers. It is a lightweight, executable, stand-alone package that includes everything needed to run the software, including the code, a runtime, libraries, environment variables, and config files. ContainerA container is a runtime instance of an image. It provides a way to run an application in an isolated environment, encapsulating all the necessary dependencies and libraries, and eliminating potential conflicts between applications. DockerfileA Dockerfile is a simple text file that contains a set of commands that Docker uses sequentially to build an image. To read more about Dockerfile, you can read this article. Exporting and Importing Docker ImagesStep-by-Step Process to Export a Docker Image1. Identify the Image ID or Name: To export an image, you need its ID or name. List all images using: docker images
2. Save the Image: Use the docker save command to save the image to a tarball. docker save -o <filename>.tar <image_name>
3. Verify the Saved Image: Ensure that the tarball has been created successfully in the specified location. Step-by-Step Process to Import a Docker Image1. Transfer the Tarball: Move the tarball to the target system where you want to import the image. 2. Load the Image: Use the docker load command to load the image from the tarball. docker load -i <filename>.tar
3. Verify the Loaded Image: List all images to verify the image has been loaded. docker images
Exporting and Importing Docker ContainersStep by Step Process to Export a Docker Container1. Identify the Container ID or Name: To export a container, you need its ID or name. You can list all running containers using the following command: docker ps
2. Export the Container: Use the docker export command to export the container to a tarball. docker export <container_id> -o <filename>.tar
3. Verify the Exported File: Ensure that the tarball has been created successfully in the specified location. Step by Step Process to Import a Docker Container1. Transfer the Tarball: Move the tarball to the target system where you want to import the container. 2. Import the Container: Use the docker import command to import the tarball into Docker as an image. docker import <filename>.tar <new_image_name>
3. Run a New Container: Create and run a new container from the imported image. Example: Exporting and Importing Docker Images and ContainersProject SetupLet’s setup a basic express server to illustrate the whole process from spinning up a container to exporting it: 1. Create a package.json file to manage the project dependencies. File: package.json { Run npm install to install the dependencies. 2. Create a file named app.js in src folder. File: src/app.js const express = require('express'); 3. Let’s create a Dockerfile to containerize the Express server. File: Dockerfile FROM node 4. Create a .dockerignore file to prevent copying unnecessary files to the Docker image. File: .dockerignore node_modules Folder StructureThis is how your folder structure should look like after following the above steps:
5. Let’s build an image of our Express server by running this command: docker build -t basic-express-server .
6. Verify the created image by listing all the images: docker image ls
.png)
Exporting Docker Image1. Save the image to a tarball: docker save -o demo-image.tar basic-express-server
where, Check if the tarball file is generated or not. 
2. Let’s first our already built image so that we can load the image again using the tarball file. You can remove the image using this command: docker rmi <image_id>
Check whether the image is deleted or not by listing all the images. Importing Docker Image3. Now, let’s load the image again using the tarball file: docker load -i demo-image.tar

Again, list all the images to see the newly loaded image. 4. Let’s now run a container using this image: docker run -p 3000:3000 -d basic-express-server
You can list down the running containers using: docker ps
Exporting Docker Container5. To export this container, run: docker export cff6965045e1 -o container.tar
A tarball file will be created named container.tar: 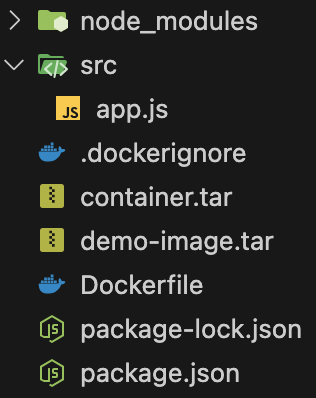
Importing Docker Container6. Import the Docker container by running: docker import container.tar new-image

List all the images and verify if the new image is present there or not. 7. Run a container using the new image created by importing the tarball file and check if everything is working fine. Exporting and Importing Docker Images/Containers – FAQsWhat is the difference between `docker export` and `docker save`?
Can I export a stopped container?
How do I transfer a Docker image between different hosts?
Is there a way to export multiple containers at once?
What happens to my data if I export and import a container?
|
Reffered: https://www.geeksforgeeks.org
| DevOps |
Type: | Geek |
Category: | Coding |
Sub Category: | Tutorial |
Uploaded by: | Admin |
Views: | 10 |