|
Before diving into how to change a VM’s subnet, let’s understand what a subnet is.
- Subnet Definition: A subnet, also known as a subnetwork, is a segmented portion of a larger virtual network. It allows you to divide your Azure network into smaller, more manageable sections. This approach enhances network security and performance by:
- Confining traffic within specific subnet boundaries.
- Optimizing IP address allocation within the network.
Subnet Example: Consider an IP address like 192.168.1.0/24. Here, 192.168.1.0 represents the network address, and /24 signifies the subnet mask. The first 24 bits define the network part, while the remaining bits are allocated for host addresses within the subnet.
Changing Subnet for an Azure VM
While Azure doesn’t permit direct reassignment of a VM’s network interface (NIC) to a different subnet, we can achieve this through the following steps (remember to stop the VM first):
- Create a New NIC: We’ll create a new network interface card (NIC) attached to the desired virtual network and subnet.
- Attach the New NIC to the VM: Once created, we’ll associate this new NIC with the (Virtual machine) VM.
- Configure the New NIC: Set up the new NIC with the necessary IP address configuration and any security rules required.
- Test and Verify: Once configured, test the new NIC to ensure proper network connectivity.
- Detach the Old NIC (Optional): After successful testing, you can optionally detach the old NIC from the VM (if no longer needed).
Step-by-Step Guide to Change the Subnet for an Azure VM
Step 1: Stopping the Azure VM
- Access the Azure portal: Begin by logging in to the Azure portal at portal.azure.com.
- Navigate to Virtual Machines: Locate the “Virtual Machines” service within the Azure portal. You can typically find it through the search bar or by browsing the categories.
- Select the Target VM: Once you’ve accessed “Virtual Machines,” identify the specific VM you intend to modify by selecting it from the list.

Step 2: Detach the Existing Network Interface Card (NIC)
- Access VM Settings: With the VM stopped (from step 1), navigate to its settings within the Azure portal.
- Locate “Networking” Section: Within the VM settings, find the section labeled “Networking” or similar (it might be under a category like “Settings”).
- Identify and Select NIC: Under the “Networking” section, you’ll see a list of network interfaces attached to the VM. Locate the NIC you want to detach and click on its name. This will open the specific NIC configuration details.

Step 3: Create a New Network Interface Card (NIC) in the Target Virtual Network and Subnet
- Access “Network interfaces”: While still within the Azure portal, navigate to the “Network interfaces” section. You can typically find it under the “Networking” service or a similar category.
- Create a New NIC: Click the “Add” button to initiate the creation of a new network interface card.
- Configure NIC Details: In the new NIC creation wizard, provide the necessary details:
- Name: Choose a descriptive name for your new NIC.
- Resource Group: Select the appropriate resource group where you want to store the NIC.
- Location: Ensure the location matches the region where your virtual network resides.
- Subnet: Crucially, select the desired subnet within your target virtual network where you want the VM to be connected.
- Other configurations (optional): You might encounter additional configuration options depending on your specific needs. Fill them out as required.
- Review and Create: Once you’ve entered all the necessary details, review them carefully for accuracy. Then, proceed with creating the new NIC.
Step 4: Attach the Newly Created NIC to the Virtual Machine
- Return to Virtual Machines: Navigate back to the “Virtual Machines” section within the Azure portal.
- Select the Target VM: Locate the specific VM you’re modifying by selecting it from the list of virtual machines.
Step 5: Start the VM and Verify Subnet Change
- Start the Virtual Machine: With the new NIC attached, initiate the VM by clicking the “Start” button.
- Verify Subnet Change (Optional): Once the VM is up and running, you can optionally confirm the subnet change. There are two ways to do this:
- Using the Azure portal: Within the Azure portal, navigate back to the VM settings and check the “Networking” section. The attached NICs and their associated subnets should be displayed.
- Using VM console (if accessible): If your VM allows access to the console (RDP or SSH), you can connect to it and run the
ipconfig command. The output will display the IP address information, including the subnet it’s currently connected to. This can help verify if the subnet change was successful.
Note: Accessing the VM console might require additional configuration depending on your VM settings and security policies.

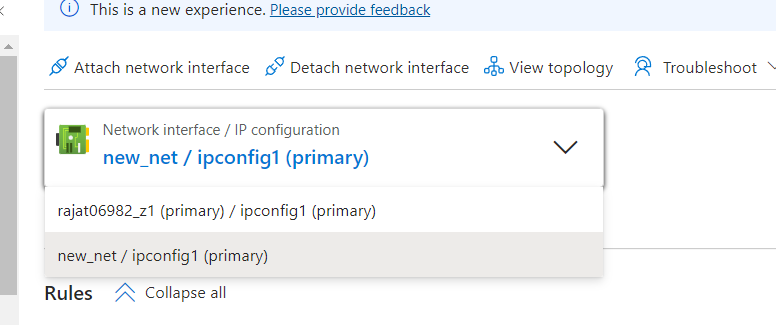
Now this falls under the current NIC we have selected for the VM.

Virtual Network/Subnet in Azure VM – FAQs
Can I directly change the subnet of an Azure VM?
No, Azure does not allow direct reassignment of a VM’s NIC to a different subnet or virtual network. You need to stop the VM, detach the NIC, create a new NIC in the desired subnet, attach the new NIC to the VM, and then start the VM.
Will there be any downtime while changing the subnet?
Yes, changing the subnet involves stopping and deallocating the VM, which will cause downtime. Plan accordingly to minimize the impact on your applications and users.
How do I retain the public IP address during the change?
Ensure that the public IP address is associated with a resource, such as a load balancer or application gateway, or set to static if it is to be retained. When creating a new NIC, you can reassign the public IP to the new NIC.
What happens to my VM’s data during the subnet change?
The data on your VM’s disks is not affected by the subnet change. However, network configurations such as IP addresses and security rules will need to be reconfigured.
Do I need to reconfigure Network Security Groups (NSG) and route tables?
Yes, ensure that any NSGs and route tables applied to the old subnet are correctly configured for the new subnet. This may involve creating new NSG rules or associating existing ones with the new subnet.
|