|
Migrating an existing Redux application to Redux Toolkit (RTK) can streamline your Redux code, reduce boilerplate, and improve maintainability. Here’s a step-by-step guide to help you through the migration process.
Prerequisites:Steps to Create Redux ApplicationStep 1: Create a React Application named ‘redux-migration-demo’ and navigate to it using this command.
npx create-react-app redux-migration-demo
cd redux-migration-demo
Step 2: Install required packages and dependencies.
npm install react-redux redux Project Structure: 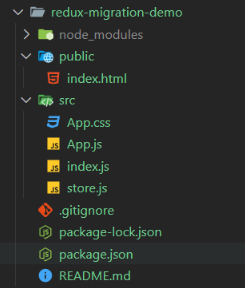 Project Structure The updated dependencies in package.json file will look like:
  "dependencies": {
    "react": "^18.3.1",
    "react-dom": "^18.3.1",
    "react-redux": "^9.1.2",
    "redux": "^5.0.1",
  },
Example:
CSS
/* App.css */
#App {
  display: flex;
  flex-direction: column;
  align-items: center;
}

button {
  background-color: rgb(58, 192, 58);
  padding: 10px 20px;
  border: 1px solid transparent;
  border-radius: 10px;
  margin: 10px 5px;
  cursor: pointer;
}
button:hover{
  background-color: rgb(27, 180, 27);
}
// index.js
import React from 'react';
import ReactDOM from 'react-dom/client';
import App from './App';
import { Provider } from 'react-redux';
import store from './store';

const root = ReactDOM.createRoot(document.getElementById('root'));
root.render(
  <Provider store={store}>
    <App />
  </Provider>
);
// App.js
import { connect } from 'react-redux';
import './App.css';

const Counter = (
    { count, increment,
        decrement, reset
    }) => (
    <div id='App' >
        <h1>
            <img src='https://media.geeksforgeeks.org/gfg-gg-logo.svg'
                alt='gfg_logo' />
            {"   "} Counter: {count}
        </h1>
        <div>
            <button onClick={decrement}>
                Decrement
            </button>
            <button onClick={reset}>
                Reset
            </button>
            <button onClick={increment}>
                Increment
            </button>
        </div>
    </div>
);

const mapStateToProps = state => ({
    count: state.count,
});

const mapDispatchToProps = dispatch => ({
    increment: () => dispatch({ type: 'INCREMENT' }),
    decrement: () => dispatch({ type: 'DECREMENT' }),
    reset: () => dispatch({ type: 'RESET' }),
});

const CounterApp =
    connect(mapStateToProps, mapDispatchToProps)(Counter);
export default CounterApp
// store.js
import { createStore } from "redux";
const initialState = {
    count: 0
};

const reducer = (state = initialState, action) => {
    switch (action.type) {
        case 'INCREMENT':
            return { ...state, count: state.count + 1 };
        case 'DECREMENT':
            return { ...state, count: state.count - 1 };
        case 'RESET':
            return { ...state, count: 0 };
        default:
            return state;
    }
};

export default createStore(reducer);
Step to Run Application: Run the application using the following command from the root directory of the project
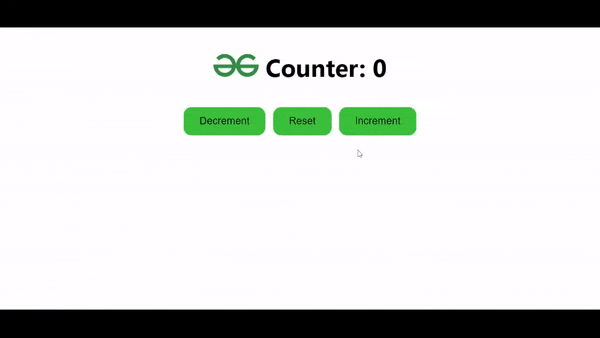
npm start Output: Your project will be shown in the URL http://localhost:3000/
 Redux Counter App Output Approach of Migration - Install Redux Toolkit and React-Redux module.
- Covert Redux’ reducer to Redux Toolkit’s Slice and make your actions and reducers into that slice.
- Replace the traditional createStore function with Redux Toolkit’s configureStore in your store configuration.
- Use useSelector hook ( React-Redux ) to fetch or Access state values in the any components.
- Use Dispatch hooks from react-redux to dispatch actions like increment, decrement etc.
- Use Provider component from ‘React-Redux’ to make Redux store available to all components in your application.
Step to Migrate ApplicationStep 1: Install required packages and dependencies.
npm install @reduxjs/toolkit react-redux Step 2 : Replace existing reducers with createSlice to automatically generate action creators and types.
Step 3 : Use configureStore from Redux Toolkit to set up the store.
Step 4 : Use useDispatch and useSelector hooks from react-redux to dispatch actions and access state in the components.
The updated dependencies in package.json file will look like:
"dependencies": {
    "@reduxjs/toolkit": "^2.2.5",
    "react": "^18.3.1",
    "react-dom": "^18.3.1",
    "react-redux": "^9.1.2",
  },
Example:
CSS
/* App.css */

#App {
  display: flex;
  flex-direction: column;
  align-items: center;
}

button {
  background-color: rgb(58, 192, 58);
  padding: 10px 20px;
  border: 1px solid transparent;
  border-radius: 10px;
  margin: 10px 5px;
  cursor: pointer;
}
button:hover{
  background-color: rgb(27, 180, 27);
}
// store.js
import { createSlice, configureStore } from '@reduxjs/toolkit';
export const counterSlice = createSlice({
    name: 'counter',
    initialState: {
        count: 0
    },
    reducers: {
        increment: state => {
            state.count += 1;
        },
        decrement: state => {
            state.count -= 1;
        },
        reset: state => {
            state.count = 0;
        }
    }
});

export const { increment, decrement, reset } = counterSlice.actions;
export default configureStore({ reducer: counterSlice.reducer });
// App.js

import React from 'react';
import { useSelector, useDispatch } from 'react-redux';
import { increment, decrement, reset } from './store';
import './App.css';

const Counter = () => {
    const count = useSelector((state) => state.count);
    console.log(count)
    const dispatch = useDispatch();
    return (
        <div id='App' >
            <h1>
                <img src='https://media.geeksforgeeks.org/gfg-gg-logo.svg'
                    alt='gfg_logo' />
                {"   "} Counter: {count}
            </h1>
            <div>
                <button onClick={() => dispatch(decrement())}>
                    Decrement
                </button>
                <button onClick={() => dispatch(reset())}>
                    Reset
                </button>
                <button onClick={() => dispatch(increment())}>
                    Increment
                </button>
            </div>
        </div>
    );
};

export default Counter;
// index.js

import React from 'react';
import ReactDOM from 'react-dom/client';
import App from './App';
import { Provider } from 'react-redux';
import store from './store';

const root = ReactDOM.createRoot(document.getElementById('root'));
root.render(
  <Provider store={store}>
    <App />
  </Provider>
);
Step to Run Application: Run the application using the following command from the root directory of the project
npm start Output: Your project will be shown in the URL http://localhost:3000/
Redux Toolkit Counter App OutputE
|