|
Apache Kafka is a distributed streaming platform and can be widely used to create real-time data pipelines and streaming applications. It can publish and subscribe to records in progress, save these records in an error-free manner, and handle floating records as they arrive. Combined with Spring Boot, Kafka can provide a powerful solution for microservice communication and ensure scalability and fault tolerance.
In a microservice architecture, services need to communicate with each other to exchange data and orchestrate workflows. There are two primary communication patterns:
- Synchronous Communication: It can direct calls between the services using HTTP/REST or gRPC.
- Asynchronous Communication: It can service communication via messages using a message system like Apache Kafka.
Asynchronous communication offers several advantages.
- Decoupling: The service can operate independently, improving the scalability and fault tolerance of the application.
- Resilience: If the service is down then the messages can be stored and processed later when the service is back up.
- Scalability: Kafka can handle the throughput, allowing the service to scale independently.
Apache Kafka OverviewApache Kafka is the distributed streaming platform that provides three key capabilities:
- Publish and Subscribe: Kafka allows the services to publish messages to topics and subscribe to topics to receive messages.
- Storage: Kafka stores the messages durably and reliably of the application.
- Processing: Kafka provides the tools for processing streams of messages in real time.
Key Components of Kafka- Producer: It sends the messages to the Kafka topic.
- Consumer: It reads the messages from the Kafka topic.
- Broker: Kafka server that stores the messages and serves them to the consumers.
- Topic: The logical channel to which provides the send messages and from which consumers read messages.
- Partition: The topic can be divided into multiple partitions to parallelize processing and storage.
- Zookeeper: It manages and coordinates the Kafka brokers and it can be used in the older versions of Kafka, newer versions use the KRaft mode.
Kafka in the Microservice ArchitectureIn the microservice architecture, Kafka can be used to:
- Publish events: Services can publish the events or messages to the Kafka topics of the application.
- Subscribe to events: Services can subscribe to the relevant Kafka topics to receive and process events.
Implementation of Microservices Communication with Apache Kafka in Spring BootStep 1: Setup the KafkaWe can refer this link to ensure Kafka is installed and running on your local system of the Kafka server application.
Step 2: Create the Spring Boot ProjectCreate a Spring Boot project using the Spring Initializr and add the required dependencies.
- Spring Web
- Spring For Apache Kafka
- Lombok
- Spring DevTools
After Creating, the project folder structure will be like the below.

Step 3: Configure the application properties
Open the application.properties and add the below code for the configurations of the Apache Kafka of the Spring project.
spring.application.name=kafka-subscribe

spring.kafka.bootstrap-servers=localhost:9092
spring.kafka.consumer.group-id=my-group
spring.kafka.consumer.auto-offset-reset=earliest
spring.kafka.consumer.key-deserializer=org.apache.kafka.common.serialization.StringDeserializer
spring.kafka.consumer.value-deserializer=org.apache.kafka.common.serialization.StringDeserializer
spring.kafka.producer.key-serializer=org.apache.kafka.common.serialization.StringSerializer
spring.kafka.producer.value-serializer=org.apache.kafka.common.serialization.StringSerializer
Step 4: Consumer Kafka ConfigurationWe can create the KafkaConsumerConfig class that can configure the configuration of the Consumer service of the Spring application.
Go to src > main > java > org.example.kafkasubscribe > config > KafkaConsumerConfig and put the below code.
Java
package org.example.kafkasubscribe.config;


import org.apache.kafka.clients.consumer.ConsumerConfig;
import org.apache.kafka.common.serialization.StringDeserializer;

import org.springframework.context.annotation.Bean;
import org.springframework.context.annotation.Configuration;
import org.springframework.kafka.annotation.EnableKafka;
import org.springframework.kafka.config.ConcurrentKafkaListenerContainerFactory;
import org.springframework.kafka.core.DefaultKafkaConsumerFactory;
import org.springframework.kafka.core.ConsumerFactory;

import java.util.HashMap;
import java.util.Map;

@Configuration
@EnableKafka
public class KafkaConsumerConfig {

    @Bean
    public ConsumerFactory<String, String> consumerFactory() {
        Map<String, Object> props = new HashMap<>();
        props.put(ConsumerConfig.BOOTSTRAP_SERVERS_CONFIG, "localhost:9092");
        props.put(ConsumerConfig.GROUP_ID_CONFIG, "my-group");
        props.put(ConsumerConfig.KEY_DESERIALIZER_CLASS_CONFIG, StringDeserializer.class);
        props.put(ConsumerConfig.VALUE_DESERIALIZER_CLASS_CONFIG, StringDeserializer.class);
        props.put(ConsumerConfig.AUTO_OFFSET_RESET_CONFIG, "earliest");
        return new DefaultKafkaConsumerFactory<>(props);
    }

    @Bean
    public ConcurrentKafkaListenerContainerFactory<String, String> kafkaListenerContainerFactory() {
        ConcurrentKafkaListenerContainerFactory<String, String> factory =
                new ConcurrentKafkaListenerContainerFactory<>();
        factory.setConsumerFactory(consumerFactory());
        return factory;
    }
}
Step 5: Producer Kafka Configuration
We will create the KafkaProducerConfig class that can configure the configuration of the producer service of the Spring application.
Go to src > main > java > org.example.kafkasubscribe > config > KafkaProducerConfig and put the below code.
Java
package org.example.kafkasubscribe.config;


import org.apache.kafka.clients.producer.ProducerConfig;
import org.apache.kafka.common.serialization.StringSerializer;
import org.springframework.context.annotation.Bean;
import org.springframework.context.annotation.Configuration;
import org.springframework.kafka.core.DefaultKafkaProducerFactory;
import org.springframework.kafka.core.KafkaTemplate;
import org.springframework.kafka.core.ProducerFactory;

import java.util.HashMap;
import java.util.Map;

@Configuration
public class KafkaProducerConfig {

    @Bean
    public ProducerFactory<String, String> producerFactory() {
        Map<String, Object> configProps = new HashMap<>();
        configProps.put(ProducerConfig.BOOTSTRAP_SERVERS_CONFIG, "localhost:9092");
        configProps.put(ProducerConfig.KEY_SERIALIZER_CLASS_CONFIG, StringSerializer.class);
        configProps.put(ProducerConfig.VALUE_SERIALIZER_CLASS_CONFIG, StringSerializer.class);
        return new DefaultKafkaProducerFactory<>(configProps);
    }

    @Bean
    public KafkaTemplate<String, String> kafkaTemplate() {
        return new KafkaTemplate<>(producerFactory());
    }
}
Step 6: Create the KafkaConsumerService
We will create the KafkaConsumerService that provides the service of the Consumer of the application.
Go to src > main > java > org.example.kafkasubscribe > service > KafkaConsumerService and put the below code.
Java
package org.example.kafkasubscribe.service;


import org.springframework.kafka.annotation.KafkaListener;
import org.springframework.stereotype.Service;

@Service
public class KafkaConsumerService {

    @KafkaListener(topics = "my-topic", groupId = "my-group")
    public void listen(String message) {
        System.out.println("Received Message: " + message);
    }
}
Step 7: Create the KafkaProducerService
We will create the KafkaProducerService that provides the service of the Producer of the application.
Go to src > main > java > org.example.kafkasubscribe > service > KafkaProducerService and put the below code.
Java
package org.example.kafkasubscribe.service;


import org.springframework.beans.factory.annotation.Autowired;
import org.springframework.kafka.core.KafkaTemplate;
import org.springframework.stereotype.Service;

@Service
public class KafkaProducerService {

    private final KafkaTemplate<String, String> kafkaTemplate;

    @Autowired
    public KafkaProducerService(KafkaTemplate<String, String> kafkaTemplate) {
        this.kafkaTemplate = kafkaTemplate;
    }

    public void sendMessage(String topic, String message)
    {
        kafkaTemplate.send(topic, message);
    }
}
Step 8: Create the KafkaController class
We will create the KafkaController class that can create the endpoint of the publish message of the application.
Go to src > main > java > org.example.kafkasubscribe > controller > KafkaController and put the below code.
Java
package org.example.kafkasubscribe.controller;


import org.example.kafkasubscribe.service.KafkaProducerService;
import org.springframework.beans.factory.annotation.Autowired;
import org.springframework.http.ResponseEntity;
import org.springframework.web.bind.annotation.PostMapping;
import org.springframework.web.bind.annotation.RequestParam;
import org.springframework.web.bind.annotation.RestController;

@RestController
public class KafkaController {

    private final KafkaProducerService producerService;

    @Autowired
    public KafkaController(KafkaProducerService producerService) {
        this.producerService = producerService;
    }

    @PostMapping("/publish")
    public ResponseEntity<String> publishMessage(@RequestParam("message") String message) {
        producerService.sendMessage("my-topic", message);
        return ResponseEntity.ok("Message published to Kafka topic");
    }
}
Step 9: Main Class
Open the main class. No changes are required to be done in main class.
Java
package org.example.kafkasubscribe;

import org.apache.kafka.clients.consumer.ConsumerRecord;
import org.apache.kafka.clients.consumer.ConsumerRecords;
import org.apache.kafka.clients.consumer.KafkaConsumer;
import org.springframework.boot.SpringApplication;
import org.springframework.boot.autoconfigure.SpringBootApplication;

import java.time.Duration;
import java.util.Collections;

@SpringBootApplication
public class KafkaSubscribeApplication {

    public static void main(String[] args) {
        SpringApplication.run(KafkaSubscribeApplication.class, args);
    }
}
pom.xml:
XML
<?xml version="1.0" encoding="UTF-8"?>
<project xmlns="http://maven.apache.org/POM/4.0.0" xmlns:xsi="http://www.w3.org/2001/XMLSchema-instance"
         xsi:schemaLocation="http://maven.apache.org/POM/4.0.0 https://maven.apache.org/xsd/maven-4.0.0.xsd">
    <modelVersion>4.0.0</modelVersion>
    <parent>
        <groupId>org.springframework.boot</groupId>
        <artifactId>spring-boot-starter-parent</artifactId>
        <version>3.2.5</version>
        <relativePath/> <!-- lookup parent from repository -->
    </parent>
    <groupId>org.example</groupId>
    <artifactId>kafka-subscribe</artifactId>
    <version>0.0.1-SNAPSHOT</version>
    <name>kafka-subscribe</name>
    <description>kafka-subscribe</description>
    <properties>
        <java.version>17</java.version>
    </properties>
    <dependencies>
        <dependency>
            <groupId>org.springframework.boot</groupId>
            <artifactId>spring-boot-starter-web</artifactId>
        </dependency>
        <dependency>
            <groupId>org.springframework.kafka</groupId>
            <artifactId>spring-kafka</artifactId>
        </dependency>

        <dependency>
            <groupId>org.springframework.boot</groupId>
            <artifactId>spring-boot-devtools</artifactId>
            <scope>runtime</scope>
            <optional>true</optional>
        </dependency>
        <dependency>
            <groupId>org.projectlombok</groupId>
            <artifactId>lombok</artifactId>
            <optional>true</optional>
        </dependency>
        <dependency>
            <groupId>org.springframework.boot</groupId>
            <artifactId>spring-boot-starter-test</artifactId>
            <scope>test</scope>
        </dependency>
        <dependency>
            <groupId>org.springframework.kafka</groupId>
            <artifactId>spring-kafka-test</artifactId>
            <scope>test</scope>
        </dependency>
    </dependencies>

    <build>
        <plugins>
            <plugin>
                <groupId>org.springframework.boot</groupId>
                <artifactId>spring-boot-maven-plugin</artifactId>
                <configuration>
                    <excludes>
                        <exclude>
                            <groupId>org.projectlombok</groupId>
                            <artifactId>lombok</artifactId>
                        </exclude>
                    </excludes>
                </configuration>
            </plugin>
        </plugins>
    </build>

</project>
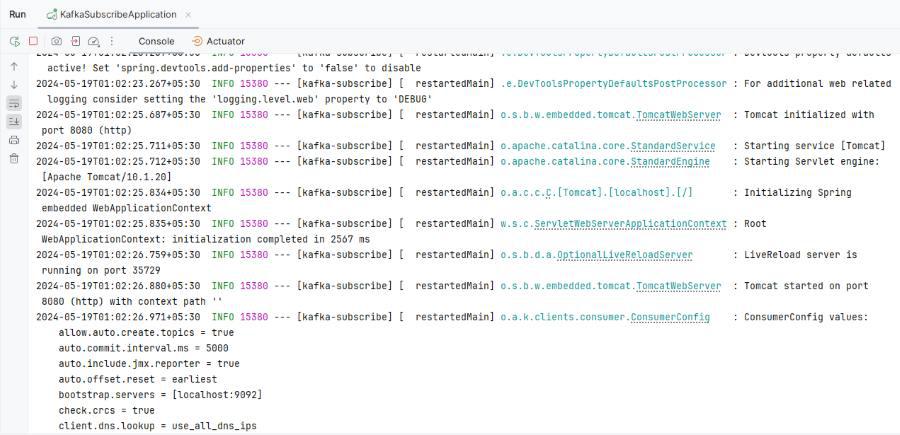
Step 10: Run the Application
Once complete the application then it will start the application at port 8080.
Step 11: Endpoint Testing
Publish the message API:
POST http://localhost:8080/publish?message=HelloKafka Output: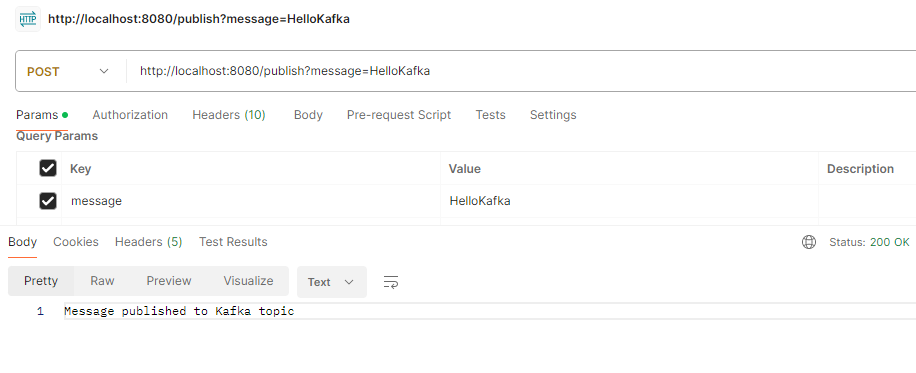
Application Log to print the Kafka Message:
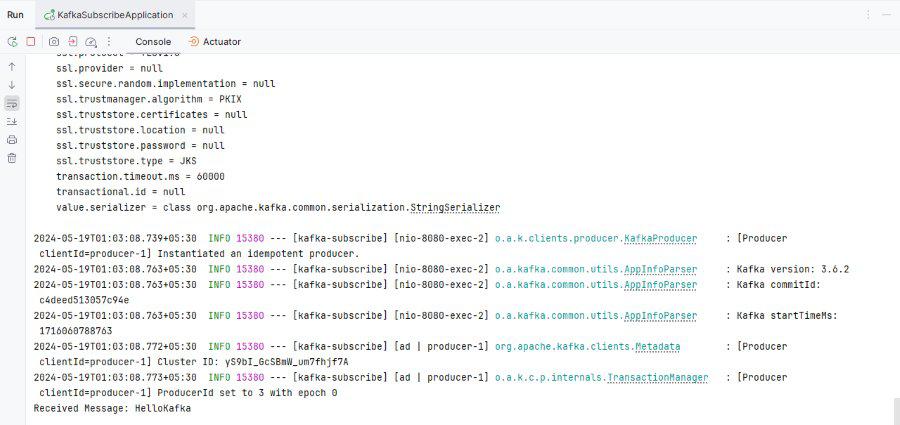 By following these steps, we can set up the basic microservices communication system using Apache Kafka and Spring Boot. This setup ensures that the microservices can communicate effectively and it can handle high throughput and provide scalability and fault tolerance.
|