|
|
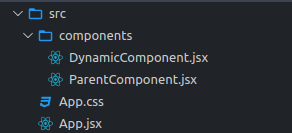
React is a popular library, maintained by Meta, which is used for building user interfaces and dynamic websites. It offers several techniques to optimize performance and enhance end-user experience. Lazy loading is one such technique that can be used to improve the performance of web applications by deferring the loading of resources until the browser needs them. This article will dive deep into lazy loading and how to implement it in a React application. Prerequisites:Approach:React.lazy() enables lazy loading of components, loading them only when needed, not with the initial bundle. Suspense, a built-in React component, manages the loading state, displaying a fallback UI during component fetch. Upon completion, Suspense replaces the fallback UI with the actual component, enhancing React app performance by asynchronously loading components. Steps to Implement Lazy Loading in React:Step 1: Set Up a New React App Open your terminal and run the following commands to create a new React app: npx create-react-app lazy-loading Step 2: Create Components After setting up react environment on your system, we can start implementing components for lazy loading. Folder Structure:Project Structure for lazy loading project The updated dependencies in package.json file will look like this: "dependencies": { Example: `ParentLazyComponent` uses React.lazy() to lazily load `DynamicComponent` when it’s needed. The Suspense component is used to display a loading indicator while `DynamicComponent` is being loaded. This kind of approach simplifies makes sure that components like `DynamicComponent` are not loaded in initial application bundle and loaded only when needed in case of complex UI applications. Step 3: In your terminal, make sure you’re in the project directory and run below command: npm startOutput:  Lazy Loading Output |
Reffered: https://www.geeksforgeeks.org
| ReactJS |
Type: | Geek |
Category: | Coding |
Sub Category: | Tutorial |
Uploaded by: | Admin |
Views: | 13 |