|
SonarQube is a popular open-source platform that can be used to continuously monitor code quality and can provide static code analysis, code coverage, and other metrics to help teams improve code quality and maintainability SonarQube. Its integration with Spring Boot is invaluable in ensuring that our code base has quality, and is secure.
Key Terminologies:- Static Code Analysis: The process of analyzing source code before compilation or execution to find potential problems such as errors, vulnerabilities, and violations of coding standards.
- Code quality metrics: These can include measures such as code coverage, cyclone complexity, duplicate percentage, maintainability index, etc. They can be used to measure code quality and maintainability.
Steps to Integrate SonarQube in Spring BootStep 1: First, we can download and install SonarQube from the official website and start the SonarQube server by executing the appropriate commands of our Windows platform.
Open the command prompt and go to the bin folder of the sonarQuber server then execute the below command to start the server.
startsonar.bat
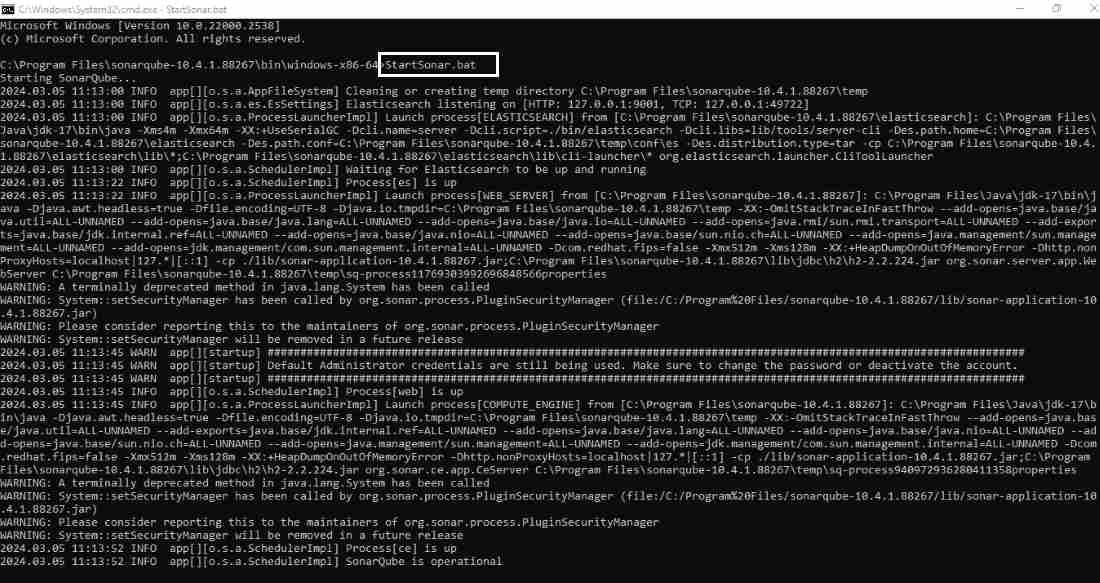
Once SonorQube Server run successfully, we can now login to the SonarQube. The default username and password is admin.
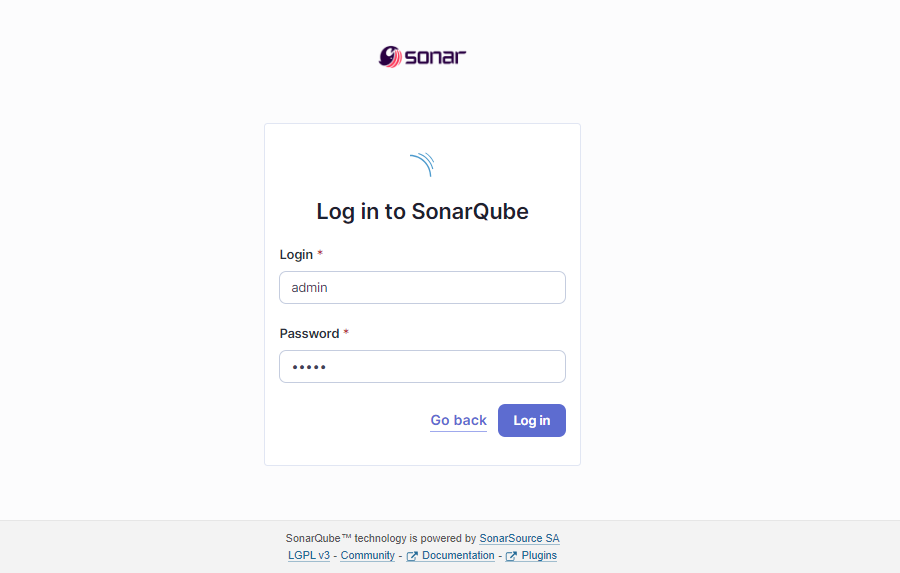
After that, update the password of the SonorQube and Login dashboard. Refer the image for the better understanding.

Step 2: Open the dashboard then create the new project and it enters the project display name and project key click on the create the button.

Refer the image for the understanding the concept of creating the project into the SonarQube Server.

Step 3: Now Deploy the local project into the SonarQube. Click on the locally option that can show like the below image.

Step 4: Once click on the locally option then open the new page for generating the token of the SonarQube Server project then click on the continue button.

Step 5: Finally, complete the creation of the SonarQube project then the save command.
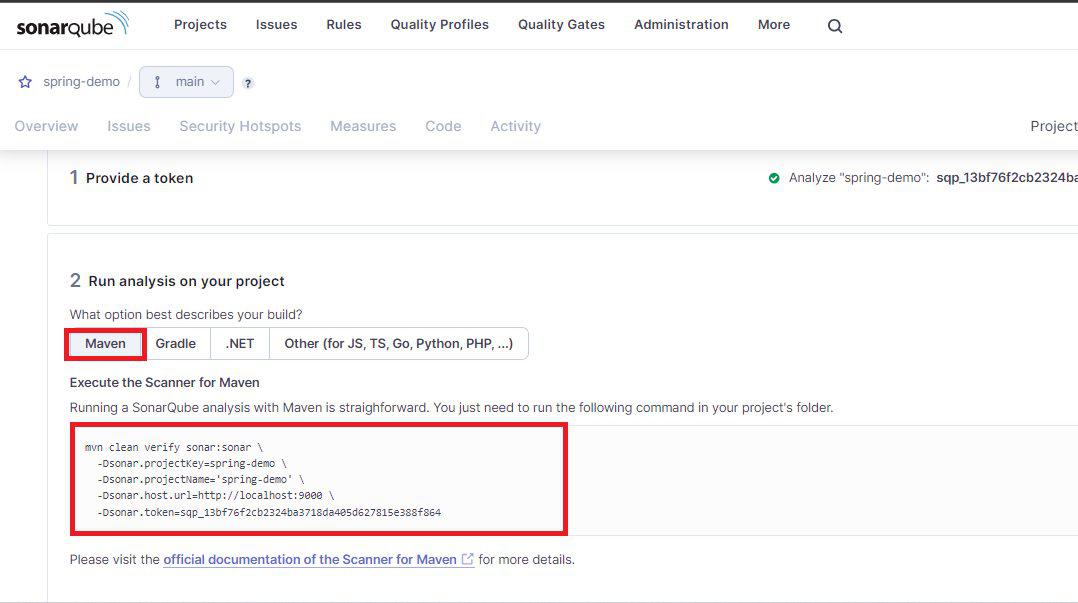
Save the code for the integrating into the spring boot project.
mvn clean verify sonar:sonar  \
  -Dsonar.projectKey=spring-demo  \
  -Dsonar.projectName='spring-demo'  \
  -Dsonar.host.url=http://localhost:9000  \
  -Dsonar.token=sqp_13bf76f2cb2324ba3718da405d627815e388f864
Create the Spring projectStep 6: Create the new spring project using spring initializer and it named as spring-sonorQube-demo on creating the project add the below dependencies into the project.
Dependencies:
- Spring Web
- Lombok
- Spring Dev tools
External dependency:
<!-- Jacoco Maven Plugin -->
<dependency>
<groupId>org.jacoco</groupId>
<artifactId>jacoco-maven-plugin</artifactId>
<version>0.8.7</version>
</dependency>
<!-- https://mvnrepository.com/artifact/org.sonarsource.scanner.maven/sonar-maven-plugin -->
<dependency>
<groupId>org.sonarsource.scanner.maven</groupId>
<artifactId>sonar-maven-plugin</artifactId>
<version>3.10.0.2594</version>
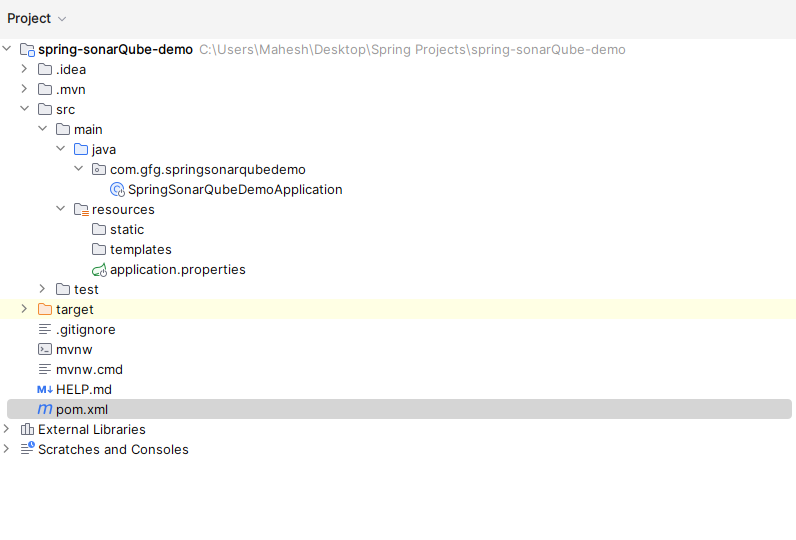
</dependency> Once the project created, then the file structure looks likes the below image.
Main class:
Java
package com.gfg.springsonarqubedemo;

import org.springframework.boot.SpringApplication;
import org.springframework.boot.autoconfigure.SpringBootApplication;

/**
 * Main class to start the Spring SonarQube Demo application.
 */
@SpringBootApplication
public class SpringSonarQubeDemoApplication {

    public static void main(String[] args) {
        SpringApplication.run(SpringSonarQubeDemoApplication.class, args);
    }

}
pom.xml:
XML
<?xml version="1.0" encoding="UTF-8"?>
<project xmlns="http://maven.apache.org/POM/4.0.0"
         xmlns:xsi="http://www.w3.org/2001/XMLSchema-instance"
         xsi:schemaLocation="http://maven.apache.org/POM/4.0.0
                             https://maven.apache.org/xsd/maven-4.0.0.xsd">

    <modelVersion>4.0.0</modelVersion>

    <parent>
        <groupId>org.springframework.boot</groupId>
        <artifactId>spring-boot-starter-parent</artifactId>
        <version>3.2.3</version>
        <relativePath/> <!-- lookup parent from repository -->
    </parent>

    <groupId>com.gfg</groupId>
    <artifactId>spring-sonarQube-demo</artifactId>
    <version>0.0.1-SNAPSHOT</version>
    <name>spring-sonarQube-demo</name>
    <description>spring-sonarQube-demo</description>

    <properties>
        <java.version>17</java.version>
    </properties>

    <dependencies>
        <dependency>
            <groupId>org.springframework.boot</groupId>
            <artifactId>spring-boot-starter-web</artifactId>
        </dependency>

        <!-- Jacoco Maven Plugin -->
        <dependency>
            <groupId>org.jacoco</groupId>
            <artifactId>jacoco-maven-plugin</artifactId>
            <version>0.8.7</version>
        </dependency>


        <!-- Spring Boot DevTools -->
        <dependency>
            <groupId>org.springframework.boot</groupId>
            <artifactId>spring-boot-devtools</artifactId>
            <scope>runtime</scope>
            <optional>true</optional>
        </dependency>

        <!-- Project Lombok -->
        <dependency>
            <groupId>org.projectlombok</groupId>
            <artifactId>lombok</artifactId>
            <optional>true</optional>
        </dependency>

        <!-- Spring Boot Starter Test -->
        <dependency>
            <groupId>org.springframework.boot</groupId>
            <artifactId>spring-boot-starter-test</artifactId>
            <scope>test</scope>
        </dependency>
    </dependencies>

    <build>
        <plugins>
            <!-- Spring Boot Maven Plugin -->
            <plugin>
                <groupId>org.springframework.boot</groupId>
                <artifactId>spring-boot-maven-plugin</artifactId>
                <configuration>
                    <excludes>
                        <exclude>
                            <groupId>org.projectlombok</groupId>
                            <artifactId>lombok</artifactId>
                        </exclude>
                    </excludes>
                </configuration>
            </plugin>
        </plugins>
    </build>

</project>
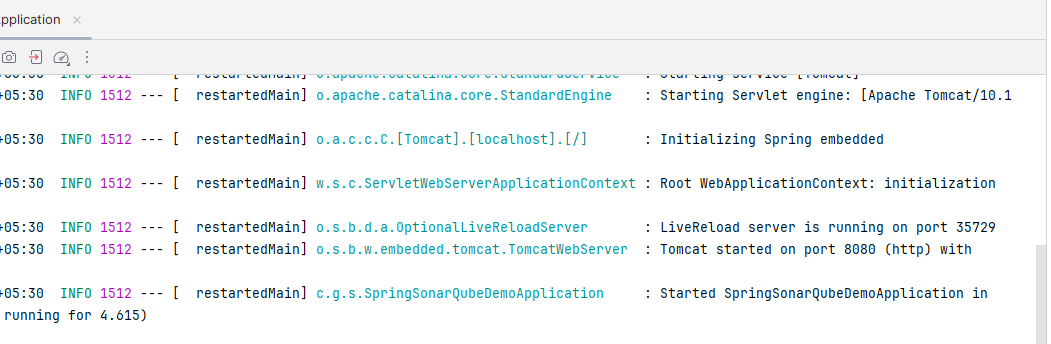
Step 7: Once completed the project, run the project as spring application and it will start at port 8080. Refer below image for better understanding.
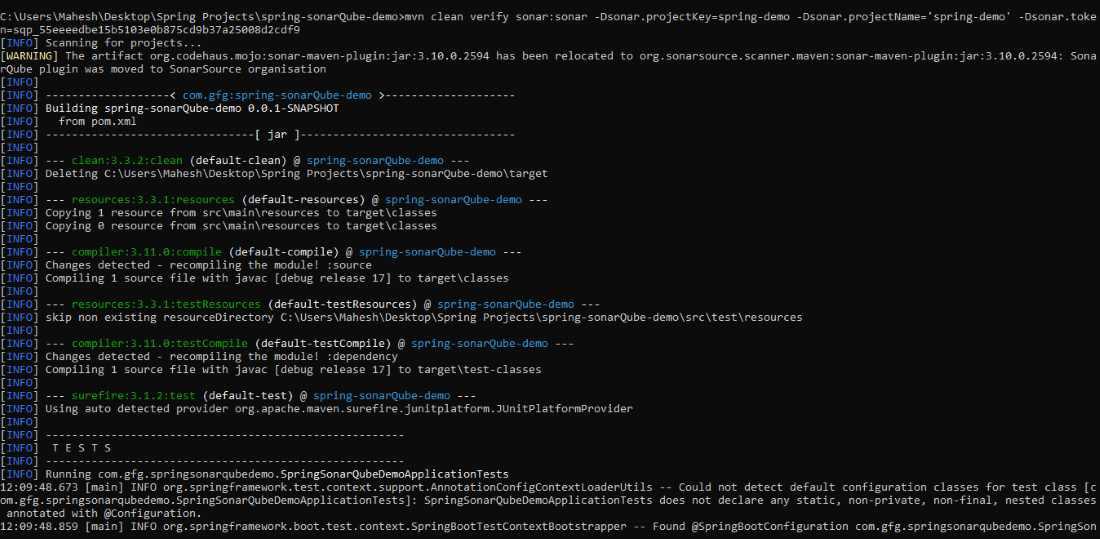
Step 8: Open the terminal at root folder of the spring project and execute the below command to the integrating the SonarQube with spring project.
mvn clean verify sonar:sonar
                   -Dsonar.projectKey=spring-demo
                   -Dsonar.projectName='spring-demo'
                   -Dsonar.host.url=http://localhost:9000
                   -Dsonar.token=sqp_13bf76f2cb2324ba3718da405d627815e388f864
Refer the below image:
The Spring Boot project successfully integrates with the SonarQube. Now, the spring boot project can analysis with the SonarQube. The page looks like the below image.
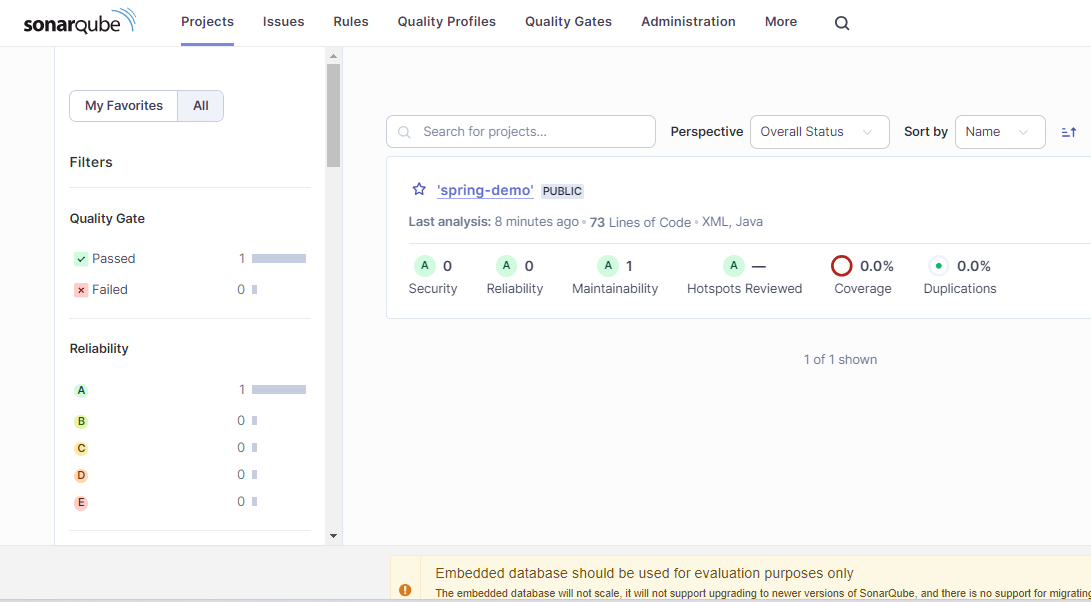
Sonar Dashboard:

We can follow the step-by-step instructions of the above article then we can successfully integrate the SonarQube with the Spring project.
|