|
Machine learning models learn from data to recognize patterns and make predictions. TensorFlow.js enables ML in JavaScript. React Hooks helps integrate ML models into React apps. Custom Hooks handle model loading and usage. useEffect loads the model on the component mount. useState manages input data and predictions.
Integrating Machine Learning Models into React Hooks App:Step 1: Set Up Your Project
npx create-react-app ml-react-app
cd ml-react-app
Step 2: Install Required Libraries:
Install "@tensorflow/tfjs" and "@tensorflow-models/mobilenet". By installing “@tensorflow-models/mobilenet”, you gain access to the MobileNet model implementation in TensorFlow.js. This model is optimized for mobile devices and real-time applications, making it suitable for many image classification use cases.
npm install @tensorflow/tfjs @tensorflow-models/mobilenet Folder Structure: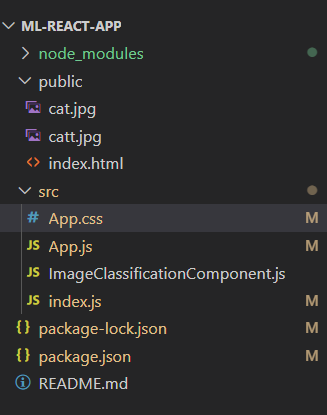 Project Structure The updated dependencies will look like this:
"dependencies": {
        "@tensorflow-models/mobilenet": "^2.1.1",
        "@tensorflow/tfjs": "^4.17.0",
        "@testing-library/jest-dom": "^5.17.0",
        "@testing-library/react": "^13.4.0",
        "@testing-library/user-event": "^13.5.0",
        "cors": "^2.8.5",
        "react": "^18.2.0",
        "react-dom": "^18.2.0",
        "react-scripts": "5.0.1",
        "web-vitals": "^2.1.4"
}
Example: Below is the code example.
CSS
.navbar {
    background-color: #333;
    padding: 10px 0;
}

.logo-container {
    display: flex;
    justify-content: center;
    align-items: center;
}

.logo {
    width: 80px;
    height: auto;
}

.title {
    font-size: 24px;
    text-align: center;
}

.container {
    max-width: 600px;
    margin: 0 auto;
    padding: 20px;
}

.input-container {
    display: flex;
    justify-content: center;
    align-items: center;
    margin-bottom: 20px;
}

.input-container input[type="text"] {
    padding: 10px;
    width: 80%;
    max-width: 300px;
    border: 1px solid #ccc;
    border-radius: 5px;
    box-sizing: border-box;
}

.button {
    padding: 10px 20px;
    background-color: #007bff;
    color: #fff;
    border: none;
    border-radius: 5px;
    cursor: pointer;
}

.button:disabled {
    background-color: #ccc;
    cursor: not-allowed;
}

.image-container {
    display: flex;
    justify-content: center;
    align-items: center;
    margin-bottom: 20px;
}


.image-container img {
    max-width: 100%;
    max-height: 300px;
    width: auto;
}

.loading-text {
    text-align: center;
    color: #007bff;
    font-weight: bold;
}

.predictions-container {
    display: flex;
    flex-direction: column;
    justify-content: center;
    align-items: center;
    height: 300px;
    border: 1px solid #ccc;
    padding: 3px;
    border-radius: 5px;
    background-color: #f9f9f9;
}

.predictions-container h2 {
    margin-bottom: 10px;
}

.predictions-container ul {
    list-style-type: none;
    padding: 0;
}

.predictions-container li {
    margin-bottom: 5px;
}
//App.js

import React,
{
    useEffect
} from 'react';
import * as tf from '@tensorflow/tfjs';
import ImageClassificationComponent
    from './ImageClassificationComponent';
import Nav from './Nav';
import './App.css';

function App() {
    useEffect(() => {

        async function checkTensorFlowReady() {
            await tf.ready();
            const backend = tf.getBackend();
            console.log('Current Backend:', backend);
        }

        checkTensorFlowReady();
    }, []);

    return (
        <div className="App">
            <nav className="navbar">
                <div className="logo-container">
                    <img src=
'https://media.geeksforgeeks.org/gfg-gg-logo.svg'
                        alt="Logo" className="logo" />
                </div>
            </nav>
            <h1 className='title'>
                Image Classification in React with Hooks
            </h1>
            <ImageClassificationComponent />
        </div>
    );
}

export default App;
// ImageClassificationComponent.js
import React,
{
    useState
} from 'react';
import * as mobilenet
    from '@tensorflow-models/mobilenet';
import './App.css';

const ImageClassificationComponent = () => {
    const [inputUrl, setInputUrl] = useState('');
    const [predictions, setPredictions] = useState([]);
    const [loading, setLoading] = useState(false);

    const handleInputChange = (event) => {
        setInputUrl(event.target.value);
    };

    const handleImageSubmit = async () => {
        setLoading(true);
        const img = document.getElementById('img');
        const model = await mobilenet.load();
        const predictions = await model.classify(img);
        setPredictions(predictions);
        setLoading(false);
    };

    return (
        <div className="container">
            <div className="input-container">
                <input
                    type="text"
                    placeholder="Enter Image URL"
                    value={inputUrl}
                    onChange={handleInputChange}
                />
                <button className="button"
                    onClick={handleImageSubmit}>
                    Submit
                </button>
            </div>
            {
                loading &&
                <p className="loading-text">
                    Loading...
                </p>
            }
            {
                inputUrl && (
                    <div className="image-container">
                        <img id="img" src={inputUrl}
                            alt="input" className="image" />
                        {
                            predictions.length > 0 && (
                                <div className="predictions-container">
                                    <h2>Predictions:</h2>
                                    <ul>
                                        {
                                            predictions.map((prediction, index) => (
                                                <li key={index}>
                                                {prediction.className}:
                                                {Math.round(prediction.probability * 100)}%
                                                </li>
                                            ))
                                        }
                                    </ul>
                                </div>
                            )
                        }
                    </div>
                )}
        </div>
    );
};

export default ImageClassificationComponent;
Step 5: Run Your Application
npm start Output:
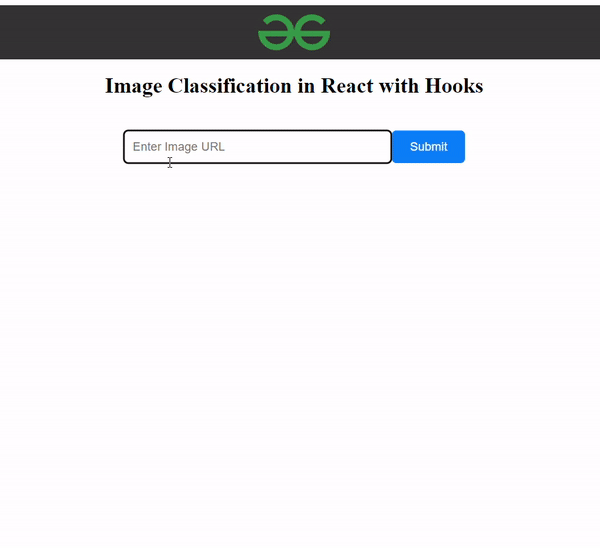 output
|