|
|
Jinja, a template engine, seamlessly combines the power of Python with HTML’s structure. It enhances the development experience, making web applications more flexible. Jinja solves the challenge of cleanly integrating server-side logic (Python) with client-side presentation (HTML). It eliminates clutter, offering a more elegant and readable way to build dynamic web content. In this article, we will see how we can switch from other template engines using Jinja Templating. Switching from Other Template Using Python JinjaBelow is the step-by-step guide on how to Switching From Other Template Engines-Jinja: Step 1: Create a Virtual EnvironmentFirst, create the virtual environment using the below commands python -m venv env Step 2: Install FlaskTo install the Flask library, you can use the following command in your terminal or command prompt: pip install Flask
Make sure you have Python and pip installed on your system. Once Flask is installed, you can proceed to work with Flask and Jinja templates. File Structure
Step 3: Setting Necessary Filesmain.py : This Flask application defines routes for different URLs. The `hello_world` route renders `index.html` with a user parameter. The `second` and `third` routes render different templates, passing data to `third.html`. The `fourth` route renders `child_template.html` with a user parameter, and `app.run()` starts the development server. Python3
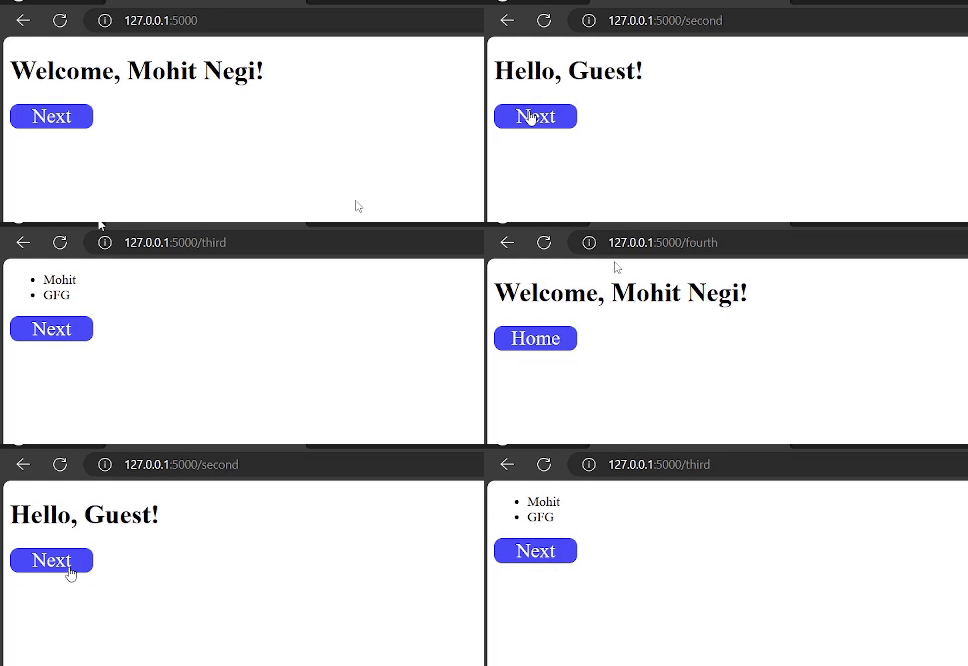
Step 4: Creating GUI using JinjaVariable Insertion : In the `child_template.html` file, the Jinja syntax `{{ user }}` is used for variable insertion. This placeholder will be replaced with the actual value of the “user” variable when rendering the template, displaying a personalized welcome message. HTML
Control Structures : In the `second.html` file, Jinja syntax is used for conditional rendering. The `{% if user %}` block checks if the “user” variable has a value. If true, it displays a personalized welcome message using `{{ user }}`. If false (when “user” is not defined). This example demonstrates how to conditionally render a greeting based on the presence of the user variable. HTML
Jinja Looping: In the `third.html` file, Jinja utilizes a `{% for user in user_list %}` loop to dynamically generate an unordered list (`<ul>`) based on the elements in the “user_list” variable. For each “user” in the list, it creates a list item (`<li>`) containing the user’s name, and the loop is closed with `{% endfor %}`. In this example, the template iterates over a user_list and creates a list item for each user. HTML
Template Inheritance: This HTML template employs Jinja’s template inheritance. The `{% block title %}Default Title{% endblock %}` and `{% block content %}{% endblock %}` syntax creates placeholders for title and content. Child templates can override these blocks, allowing dynamic customization while maintaining a consistent structure HTML
child_template.html: This Jinja template extends “base_template.html,” replacing the title with “Custom Title” and inserting a personalized welcome message in the content block using the “user” variable. HTML
Step 5: Run the Serverpython main.py
Output :
|
Reffered: https://www.geeksforgeeks.org
| Python |
Type: | Geek |
Category: | Coding |
Sub Category: | Tutorial |
Uploaded by: | Admin |
Views: | 12 |
