|
A component in Angular is the building block for making web pages. It is a reusable block of code that can be used anywhere in the app any number of times. It provides scalability, reusability, and readability. Each component does a specific job like showing a menu, a photo or a card, etc.
In this article, we will see how to create a new component in Angular.
Steps to create a new component in Angular:
Step 1: Download and install NodeJS from its official website, npm is included with that.
Step 2: To install angular CLI run the following command in the terminal.
npm install -g @angular/cli
Step 3: After installing angular cli, set up a new project in angular using the below command:
ng new my-angular-app
Folder structure:
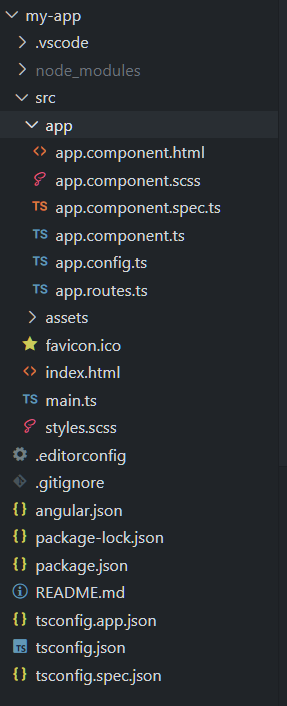 Angular Folder structure Dependencies:
"dependencies": {
    "@angular/animations": "^17.1.0",
    "@angular/common": "^17.1.0",
    "@angular/compiler": "^17.1.0",
    "@angular/core": "^17.1.0",
    "@angular/forms": "^17.1.0",
    "@angular/platform-browser": "^17.1.0",
    "@angular/platform-browser-dynamic": "^17.1.0",
    "@angular/router": "^17.1.0",
    "rxjs": "~7.8.0",
    "tslib": "^2.3.0",
    "zone.js": "~0.14.3"
}
Step 3: Navigate to the project using cd your-project-name and open the terminal and write the command mentioned below to generate a new component in angular:
ng generate component component-name
“OR”
You can use this shortcut
ng g c component-name
Note: After this command, it will ask you for styling so chose as per your needs( css for now) then it will ask for SSR, press n to skip it then the component will be generated in src folder of the project.
The component will look like this:
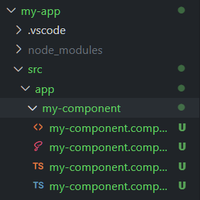 New component in angular Example to create a New Component in Angular
Code: Now add the following code in the required files.
HTML
<div class="card">
<div class="card-header">
<h2 class="heading">GeeksforGeeks</h2>
</div>
<div class="card-body">
<img src="../../assets/img/gfg logo.png" alt="GeeksforGeeks Image" />
<p>
GeeksforGeeks is a leading platform that provides computer science
resources and coding challenges for programmers and technology
enthusiasts, along with interview and exam preparations for upcoming
aspirants. With a strong emphasis on enhancing coding skills and
knowledge, it has become a trusted destination for over 12 million
plus registered users worldwide. The platform offers a vast
collection of tutorials, practice problems, interview tutorials,
articles, and courses, covering various domains of computer science.
</p>
</div>
</div>
|
HTML
// app.compoenent.html
<app-card></app-card>
|
CSS
body {
font-family: 'Roboto', sans-serif;
}
.heading {
text-align: center;
color: #ffff;
}
.card {
width: 20%;
height: auto;
margin: auto;
margin-top: 10vh;
border-radius: 10px;
overflow: hidden;
background: linear-gradient(to bottom right, #4e54c8, #8f94fb);
}
.card-header {
background: linear-gradient(to top left, #00a300, #00c900);
padding: 10px;
}
.card-body {
padding: 20px;
}
.card img {
max-width: 60%;
height: auto;
margin-bottom: 20px;
border-radius: 20px;
display: flex;
margin: auto;
}
.card-body p {
color: #ffff;
margin-top: 20%;
}
@media screen and (max-width: 768px) {
.card {
width: 90%;
height: auto;
}
}
|
Javascript
import { Component, NgModule } from '@angular/core';
import { RouterOutlet } from '@angular/router';
import { CardComponent } from './my-component/my-component.component';
@Component({
selector: 'app-root',
standalone: true,
imports: [RouterOutlet,
my - component],
templateUrl: './app.component.html',
styleUrl: './app.component.css'
})
export class AppComponent {
title = 'card';
}
|
Javascript
import { Component } from '@angular/core';
@Component({
selector: 'my-component',
standalone: true,
imports: [],
templateUrl: './my-component.component.html',
styleUrl: './my-component.component.css'
})
export class my-component {
}
|
Run the project using command given below:
ng serve
Output:
 How do you create a new component in Angular
|