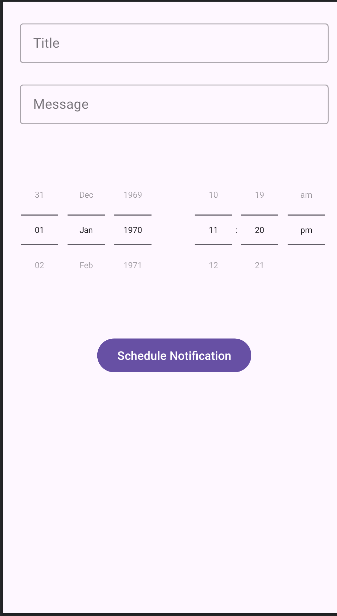
package com.horje.app
import android.annotation.SuppressLint
import android.app.AlarmManager
import android.app.AlertDialog
import android.app.NotificationChannel
import android.app.NotificationManager
import android.app.PendingIntent
import android.content.Context
import android.content.Intent
import android.content.pm.PackageManager
import android.os.Build
import android.os.Bundle
import android.provider.Settings
import android.util.Log
import androidx.annotation.RequiresApi
import androidx.appcompat.app.AppCompatActivity
import androidx.core.app.ActivityCompat
import androidx.core.app.NotificationManagerCompat
import androidx.core.content.ContextCompat
import com.ayush.assignment.databinding.ActivityMainBinding
import java.util.Calendar
import java.util.Date
class MainActivity : AppCompatActivity() {
private lateinit var binding: ActivityMainBinding
@RequiresApi(Build.VERSION_CODES.O)
override fun onCreate(savedInstanceState: Bundle?) {
super.onCreate(savedInstanceState)
binding = ActivityMainBinding.inflate(layoutInflater)
setContentView(binding.root)
createNotificationChannel()
binding.submitButton.setOnClickListener {
if (checkNotificationPermissions(this)) {
scheduleNotification()
}
}
}
@SuppressLint("ScheduleExactAlarm")
private fun scheduleNotification() {
val intent = Intent(applicationContext, Notification::class.java)
val title = binding.title.text.toString()
val message = binding.message.text.toString()
intent.putExtra(titleExtra, title)
intent.putExtra(messageExtra, message)
val pendingIntent = PendingIntent.getBroadcast(
applicationContext,
notificationID,
intent,
PendingIntent.FLAG_IMMUTABLE or PendingIntent.FLAG_UPDATE_CURRENT
)
val alarmManager = getSystemService(Context.ALARM_SERVICE) as AlarmManager
val time = getTime()
alarmManager.setExactAndAllowWhileIdle(
AlarmManager.RTC_WAKEUP,
time,
pendingIntent
)
showAlert(time, title, message)
}
private fun showAlert(time: Long, title: String, message: String) {
val date = Date(time)
val dateFormat = android.text.format.DateFormat.getLongDateFormat(applicationContext)
val timeFormat = android.text.format.DateFormat.getTimeFormat(applicationContext)
AlertDialog.Builder(this)
.setTitle("Notification Scheduled")
.setMessage(
"Title: $title\nMessage: $message\nAt: ${dateFormat.format(date)} ${timeFormat.format(date)}"
)
.setPositiveButton("Okay") { _, _ -> }
.show()
}
private fun getTime(): Long {
val minute = binding.timePicker.minute
val hour = binding.timePicker.hour
val day = binding.datePicker.dayOfMonth
val month = binding.datePicker.month
val year = binding.datePicker.year
val calendar = Calendar.getInstance()
calendar.set(year, month, day, hour, minute)
return calendar.timeInMillis
}
@RequiresApi(Build.VERSION_CODES.O)
private fun createNotificationChannel() {
val name = "Notify Channel"
val desc = "A Description of the Channel"
val importance = NotificationManager.IMPORTANCE_DEFAULT
val channel = NotificationChannel(channelID, name, importance)
channel.description = desc
val notificationManager = getSystemService(NOTIFICATION_SERVICE) as NotificationManager
notificationManager.createNotificationChannel(channel)
}
fun checkNotificationPermissions(context: Context): Boolean {
if (Build.VERSION.SDK_INT >= Build.VERSION_CODES.O) {
val notificationManager =
context.getSystemService(Context.NOTIFICATION_SERVICE) as NotificationManager
val isEnabled = notificationManager.areNotificationsEnabled()
if (!isEnabled) {
val intent = Intent(Settings.ACTION_APP_NOTIFICATION_SETTINGS)
intent.putExtra(Settings.EXTRA_APP_PACKAGE, context.packageName)
context.startActivity(intent)
return false
}
} else {
val areEnabled = NotificationManagerCompat.from(context).areNotificationsEnabled()
if (!areEnabled) {
val intent = Intent(Settings.ACTION_APP_NOTIFICATION_SETTINGS)
intent.putExtra(Settings.EXTRA_APP_PACKAGE, context.packageName)
context.startActivity(intent)
return false
}
}
return true
}
}

