|
|
JUnit 5 is the recent version of the JUnit testing framework. JUnit 5 is the most powerful version compared to the other versions because it consists of enhanced features that make the developers’ lives easy. Moreover, writing and running the unit tests with the JUnit 5 testing framework increases the correctness of your code and ensures your Java application has no defects. In JUnit 5, the @AfterEach annotation is just as same as the @After annotation which is in JUnit 4 testing framework. The only difference is that the naming convention between these both. If your JUnit testing framework is Junit4 then go for @After Annotation and JUnit 5 @AfterEach Annotation. Prerequisites
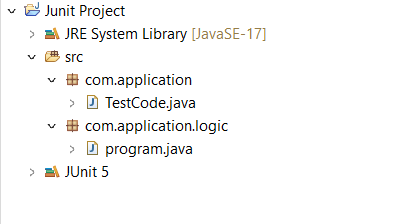
Setting up Junit 5 Jar FilesFirst, we will write test cases in a simple Java project. To make sure that JUnit works finely in our program, download the Junit5 jar files from online and import them into the IDE. To import the jar files into the Java project, Right-click on your Java Project > Select the option “Buildpath” > Select “Add libraries”. Then import the jar file from the local computer into the libraries. @AfterEach Annotation@AfterEach annotation is generally used to indicate that the annotated method must be executed after every @Test, @RepeatedTest, @ParameterizedTest, or @TestFactory in the same Test class. This means whenever you run the test method, the @AfterEach method will be executed at least once. Example of @AfterEach annotation:Now, let’s go through an example to understand more about @AfterEach annotation. Project Structure:
Main Class:Java
In the above program, we have created a class with name “Program” with a method “findMult” inside. This method calculates product of two integers and returns the same. So, we will be testing the above code with the @AfterEach annotation and find out the functionality of it. Test Class:Java
Output:Test Running: 1 Explaination of the above Method:
In the above output, we can see that whenever the “testMul” method is executed parallelly @AfterEach annotated method “cleanCheck” is also executed. which means after “in multiplication” is displayed “Running in CleanCheck ” is printed right after it. Conclusion@AfterEach annotation enhances the test isolation whenever each iteration is tested. This helps developers to maintain and run their tests without any difficulties. Test readability is increased with this annotation. The Junit 5 @AfterEach annotation serves the same functionality as @After annotation which is in JUnit 4 testing framework. The only difference is the naming convention and the version difference of the testing framework. |
Reffered: https://www.geeksforgeeks.org
| Advance Java |
Type: | Geek |
Category: | Coding |
Sub Category: | Tutorial |
Uploaded by: | Admin |
Views: | 11 |