
|
|
In this article, We are going to create an ec2 instance, install a MySQL database using MariaDB on the ec2 instance, and create an API of Login using the flask python framework. Flask is a micro web framework written in Python. MariaDB is one of the most popular open-source relational database management systems and could be used as a great replacement for MySQL. AWS ec2 instance allows users to rent virtual computers on which to run their computer applications, installing and Running MYSQL on EC2 Server(Linux) Step-by-Step Guide for Creating Flask API with MariaDB on EC2Step 1: Signing InSign in to your Management Console. Go to EC2. Step 2: Launching InstanceClick on the “Instances” section in the left sidebar. Click the “Launch Instance” button to start the instance creation process.
Then enter the appropriate Name of instance, for example MyInstance and select instance type as Amazon Linux 2 AMI(HVM) -Kernel 5.10, SSD volume Type in Application and OS Images. Select t2.micro as instance type. Step 3: Creating Key Pair(.pem)Choose an existing key pair if you have one, or create a new one. If you create a new key pair, make sure to download the private key file (.pem) and store it securely. Step 4: Configuration to Launch InstanceCreate a new security group or choose an existing one. Open ports for SSH (22), HTTP (80), Custom TCP(8080) to Run Flask API, MySQL/Aurora(3306). Review your settings and launch the Instance by clicking the Launch Instance Button
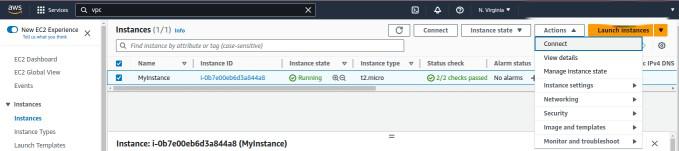
Step 5: Connecting to InstanceWe can see our Instance (MyInstance) in EC2 instance Dashboard. Select the check box of our Instance and go to Action and click on Connect to Connect the Instance.
Step 6: Checking Python VersionEnter the following command in the console to check the Python Version. python3 --version
if Python is not installed then enter following command. sudo apt-get install python3
Step 7: Installing MariaDB ServerRun the following command for installing mariadb-server sudo yum install -y mariadb-server
This command will install the MariaDB server. After install MariaDB server start using sudo systemctl start mariadb
Use this command for start MariaDB service automatically sudo systemctl enable mariadb
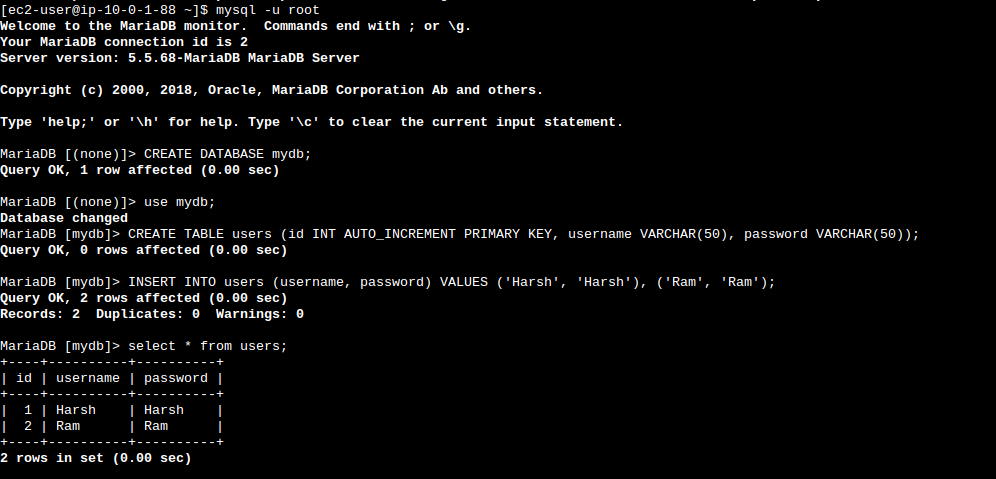
Step 8: Accessing MariaDB ShellAccess the MariaDB shell mysql -u root
create a new database for your Flask app using SQL commands CREATE DATABASE mydb
Use the new created Database and create a Table using SQL command CREATE TABLE users (id INT PRIMARY KEY, username VARCHAR(20), password VARCHAR(20))
To Insert Data in Table using SQL command INSERT INTO users (username, password) VALUES ('Harsh', 'Harsh'), ('Ram', 'Ram')
Step 9: Save Flask AppAfter exiting from MySQL and Create a Directory to save your Flask app code and its related file. mkdir Web
cd Web
Step 10: Setup Flask EnvironmentSetup Flask environment, For creating virtual environment python3 -m venv exflask
Activate the virtual environment source exflask/bin/activate
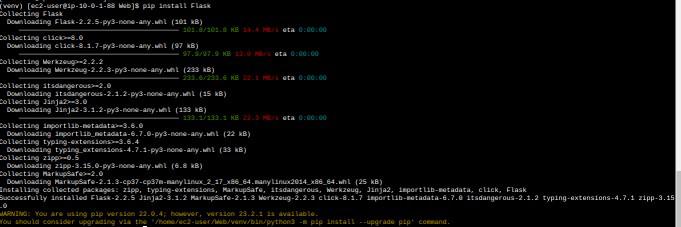
Step 11: Install Flask Package using pipInstall the Flask package using pip pip3 install Flask
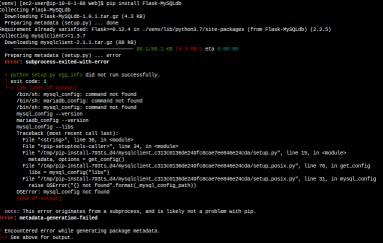
This command install the Flask package, which help us to create an web application in python.Access the mysql in your flask app to install flask-mysqllab package. pip3 install Flask-MySQLdb
.If you get an error like this.
We have to Install some dependencies to avoid the error. “pip install mysqlclient>=1.3.7
These commands install necessary dependencies allow to the “mysqlclient” package to Flask app. Step 12: Writing Code for Flask AppLeat’s create Flask app. touch app.py
This command creates an empty file which contains your Flask application code. To write your application code in app.py file ,Using nano app.py
This command opens the app.py file in the nano editor, you write and edit your code hear. Inside the ‘app.py‘ file, you’ll write your Flask application code. Python
Step 13: Creating TemplatesInside your main project directory create a subdirectory named “templates” mkdir templates && cd templates
Within the “templates” directory, create a new HTML file named login.html touch login.html
This command creates an empty login.html file, which you’ll write your login page code. nano login.html
Inside the ‘login.html’ file, paste the following HTML code to define the structure of your login page template HTML
Step 14: Running Flask AppNavigate to Your main Project Directory ‘Web’ and Run Your Flask App python3 app.py
This command starts the Flask development server
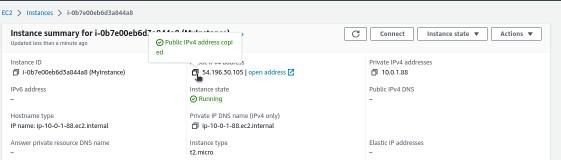
Open your browser and open AWS console navigate EC2 and select your instance public IP copy it and past it in URL and at last add “:8080” to access our flask app (ec2-public-ip:8080).
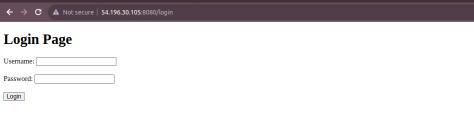
For going Login page write “(ec2-public-ip:8080/login”
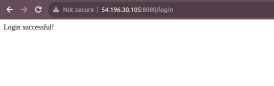
Enter a username and password to test the login functionality.
FAQs OnCreate a Flask API with MariaDB on AWS EC21. What Is Flask?
2. What is API?
3. What is MariaDB?
4. Use of Flask?
5. Why API are used?
|


Reffered: https://www.geeksforgeeks.org
| Cloud Computing |
| Related |
|---|
| |
| |
| |
| |
| |
Type: | Geek |
Category: | Coding |
Sub Category: | Tutorial |
Uploaded by: | Admin |
Views: | 14 |