|
|
In the era of emerging technologies like Data Analytics, Data Science, Machine Learning, etc., we have seen and come across scenarios, demanding powerful tools that can accelerate and streamline the process of work. One such useful tool that we encountered is JupyterLab. In this article, we will explore the various concepts related to JupyterLab Notebook. Also, we will see different steps with which one can connect a JupyterLab Notebook present on a local machine to a remote server. What is JupyterLab?JupyterLab is a free, open-source, web-based, interactive development environment (IDE) for data science, scientific computing, and general-purpose programming. It is used to create and share documents that contain live code, equations, visualizations, and narrative text. It is an extension or we can say, an evolution of the Jupyter Notebook. The environment for working with Jupyter notebooks, code, data, and interactive visualizations is more flexible and feature-rich with JupyterLab. What is a Remote Kernel?A pure Python module called “Remote Kernel” creates an SSH connection with port forwarding to a remote host and launches an IPyKernel on that host. This makes it simple to execute code on a remote server using a locally running instance of Jupyter or Spyder. Additionally, you can use this just as simply as a local kernel by installing it as a jupyter “kernel”. Moreover, talking in the context of Jupyter Notebook and JupyterLab, it’s a computational engine or interpreter that runs on a distant computer or server and executes code on behalf of a Jupyter Notebook or JupyterLab interface operating on a local or remote client system. While interacting with the notebook interface locally, remote kernels are utilized to offload calculations to a more capable or specialized remote server. PrerequisitesTo complete the article, we need the following requirements:
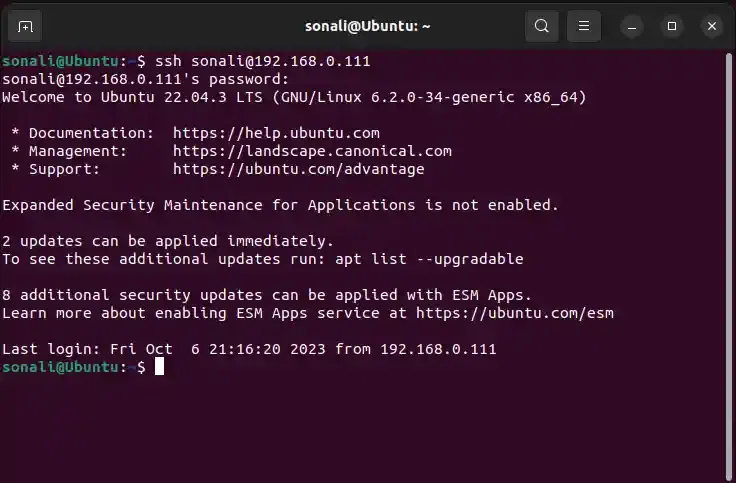
How to Connect a Local JupyterLab Notebook to a Remote Kernel?In order to connect local Jupyter Notebook/JupyterLab remotely, we need to first set up the Jupyter Notebook server or kernel on the remote machine (Here, we are using Ubuntu 22.04.3). Remote Kernel SetupStep 1: Using SSH into a Remote MachineBefore using SSH into your remote machine, you need to first install SSH and perform all the required configurations needed for it. Once, you installed SSH into your remote system, you can start using it for your Jupyter Notebook/Lab using the following command: ssh username@remote_machine_ip_address
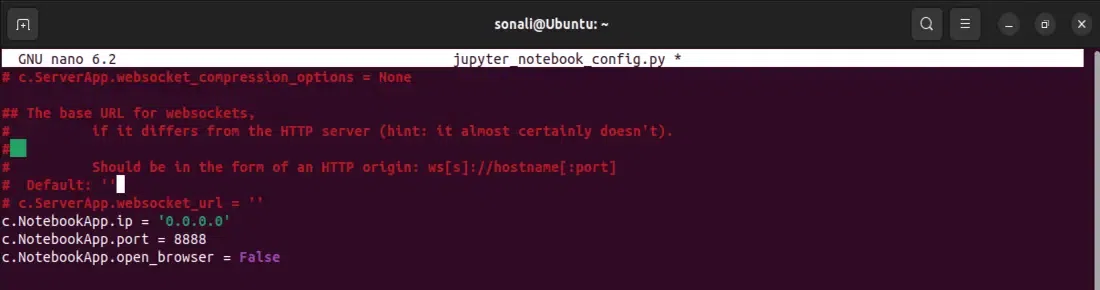
Replace ‘username’ with your username in the remote machine and ‘remote_machine_ip_address’ with the ip address of your remote machine. Step 2: Install JupyterNow, that you have installed and successfully started with SSH in your remote machine, install Jupyter using the following command in your remote machine pip install jupyter This will start to install Jupyter in your remote machine. Step 3: Generate a Jupyter Configuration fileOnce you installed Jupyter in your remote machine, generate Jupyter configuration file using the following command jupyter notebook --generate-config This command will create a configuration file named jupyter_notebook_config.py in the ~/.jupyter directory by default. Step 4: Configure Jupyter for Remote AccessTo configure Jupyter Notebook for remote access, you need to edit the jupyter configuration file using any text editor like ‘nano’. nano ~/.jupyter/jupyter_notebook_config.py Once, you open the configuration file, add the following lines in it. c.NotebookApp.ip = '0.0.0.0' # Allow connections from any IP address
Edit and save it. Using SSH ConnectionSSH, or Secure Shell, is a network protocol and cryptographic technology used for secure remote access to computers over a potentially insecure network. It provides a secure and encrypted connection for tasks like remote command execution, file transfer, and tunneling network services. Launching Jupyter on the Remote MachineTo start a Jupyter Notebook server on the remote machine. You may need to specify an IP address and port. For example, to run Jupyter on all available interfaces (0.0.0.0) on port 8888 , use the following command: jupyter notebook --ip 0.0.0.0 --port 8888
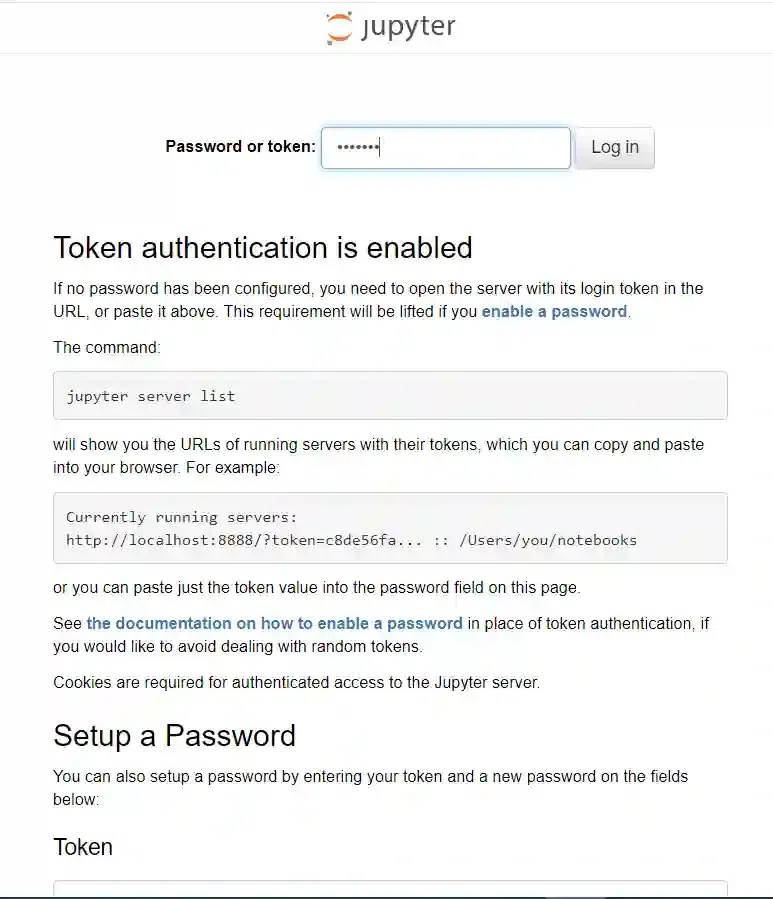
This will launch Jupyter server on your remote machine. Connecting LocallyIn order to connect to a remote Jupyter kernel and run remotely, you need to follow the following steps Step 1: Open and create a new NotebookFirst of all, in your local computer, open the command prompt and run the following command. jupyter notebook This will launch the Jupyter Notebook on the web browser of your local machine. Step 2: Connect to remote kernelNow, to connect to the remote Jupyter kernel, you need to have the access of the remote Jupyter server present on the remote machine. Use the following command to run and launch the Jupyter server on your remote machine (Here, Ubuntu 22.04.3 server is used). jupyter server This will run the remote Jupyter server and you will be able to easily access it locally. Step 3: Connection InfoTo connect to the remote kernel, you will typically need the following information: Host: The hostname or IP address of the machine where the remote Jupyter server is running. Port: The port number on which the Jupyter server is listening. The default is usually 8888. Token or Password: If the Jupyter server is configured with security, you may need an access token or password to authenticate. Step 4: Connect and Run RemotelyAfter successfully connecting to the remote kernel, you can start running code in the notebook just as you would with a local kernel. The code you run in the notebook will be executed on the remote machine where the kernel is running. The results will be displayed in your local notebook interface. Using SSH TunnelA secure method for creating a secure communication channel between a local computer and a distant server using an encrypted SSH connection is called an SSH tunnel, also known as SSH port forwarding or SSH tunneling. By establishing a tunnel over the SSH connection, SSH tunnels are used to securely send data between two devices, even if they are not directly linked. Configure SSH AccessOn your local machine, configure SSH port forwarding (tunneling) to connect to the remote Jupyter server securely. Use a separate terminal window or tab for this, and keep the SSH connection open while you work with Jupyter. ssh -N -L 8888:localhost:8888 <remote_user>@<remote_host> -N: Do not execute a remote command. Only set up the tunnel. -L: Specifies the port forwarding. In this case, local port 8888 is forwarded to the remote machine’s localhost on port 8888. Verify the ConnectionOpen a web browser on your local machine and go to http://localhost:8888. You should see the Jupyter Notebook interface. You may be prompted for a token or password, depending on your Jupyter configuration.
This is how now you are able to have a Jupyter Notebook server running on your remote machine, accessible from your local machine’s web browser. Make sure to keep the SSH session running while you want to use Jupyter. Launch JupyterLab LocallyNext, on your machine, start Jupyterlab locally, using the following command jupyter lab This will start Jupyterlab which will automatically get connected to the remote kernel you configured earlier.
Create a new Notebook or Open and existing oneNow, since you have opened your Jupyterlab Notebook, you can easily perform all of your tasks. You may create a new notebook or work in the same existing one, as per your own choice. ConclusionConnecting your local JupyterLab environment to a remote kernel offers several benefits, including increased processing power, resource availability, and collaborative access. We explored various methods, including SSH tunneling, Jupyter Notebook extensions, and dedicated gateways. Choosing the optimal method depends on your specific needs, technical expertise, and security considerations. Each approach has its advantages and disadvantages, so carefully evaluate your requirements and choose the most suitable technique for your situation. By mastering these techniques, you can effectively leverage the power of remote kernels, enhancing your data exploration and analysis capabilities within your local JupyterLab environment. |
-(1).webp)
.webp)
Reffered: https://www.geeksforgeeks.org
| AI ML DS |


Type: | Geek |
Category: | Coding |
Sub Category: | Tutorial |
Uploaded by: | Admin |
Views: | 14 |