.png)
|
|
Google Chrome has many tools and techniques that allow us to watch and analyze our Internet activity and how our data is processed over the internet. The Network tab is one of the available tools inside Google Chrome. It gives us various options by which we can diagnose and debug our internet data, which is going through our internet. It does not matter whether it is going through Wi-Fi or using an Ethernet cable. Sometimes our internet is not working in the Chrome browser. This may happen because of a network tab misconfiguration. The network tab in Google Chrome can also be used for our local-level development, and it is widely used by developers because when we develop web applications, there is a need to test whether they are working perfectly or not and how the server is responding to the client side when clients try to fetch and find our services. Benefits of using the Network Tab in ChromeFollowing are some important benefits of the Network tab in Chrome.
Steps to open the network tabStep 1: Open a new tab in google chrome.
Step 2: Open any web page. For testing purpose we are opening the horje webpage. You can open anyone.
Step 3: Now Click on the right button in mouse and select the inspect function and open the source code element
Step 4: After opening the source code element, the right side third function is a network tab so click on the Network tab and open the network tab.
By the above methods we can simply find out and open the Network tab in chrome. After Opening the Network tab we can start to perform our Task what we want to do with Network Tab. Features and Usage Examples of network tab in chrome1. Third Party requests:This option is used when we want to see about the third party requests , meaning which type of request and how these requests are made through our System when we visit any Web page. For Understanding in better way let’s see following Example- Step 1: Open the geekforgeek.org in google chrome and click right to your mouse and select inspect element and open the console screen.
Step 2: Using the network tab we can see what Third party requests have been made with our system when we visit any Specific Webpage. As in our case we used a GFG web page so you can also see about all third party requests which were made by our browser backend when we visited the GFG Web page. 2. Headers:HTTP Request Response Headers play important roles. By Using the network tab option we can see headers of our visiting web page. For Understanding in better way let’s see following Example-Step 1: Open the geekforgeek.org in google chrome and click right to your mouse and select inspect element and open the console screen
Step 2: Headers option basically used for finding out headers information like what is Request URL, and what Request method is used and also status code. There may be other information also based on which type of webpage we are visiting. In our case we used GFG Web page so you can see both the data Request and Response along with Header information of our request. 3. Blocked requests:Network tab in chrome provides an option to block any request which is being used by our browsers. Lets see Example is there any blocked request in our browser or not . Step 1: open the geekforgeek.org in google chrome and click right to your mouse and select inspect element and open the console screen
Step 2: In our case there are no blocked requests. We can list out all the requests which are blocked using this option.
|
-(1).png)
-(1).png)
.png)
.png)
.png)
.png) 4. Filter:
4. Filter:.png) 5. Preview:
5. Preview: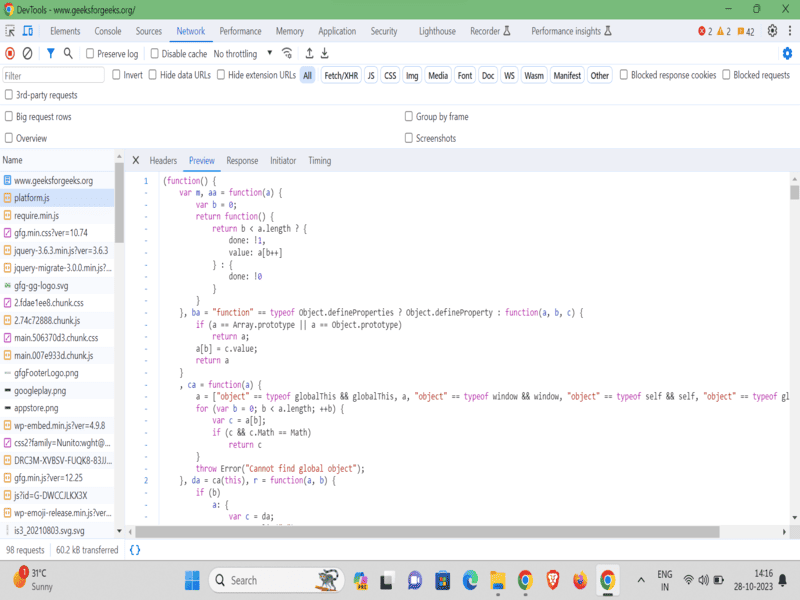
Reffered: https://www.geeksforgeeks.org
| Web Browsers |
Type: | Geek |
Category: | Coding |
Sub Category: | Tutorial |
Uploaded by: | Admin |
Views: | 12 |