.png)
|
|
Azure CLI is a very powerful tool that can be used to automate tasks, create, update, manage or delete azure resources or to troubleshoot problems with az module cmdlets. By installing az modules on your system or on your development system you and your development team can easily create, update or manage Azure AD and Azure resources such as management groups, subscriptions, resource groups, virtual machines, virtual networks, storage accounts, web apps or any other Azure native services directly from the command line interface. If you are looking for a powerful and easy-to-use way to manage Azure resources, then you must definitely learn and make use of this Azure CLI command line tool to simplify the management across Azure services. Requirements
Steps for Installing Azure CLIStep 1: To install the Azure Command Line Interface (Azure CLI) we have to open Windows PowerShell from your system and select Run as Administrator. To Know the commands in Azure CLI to maintain the VMS refer to the Microsoft Azure – Azure CLI Commands to Manage Azure VMs.
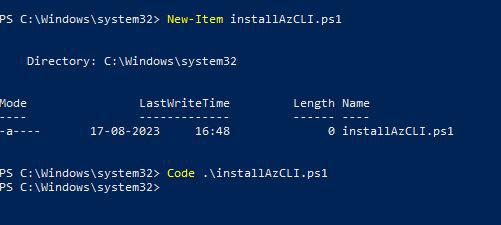
Step 2: Now, we have to create a new PowerShell file to do that use the cmdlet New-Item <file name>.ps1 Syntax:
Example: New-Item installAzCLI.ps1
Step 3: Once you are done creating a new PowerShell file. Use the code cmdlet to add the script into the file. Check syntax and example. Syntax:
Example: Code .\installAzCLI.ps1
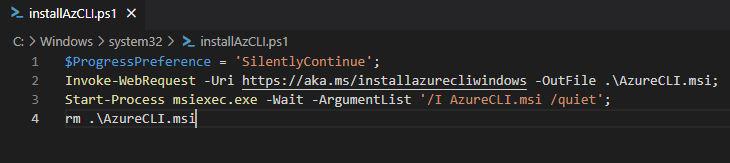
Step 4: Now in the editor copy and paste the below following code to your PowerShell file <file name>.ps1 and use CTRL+S to save the changes. $ProgressPreference = 'SilentlyContinue';
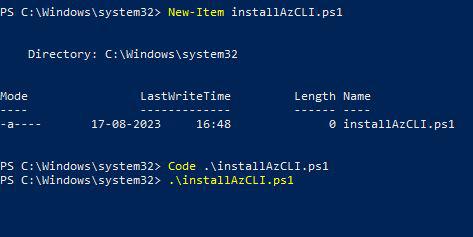
Step 5: In step 4 we have saved the Azure CLI installation script. Now, to execute or run the PowerShell script use the following syntax structure .\<file name>.ps1 Syntax:
Example: .\installAzCLI.ps1
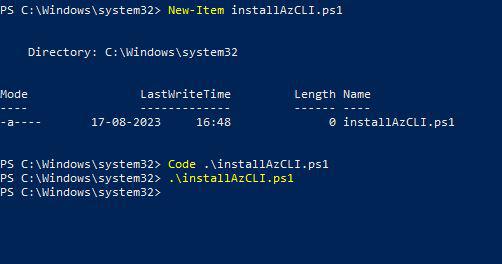
Wait until the installation is complete. (It might take 2-3 minutes to install az cli modules)
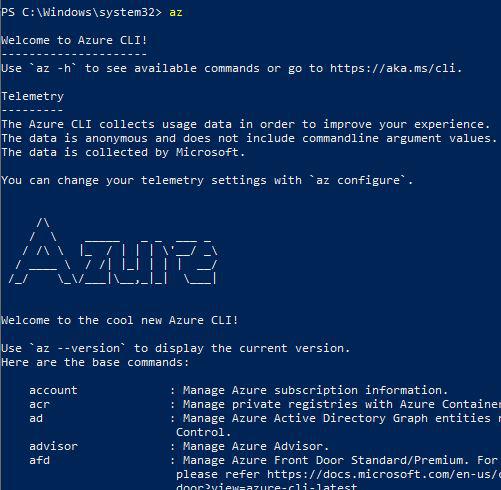
Verify Azure CLI InstallationOnce the installation is complete, you can verify the installation was successful or not by by just typing the command az or az -h: az This az command will list the available Azure CLI commands. az -h This will also list the available Azure CLI commands. Check out the sample output for better understanding. Sample Output:
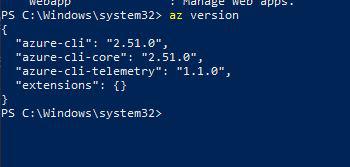
If you wish to check the Azure CLI then you may check the version of Az CLI on your system by running this below command: az version This will list the versions of azure cli, azure cli core, azure cli telemetry and extensions version if any. Sample Output:
To build your own CLI extension refer to Microsoft Azure – Building Your Own Azure CLI Extensions. Clean Up or Uninstall Azure CLI from your Environment:On your Desktop Click on Windows Start button > Go to Settings > select Apps >> select Apps & Features >> Search for Azure CLI >> Select Azure CLI service >> Click on Uninstall to continue the removal of Azure CLI. Removal will take around 5-10 minutes. Wait until it’s done and verify the removal of Azure CLI.
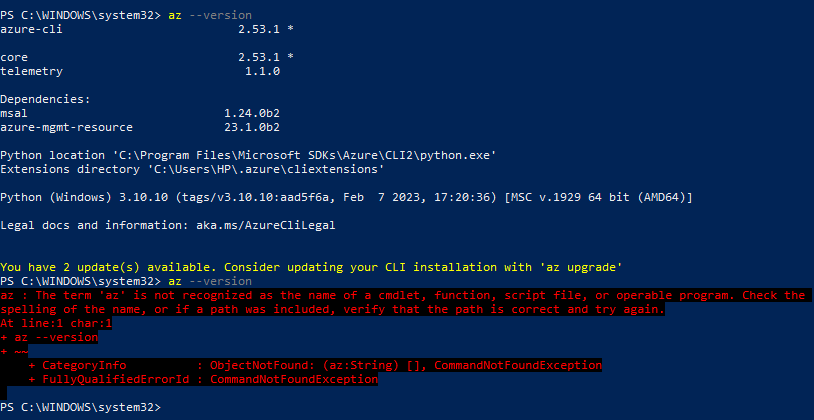
Verify Uninstallation of Azure CLIOpen Azure PowerShell or Command Prompt and type “az –version.” If you are not getting any preview of Azure CLI, then you have successfully removed Azure CLI from your environment. Sample Output before and after the removal of Azure CLI:
FAQs On Azure Command Line Interface (Azure CLI)1. In What Ways Can We Use Azure CLI?
2. Can We Deploy Azure Resources Using Azure CLI?
3.Does Azure CLI As Azure PowerShell?
|


Reffered: https://www.geeksforgeeks.org
| Geeks Premier League |
Type: | Geek |
Category: | Coding |
Sub Category: | Tutorial |
Uploaded by: | Admin |
Views: | 16 |