|
|
Discord offers various settings and features that enable server administrators to maintain privacy and manage member access effectively. Creating a private Discord server is an excellent way to ensure a secure and exclusive environment for communication. Having a private server can provide the necessary control over who can join and participate in discussions. In this article, we’ll guide you through the steps to transform your Discord server into a private hub, including configuring server settings, setting up invite-only access, and implementing role-based permissions.
How to Make a Discord Server Private on a DesktopStep 1: Open the Discord App or Web AppTo launch the Discord application on your desktop, locate the Discord icon and give it a click, or simply access Discord directly through any web browser on your desktop. 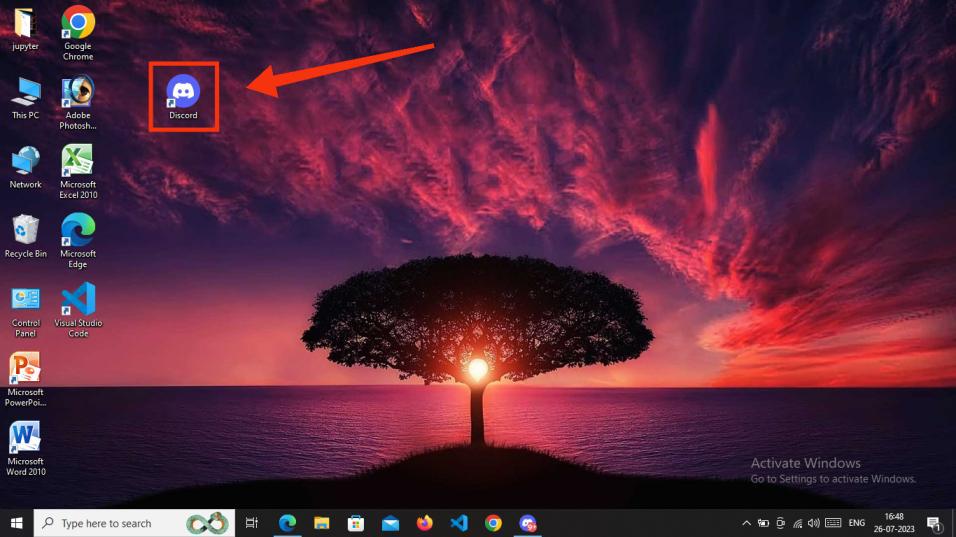 Click on Discord Icon to open App Step 2: Select a Server and Open Server SettingsNow “Select a Server” and right click on it open the server menu and then click “Server Settings”. 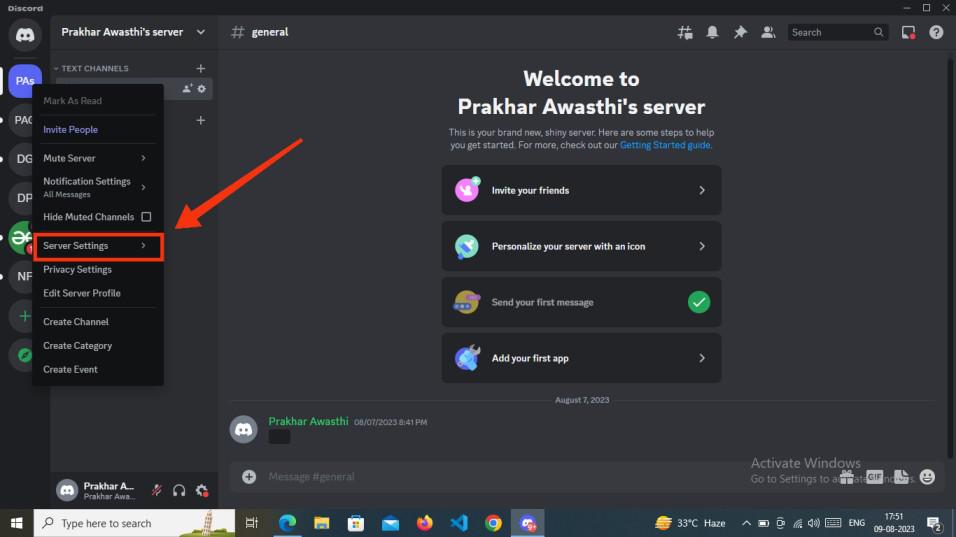 Select a Server > Open Server Settings Step 3: Select Roles and Select Default PermissionsNow select “Roles” and then click “Default Permissions”. 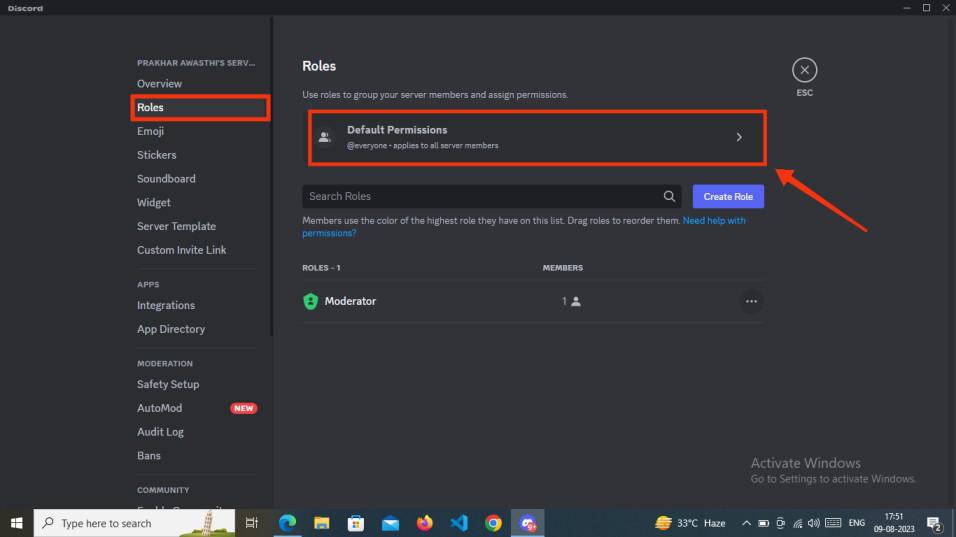 Select Roles > Select Everyone > Click on Default Permissions Step 4: Select @everyone and Disable all PermissionsNow when you click the default permissions, you could have multiple roles created, now select “@everyone” and disable all the permissions and click “save changes”. 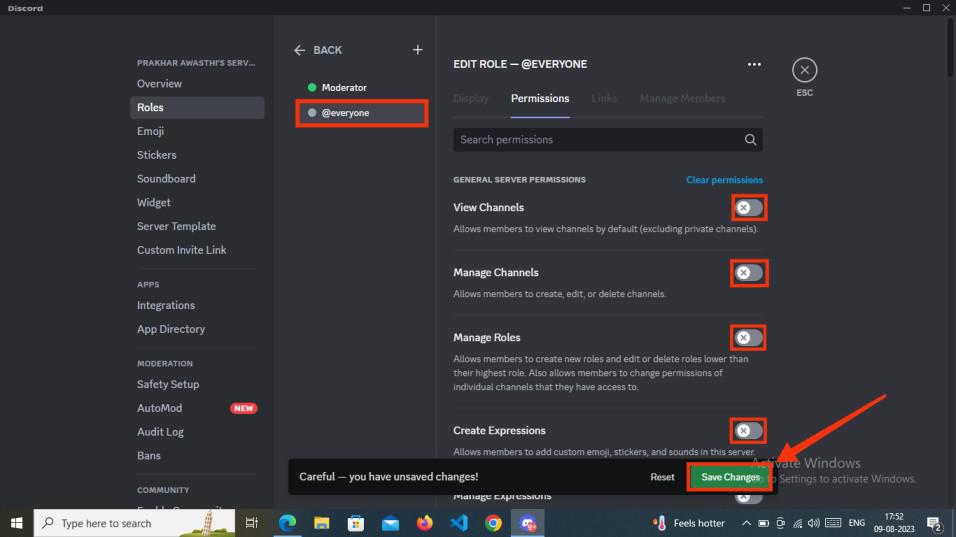 Select @everyone > Disable all Permissions > Click Save Changes How to Make a Discord Server Private on MobileStep 1: Open Discord Mobile AppLaunch Discord Appplication on your Mobile phone. -660.jpg) Open Discord App Step 2: Select a Server and Click on Three DotsNow select a “Server” which you want to make private and then click on the three dots to open the “server menu”. 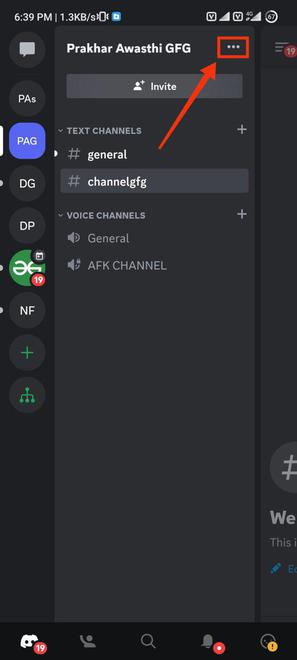 Select a Server & Open Server Settings Step 3: Select SettingsNow select “Server settings” to make changes in your server. -660.jpg) Select Server Settings Step 4: Navigate to User Management and Select RolesNow Scroll down to “User Management” and Select “Roles” Options from the menu. 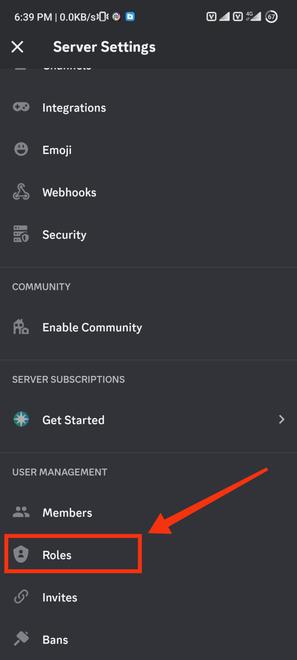 Select the “Roles” tab Step 5: Select “@everyone” roleFrom the Server Roles select @everyone to change default permissions for all server members. 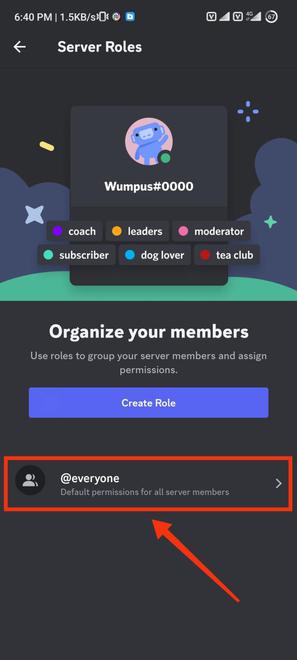 Server Roles > Select @everyone Step 6: Disable All the PermissionsDeactivate all permissions associated with the “@everyone” role. This action ensures that no member has the ability to edit or modify any aspect of the server. Once you have disabled all these permissions, finalize your changes by clicking the “Save” button. 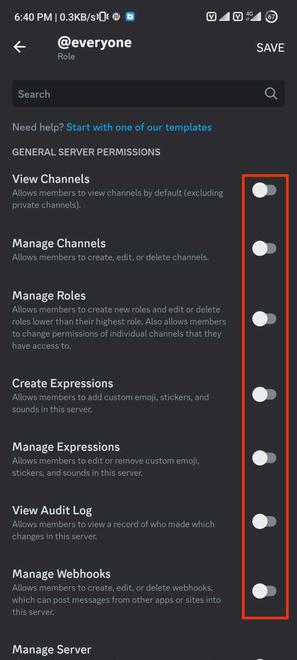 Disable all the Permissions ConclusionCreating a private Discord server goes beyond access control, increases belonging and trust. Customizing roles, permissions, and channels empowers admins to align the server with its purpose. This guide summarizes making a server private by adjusting settings and disabling “@everyone” permissions. The process involves simple steps for a cohesive and dedicated community. Crafting a private server is about valuing members, customization, and secure spaces, reflecting Discord’s principles and nurturing a thriving digital community. How to Make a Discord Server Private – FAQsHow do I make my whole Discord server private?
How do I change my Discord server from community to private?
How do I stop people from joining a Discord server?
|
Reffered: https://www.geeksforgeeks.org
| News |
Type: | Geek |
Category: | Coding |
Sub Category: | Tutorial |
Uploaded by: | Admin |
Views: | 15 |