
|
|
Are you looking for how to disable the keyboard in your Windows 10 laptop? Then you are at the right place. Here, we have covered 3 different methods to temporarily or permanently disabled the laptop’s keyboard. 
Methods To Disable The Keyboards In Windows 10Method 1: Disable the Keyboard in Windows 10 Using System PropertiesStep 1: Open the command prompt. Follow the below-mentioned command. After that click on OK to proceed. sysdm.cpl 
Step 2: Click on the Hardware Tab. After that, click on the Device Installation Settings option to open some more options to disable the keyboard. 
Step 3: Click on the No option. Post that, click on the Save Changes option to complete the process. 
Step 4: Now open the Device Manager. An option for the Keyboard will be displayed there. Expand that particular section to get some more options. After getting the Standard option, Right-Click there to get some more options. Later, click on the Uninstall Driver option to disable the keyboard. 
Hence, we have successfully disabled the keyboard using the System Properties. Method 2: Disable the Keyboard in Windows 10 Using Group Policy EditorStep 1: At first, open the Run command prompt in the machine. Execute the following command in that window. After writing the command, click on the Ok button. gpedit.msc 
Step 2: Expand the Administrative Template option. Post that, expand the System option to get some more options to move ahead. 
Step 3: Under the system option, expand the Device Installation. Under the Device Installation, click on the Device Installation Restriction option. 
Step 4: On the right-hand side of the window, some restrictions will be visible, click on the last most restricted option to get some more options to work on there. 
Step 5: A new window will open, click on the Enable option to change the settings. After that, click on the Ok option & close the opened window. 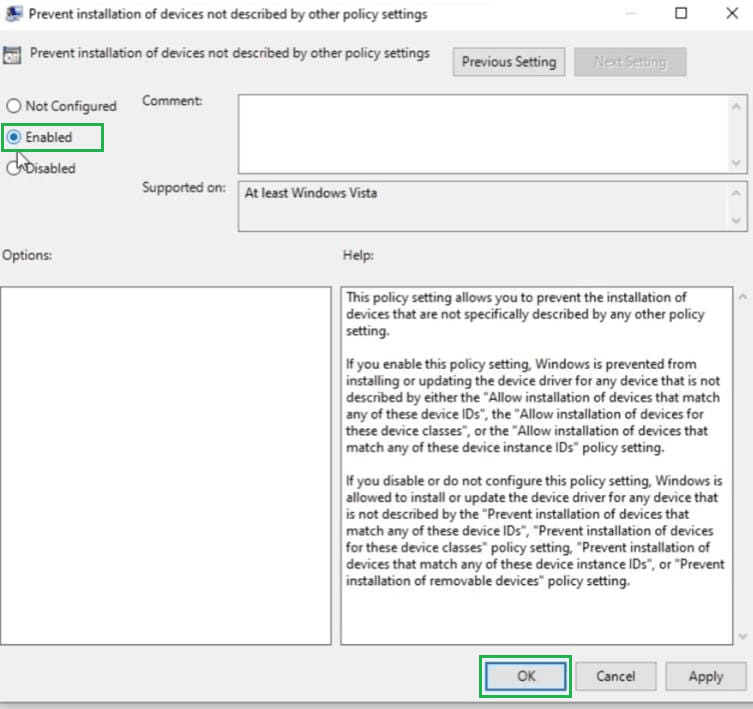
Step 6: After that, open the Device Manager. Option for a Keyboard will be displayed there. Simply expand the option to get some more options. After getting the Standard option, Right-Click there to get some more options. Then click on the Uninstall Driver option to disable the keyboard. 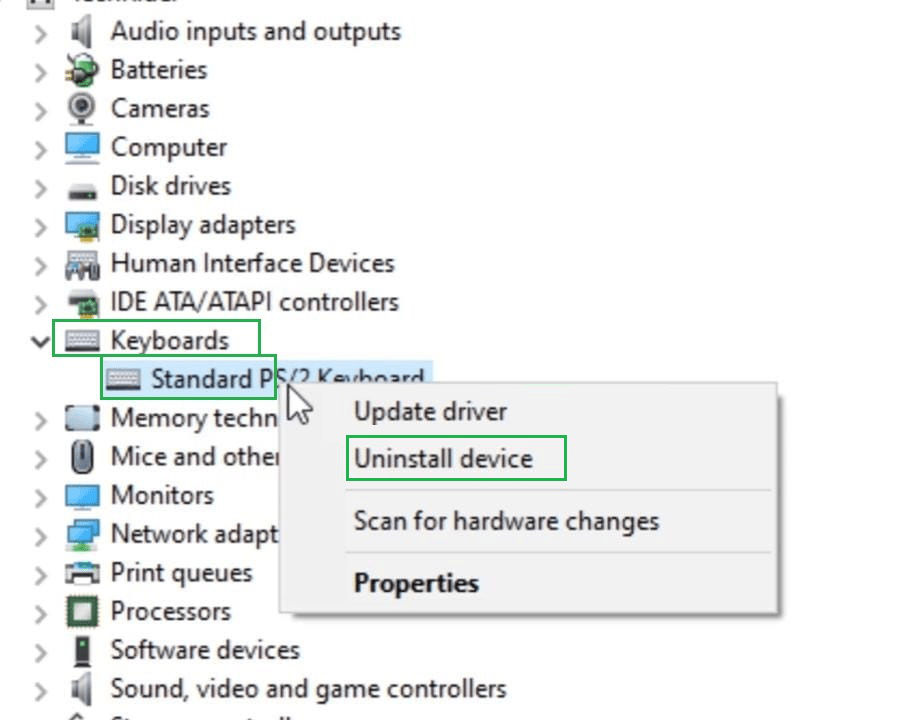
Hence, we have successfully disabled the keyboard using the Group Policy Editor. Method 3: Disable the Keyboard in Windows 10 Using Device ManagerStep 1: Open the Device Manager on the machine. A Keyboard option will be displayed there. Expand the option to get some more options. After getting the Standard option, Right-Click there to get some more options. Then click on the Update Driver option to move ahead. 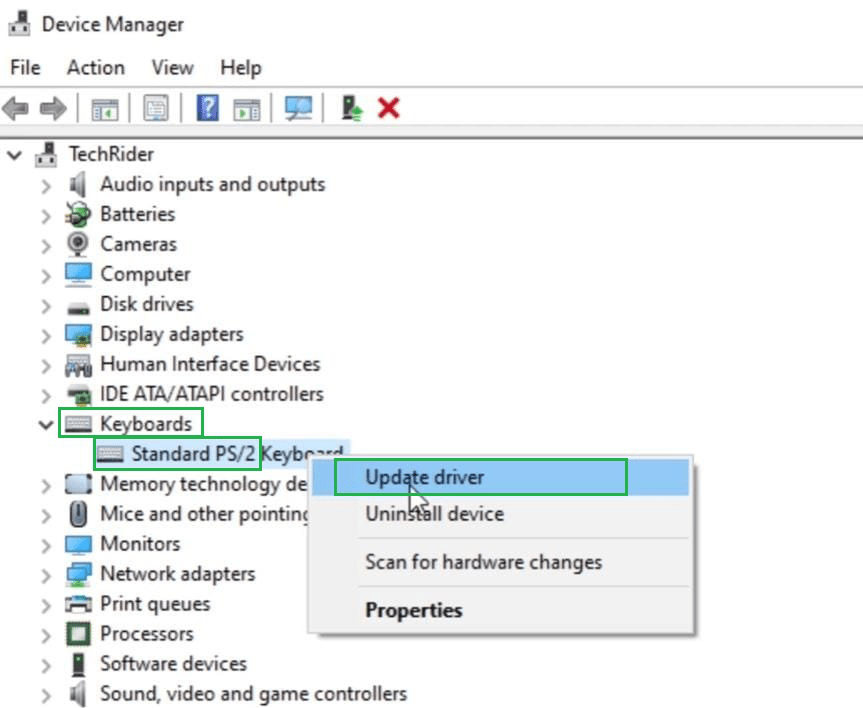
Step 2: Then a new window will open, click on the Second option to browse different other drivers present in that machine. 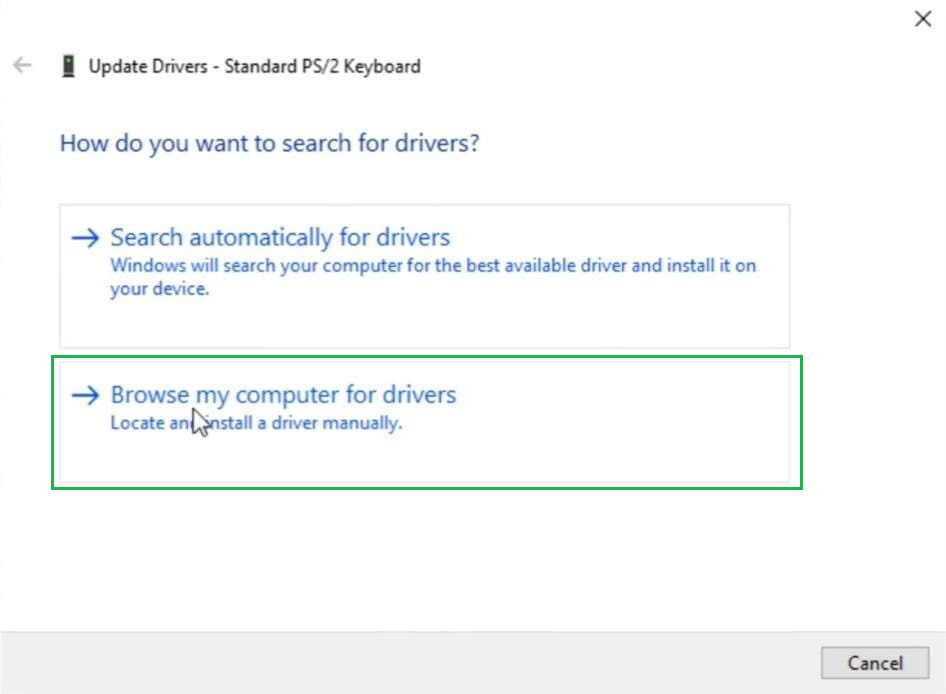
Step 3: Click on the option to pick up the drivers on their own. It will bring a new window where different drivers will be present. Click on that to initiate the process. 
Step 4: Remove the Checkbox present there. Now, click on any Manufacturer name & then need to select the model name that appears there. After that, Click on Next. 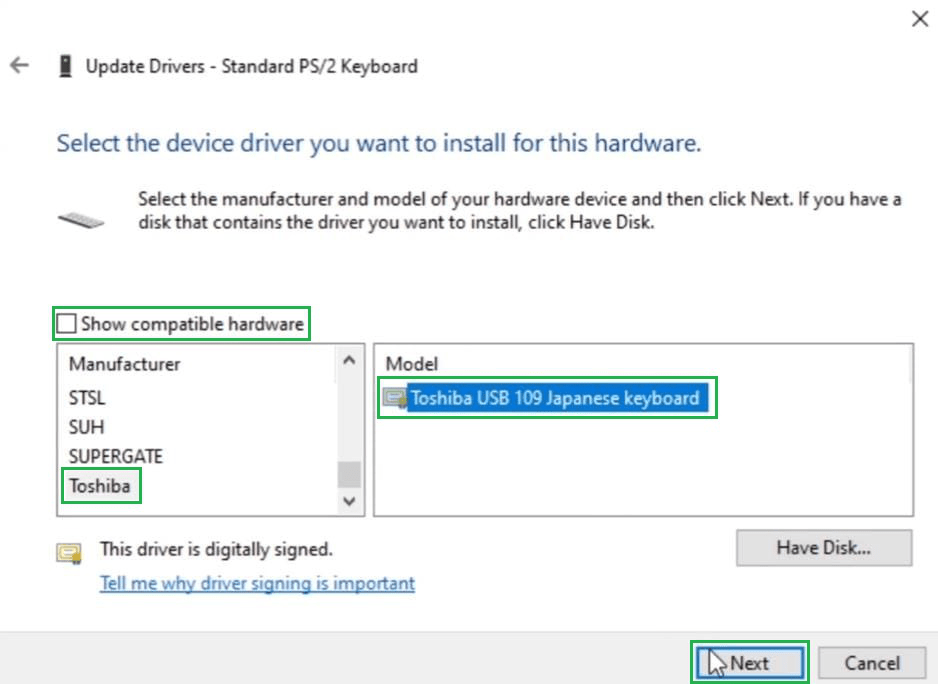
Step 5: After that, a new window will open showing that the Driver is now Updated. Now, check the inbuilt keyboard of the laptop. It will be disabled now. 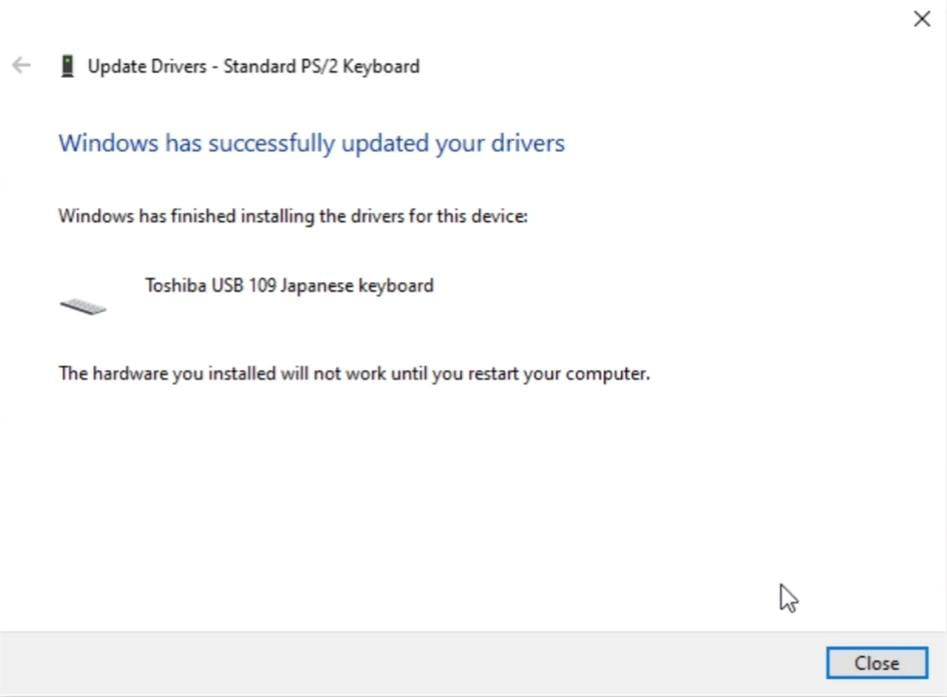
Hence, we have successfully disabled the keyboard using the Device Manager. |
Reffered: https://www.geeksforgeeks.org
| TechTips |
Type: | Geek |
Category: | Coding |
Sub Category: | Tutorial |
Uploaded by: | Admin |
Views: | 11 |