|
|
In Next.js, the create next app command is used to automatically initialize a new NextJS project with the default configuration, providing a streamlined way to build applications efficiently and quickly. System Requirements:
Getting started with Create Next AppLet’s see the installation process: Step 1: Installation and SetupInstallation of next.js require npm and node.js. You can install node.js from here. Confirm the installation by running these commands on the terminal. node -v
npm -vStep 2: create-next-appThe easiest way to get started with Next.js is by using create-next-app. With CLI(command line) tool you can quickly start building a new Next.js application. Just like React Js go to the command line and type npx/npm create next-app which will start installing a new Next Js application on your PC with everything set up for you. To get started, use the following command: npx create-next-app@latest
# Create Next App can be installed via yarn:
yarn create next-app
# Create Next App can be installed via npm:
npm create next-appStep 3: Create TypeScript ProjectYou can create a TypeScript project with the –ts (–typescript flag): npx create-next-app@latest --ts
# or
yarn create next-app --typescript
# or
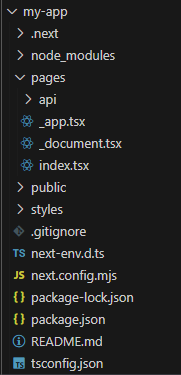
pnpm create next-app --tsStep 4: Configure Projectchoose options based on your requirement √ What is your project named? ... my-app Project Structure: Project Structure NEXT App The dependencies for nextjs project in the package.json file are: "dependencies": { Example: This example demonstrate a next js demo app created using the create-next-app command. Steps to run the application: Write the below code in the terminal to run the application: npm run dev
# OR
yarn devOutput:  browser window Now, you can make changes at pages/index.js and see the updated result in your browser/localhost. And now you are ready to start using Next Js for building an interactive website. |
Reffered: https://www.geeksforgeeks.org
| JavaScript |
Type: | Geek |
Category: | Coding |
Sub Category: | Tutorial |
Uploaded by: | Admin |
Views: | 13 |