|
|
When we encounter the Failed to Load Application Context error while running JUnit tests for a Spring Controller, it usually means that the Spring application context could not be created due to configuration issues or missing components. Here are some common steps to troubleshoot and resolve the issue. This article will explain how to solve the Failed to Load Application Context for the JUnit Test of Spring Controller with related examples. Troubleshooting ApproachesBelow we have provided the common Troubleshooting Approaches for Failing to Load ApplicationContext for JUnit Test of Spring Controller. 1. Ensure Proper Annotations:Make sure your test class is annotated correctly to load the Spring context. For a Spring Boot Application, you should use like below. @RunWith(SpringRunner.class)
@SpringBootTest
public class YourControllerTest {
// Test methods
}For non-Spring Boot applications, you might need, @RunWith(SpringJUnit4ClassRunner.class)
@ContextConfiguration(classes = YourConfigurationClass.class)
public class YourControllerTest {
// Test methods
}2. Check Configuration Classes:Ensure that the Configuration classes specified in @ContextConfiguration or @SpringBootTest can be found and loaded by Spring framework. These classes should annotated with @Configuration and properly define beans required for your tests. 3. Component Scanning:Ensure that our components are being scanned correctly. This can be done by specifying the package in our configuration class. @Configuration
@ComponentScan(basePackages = "com.your.package")
public class TestConfig {
}4. Mock Beans:If your controller relies on services or repositories, consider mocking these dependencies in your class using @MockBean. @RunWith(SpringRunner.class)
@SpringBootTest
public class YourControllerTest {
@MockBean
private YourService yourService;
// Test methods
}5. Check for Missing Dependencies:Ensure that all dependencies required for the Spring context are included in our build.gradle. For example dependencies {
testImplementation 'org.springframework.boot:spring-boot-starter-test'
testImplementation 'org.mockito:mockito-core'
// Other dependencies
}6. Gradle Configuration:Make sure your Gradle build file is properly configured. Here’s a typical setup for a Spring Boot project plugins {
id 'org.springframework.boot' version '2.5.4'
id 'io.spring.dependency-management' version '1.0.11.RELEASE'
id 'java'
}
group = 'com.example'
version = '0.0.1-SNAPSHOT'
sourceCompatibility = '11'
repositories {
mavenCentral()
}
dependencies {
implementation 'org.springframework.boot:spring-boot-starter-web'
testImplementation 'org.springframework.boot:spring-boot-starter-test'
}
test {
useJUnitPlatform()
}Prerequisites:
Tools and Technologies:
ExampleHere, we created a sample Spring Boot Application by using Spring Initializr by using Spring Tool Suite with required dependencies. Below we provide those dependencies for your reference. Step 1: Creating ProjectFirst, We created a sample spring boot application with required gradle dependencies. dependencies {
implementation 'org.springframework.boot:spring-boot-starter-web'
compileOnly 'org.projectlombok:lombok'
developmentOnly 'org.springframework.boot:spring-boot-devtools'
annotationProcessor 'org.projectlombok:lombok'
testImplementation 'org.springframework.boot:spring-boot-starter-test'
testRuntimeOnly 'org.junit.platform:junit-platform-launcher'
}
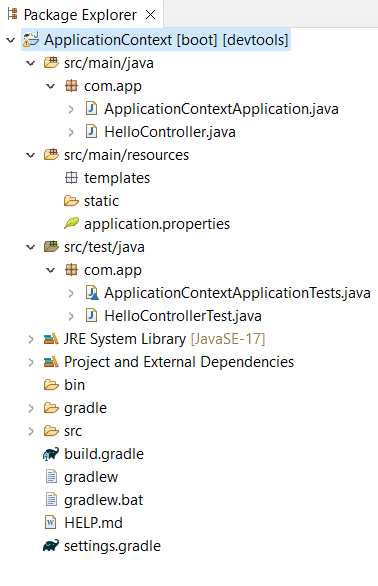
Project Folder Structure:Step 2: Create Rest ControllerOnce project is created successfully, now we create a RestController class in the main package of the Spring Project. In this controller, we define a method is mapping with @GetMapping annotation. Step 3: Testing LogicNow, we created a test class in the Spring Test folder. We can see this in the above project folder image. Here, we created a test class with name HelloControllerTest. In this class, we autowired the MockMvc. This class test can be used to test the HelloController class APIs.
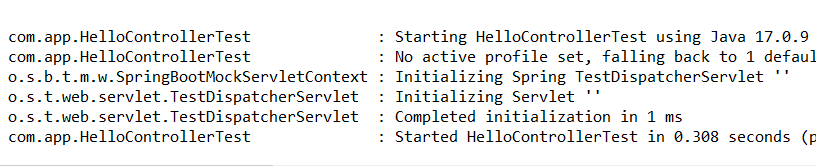
Step 4: Running ApplicationNow run the Spring Project as Spring Boot App. By default this project runs on 8080 port number with Tomcat Server. 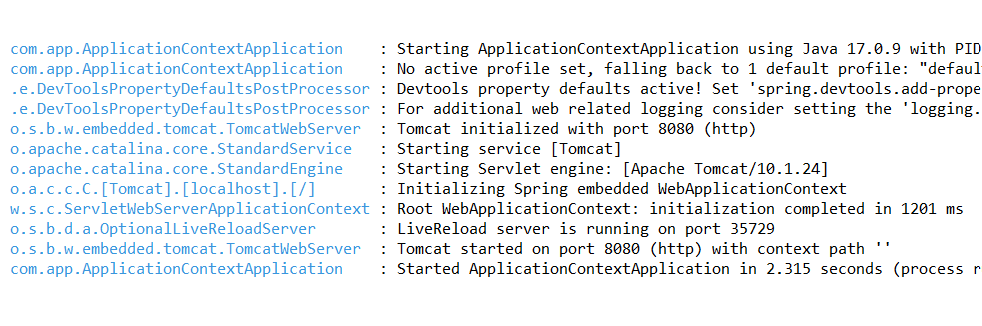 Step 5: API TestingNow, we will test the Hello API using Postman tool. Here, the Hello API is GET request type. http://localhost:8080/helloOutput: Step 6: Test Case OutputNow, run this project as JUnit Test. Output: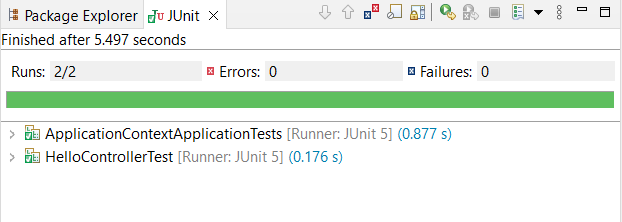
 Additional Tips:
Common Issues and Solutions:
|
Reffered: https://www.geeksforgeeks.org
| Advance Java |
Type: | Geek |
Category: | Coding |
Sub Category: | Tutorial |
Uploaded by: | Admin |
Views: | 17 |