|
|
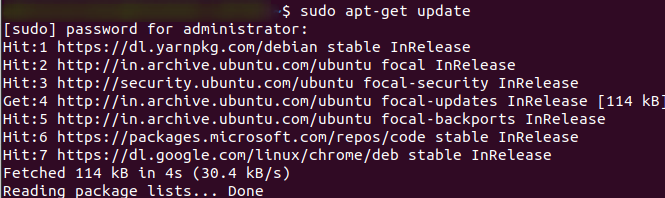
NVM (Node Version Manager) is a handy tool for managing multiple versions of Node.js on your system. With NVM, you can easily install, switch between, and manage different Node.js versions for your development projects. This guide will walk you through the step-by-step process of installing NVM on Ubuntu 22.04, covering each aspect in detail with examples and explanations. Step 1: Update Package RepositoryBefore installing NVM, it’s essential to ensure that your system’s package repository is up-to-date. Open a terminal window by pressing Ctrl + Alt + T and execute the following command: sudo apt-get update
Updating package repository Enter your password when prompted, and wait for the process to complete. This command updates the local package index to reflect the latest changes in the repository. Step 2: Install PrerequisitesNVM requires some dependencies to be installed on your system before you can proceed with the installation. Run the following command in the terminal to install these prerequisites: sudo apt install curl
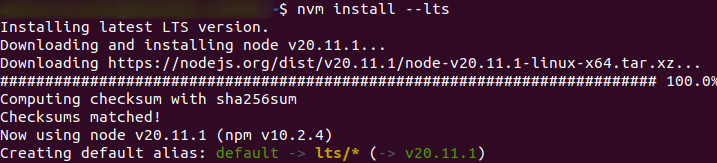
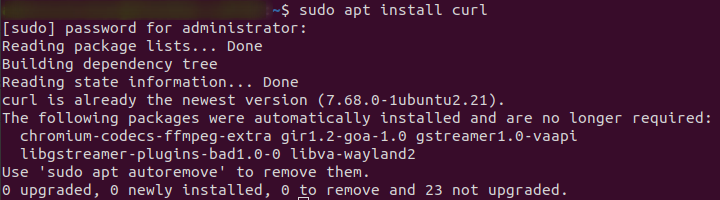 installing curl in ubuntu This command installs the curl package, which is necessary for downloading NVM and other resources. Step 3: Download and Install NVM on UbuntuOnce the prerequisites are installed, you can proceed to download and install NVM. Run the following curl command in the terminal: curl -o- https://raw.githubusercontent.com/nvm-sh/nvm/v0.39.1/install.sh | bash 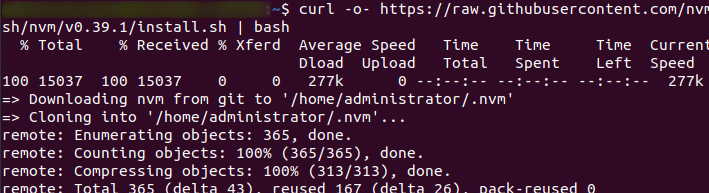 installing nvm on ubuntu This command downloads the NVM installation script from the official GitHub repository and pipes it to the bash shell for execution. Make sure to replace v0.39.1 with the latest version available at the time of installation. After the installation script completes, you may need to close and reopen your terminal window or run source ~/.bashrc to apply the changes to your current shell session. Step 4: Verify NVM Installation on UbuntuTo verify that NVM has been successfully installed on your system, you can use the following command: nvm --version Verify nvm installation If NVM has been installed correctly, this command will display the installed version of NVM. Step 5: Install Node.js Using NVMNow that NVM is installed, you can use it to install specific versions of Node.js. For example, to install the latest LTS (Long-Term Support) version of Node.js, you can run the following command: nvm install --lts
 installing node.js using nvm in Ubuntu This command will download and install the latest LTS version of Node.js available. Step 6: Switch Between Node.js VersionsOne of the key features of NVM is the ability to switch between different Node.js versions with ease. To list all installed Node.js versions on your system, you can use the following command: nvm ls
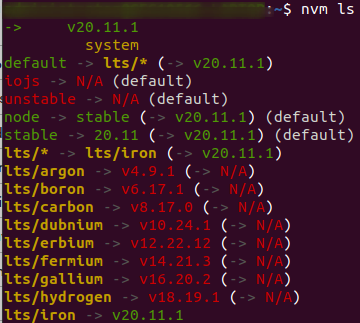 listing node.js version in Ubuntu This command will display a list of installed Node.js versions, indicating which version is currently active. To switch to a specific Node.js version, you can use the following command: nvm use <version>
Replace <version> with the desired Node.js version, such as 14.17.0 or lts. How to Install NVM on Ubuntu 22.04 – FAQWhat is NVM, and why should I use it?
How do I install NVM on Ubuntu 22.04?
Can I install NVM alongside my existing Node.js installation?
How do I use NVM to install a specific version of Node.js?
Is it possible to uninstall NVM and remove all Node.js versions installed with it?
ConclusionInstalling NVM on Ubuntu 22.04 allows you to easily manage multiple versions of Node.js on your system, providing flexibility and convenience for your development projects. By following the steps outlined in this guide, you should be able to install NVM, verify the installation, install Node.js versions, and switch between them effortlessly. NVM simplifies the process of managing Node.js versions and ensures compatibility with your projects’ requirements. |
Reffered: https://www.geeksforgeeks.org
| Linux Unix |
Type: | Geek |
Category: | Coding |
Sub Category: | Tutorial |
Uploaded by: | Admin |
Views: | 13 |