|
|
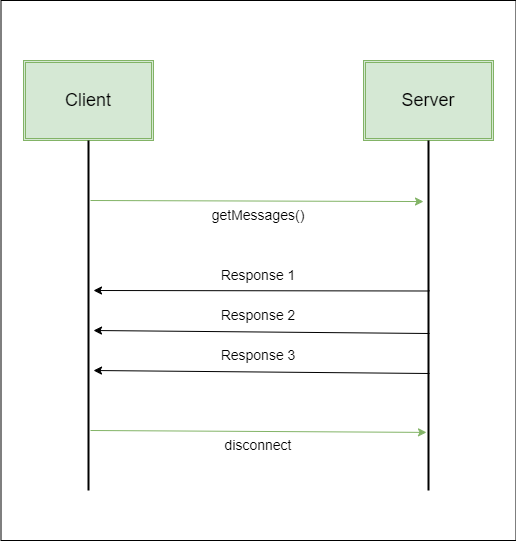
When we design web applications, we generally have a client and a server model, where the client is always the initiator of the transaction or a request to the server. The server responds to these requests. However, in certain scenarios, there arises a need for the server to respond much more frequently or give additional information to the client. This requirement leads us to techniques such as long polling, WebSockets, and Server-Sent Events (SSE). In this article, we are going to look at Server-Sent Events (SSE) using Spring Boot and how we can implement them. Server-Sent Events (SSE)It is not a new technique. However, it is a technique when we want to have a unidirectional flow of data. Let’s consider a scenario where we have a client-server architecture. The client initiates a request to the server, e.g., fetching messages with a function called getMessages(). The server responds with various messages over time within that particular stream. So, we are creating a channel from the client to the server, and the server responds within that particular channel. Once the client has received all the data it needs, it can close the connection.
Use Cases Server-Sent Events
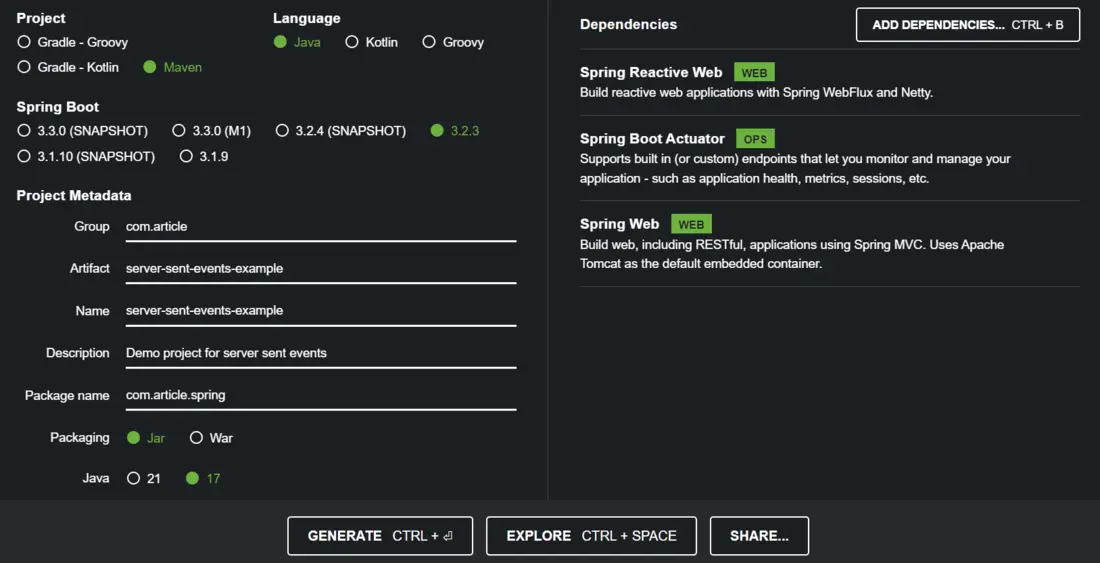
Implementation of Server-Sent Events Using Spring BootBelow is the step-by-step implementation of Server-Sent Events in Spring. Step 1: Setting up a Spring Boot Project in Spring InitializerGo to this link and create a Spring Boot project by pre-filling some information such as:
Step 2: Adding Dependencies in pom.xmlAll dependencies are specified in pom.xml file. XML
Step 3: Creating a Server-Sent Events ControllerHere is the ServerEventsController class. Java
The ServerEventsController is responsible for handling HTTP requests related to Server-Sent Events (SSE). It reads lines from a file and converts them into SSEs.
Step 4: Run the Application.To run the Spring Boot application, simply run this ServerSentEventsExampleApplication class . Java
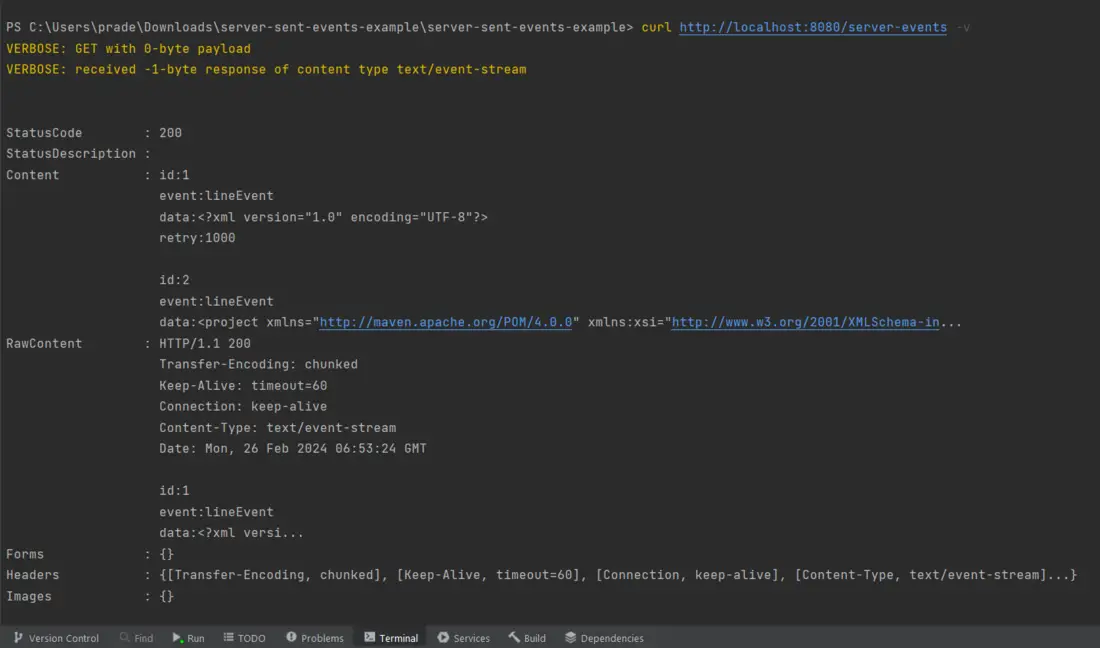
Output Using CURL:In the terminal execute the following command, curl http://localhost:8080/server-events -v After executing the above command, we will see the below output in terminal.
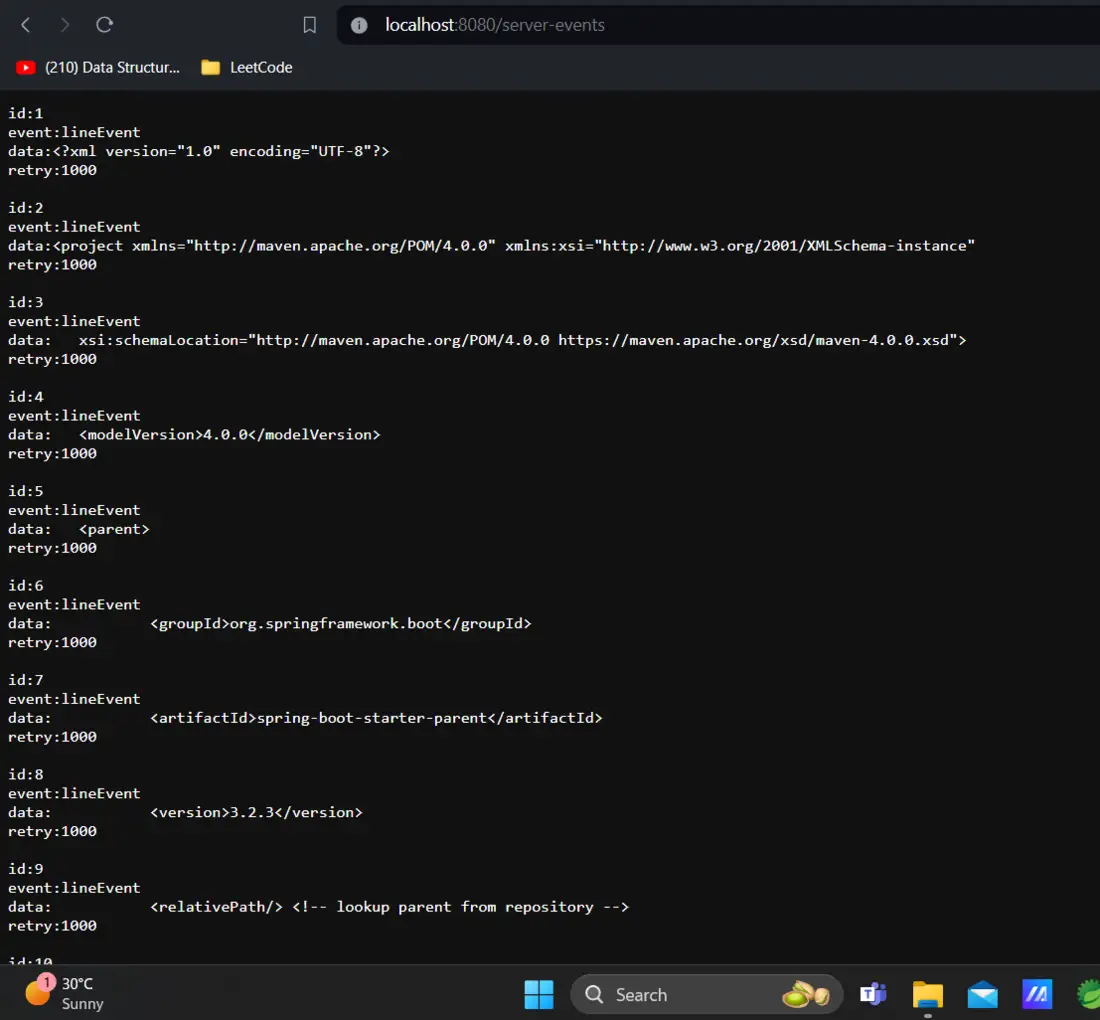
Output Using Browser:To see the Server-Sent Events in action, open browser and go to the following URL: http://localhost:8080/server-events After hitting the above link in browser, we will get the below output.
|
Reffered: https://www.geeksforgeeks.org
| Advance Java |
Type: | Geek |
Category: | Coding |
Sub Category: | Tutorial |
Uploaded by: | Admin |
Views: | 14 |