
|
|
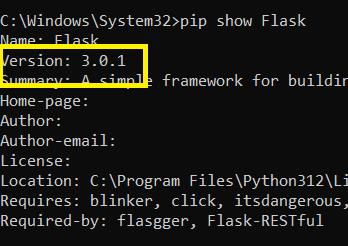
Flask, a popular web framework for Python, evolves with new features, bug fixes, and improvements. Keeping your Flask installation up-to-date ensures that you can leverage the latest enhancements and security patches. In this guide, we’ll walk through the process of updating Flask using pip, the package installer for Python. Update Flask Using Pip in WindowsBelow are the step-by-step implementations of How To Update Flask Using Pip in Python: Step 1: Check the Current Flask VersionTo determine if an update is necessary, check your current Flask version. Open a terminal or command prompt and run the following command: pip show flask
This command will display information about the installed Flask package, including the version number.
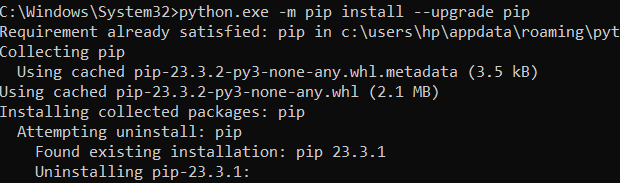
Step 2: Update PIPBefore updating Flask, it’s a good idea to ensure that your pip tool is up-to-date. Run the following command to upgrade pip to the latest version: pip install --upgrade pip
This ensures you have the latest version of the package manager.
Step 3: Update Flask Using PipNow, you’re ready to update Flask itself. Use the following command to upgrade Flask to the latest version: pip install --upgrade Flask
This command fetches and installs the latest version of Flask from the Python Package Index .
Step 4: Verify the Update FlaskAfter the installation is complete, verify that Flask has been updated successfully by checking the version again: pip show flask
Compare the displayed version with the one you noted earlier. If the version number has changed, congratulations! You have successfully updated Flask. |

Reffered: https://www.geeksforgeeks.org
| Python |
| Related |
|---|
| |
| |
 Python Program to Check if given year is Leap Year
 |
| |
| |
Type: | Geek |
Category: | Coding |
Sub Category: | Tutorial |
Uploaded by: | Admin |
Views: | 12 |