
|
|
Laravel is a famous PHP framework, and it uses Composer to handle packages. Adding packages to the Laravel project is something you often do, but sometimes you need to remove them to keep your project organized. In this article, you will learn the step-by-step process to remove a package from Laravel using PHP Composer. Table of Content Method 1: Using Composer Remove CommandThe simplest way to remove a package is by using the Composer remove command. It handles everything for you – removing the package and updating your files. Syntax: composer remove vendor/package-name
Example: Here’s the example of to removing the package. Step 1: Find the package you want to remove. Target Package want to remove Step 2: Open your terminal Step 3: Run the Follows commands composer remove intervention/image
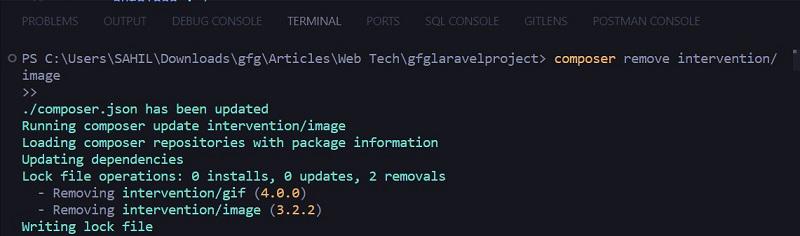 package Removed successfully This command will uninstall the package and update your composer.json file. Method 2: Editing the composer.json File ManuallyFor those who like a hands-on approach, you can edit the composer.json file directly. But be careful, this is for those comfortable with manual changes. Steps to Remove: Step 1: Open the composer.json file in your text editor. Step 2: Locate the “require” section, and remove the line related to the debug bar package. For example: Example: "require": { Remove the line “laravel/sanctum”: “^3.5”, to uninstall the package. Step 3: Save the changes. Verify Removal: After removing the package, you may want to clear the Composer cache: composer clear-cache
Verify that the package has been removed by checking the vendor directory: ls vendor/laravel/sanctum
If the package has been successfully removed, the directory should not exist. Removing a package from Laravel using PHP Composer is easy. Whether you prefer the Composer command or manual editing, both methods get the job done. Choose what suits you best to keep your Laravel application clean and efficient. |
Reffered: https://www.geeksforgeeks.org
| Geeks Premier League |
Type: | Geek |
Category: | Coding |
Sub Category: | Tutorial |
Uploaded by: | Admin |
Views: | 12 |