
|
A graphics processing unit, also known as a GPU plays a role, in computers by handling tasks such as displaying the desktop decoding videos and playing games. It is crucial for improving computer performance troubleshooting any issues related to speed or efficiency and ensuring that the latest games can be smoothly played. Having an understanding of the graphics card specifications is important, for individuals working with graphics programs or playing high graphics games. In this article, we will discuss how to check what graphics card is in Windows 11 PC. Table of Content What is a Graphics Card (GPU)?A graphics card, also known as a GPU is a processor that is specifically designed to handle the calculations required for rendering images and videos. Its main responsibility revolves around real-time rendering of images, animations and videos. These cards are intended to help the PC run quicker and more proficiently than it would without them. Know more about graphics cards here Understanding Graphics Card SpecsBefore we delve into the techniques, for checking your GPU let’s first grasp the specifications of a graphics card. The crucial specifications include;
Method 1: Check your PC’s GPU Using Task ManagerThe Windows Task Manager is a tool included in the operating system that allows you to conveniently access information, about your GPU and monitor its usage. To check your GPU using the Task Manager follow these steps: Step 1: Press Ctrl+Shift+Esc to open the task manager. Step 2: In UAC click on the “YES” button Step 3: In the Task Manager window, go to the “Performance” tab. Step 4: Click on “GPU” in the right side pane to view GPU details
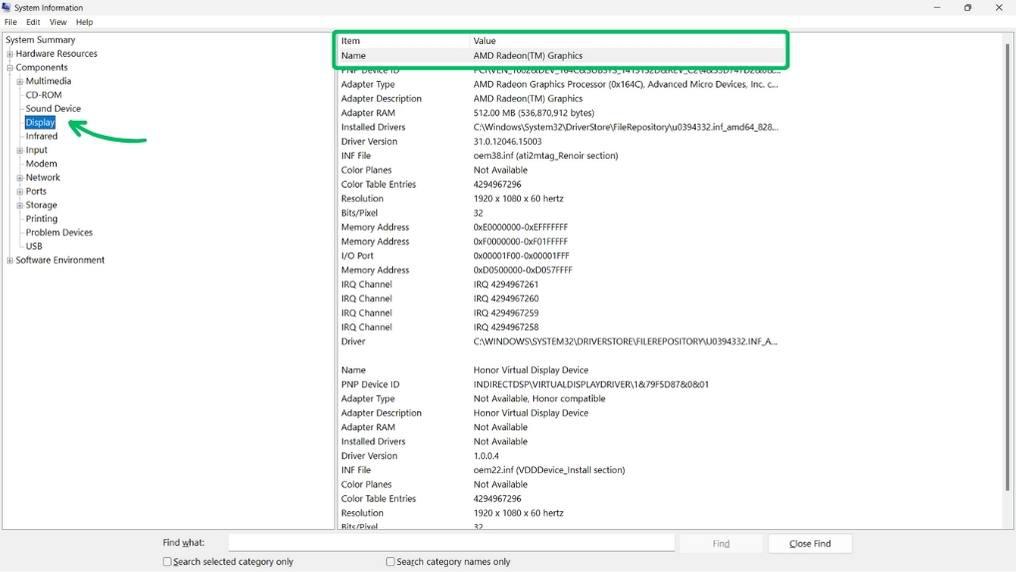
Method 2: Check your PC’s GPU Using System InformationStep 1: Press Windows+R to open “Run.” Step 2: Type “msinfo32” and press Enter. Step 3: Expand “Components” > “Display.” On the left side pan, you will see the Graphics card name
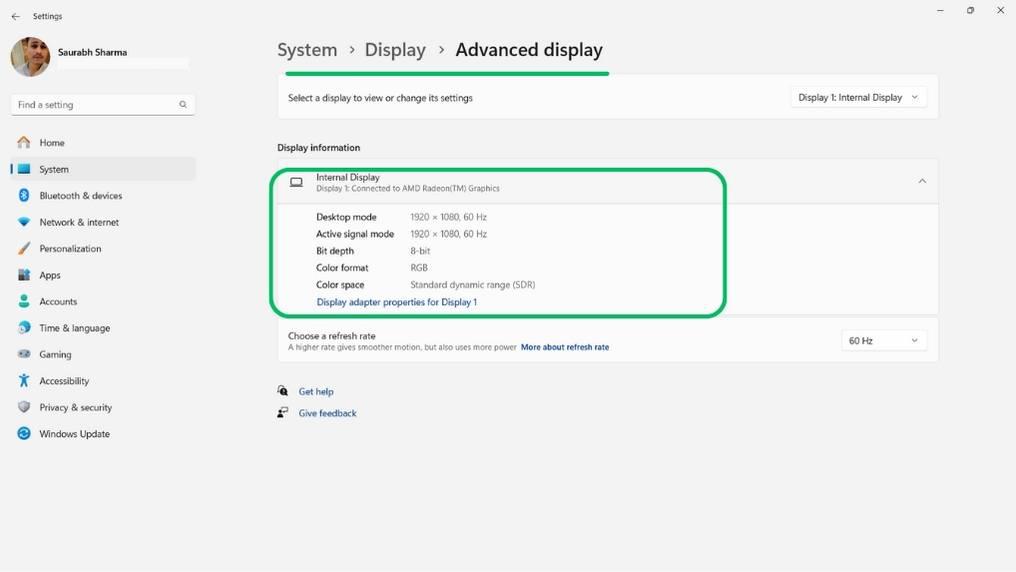
Method 3: Check your PC’s GPU Using Windows System SettingsStep 1: Press Win + I to open settings. In settings navigate to “System” > “Display.” Step 2: Scroll down to “Related settings” and click “Advanced display settings.“ Step 3: Under Display information, you can see which graphics card information
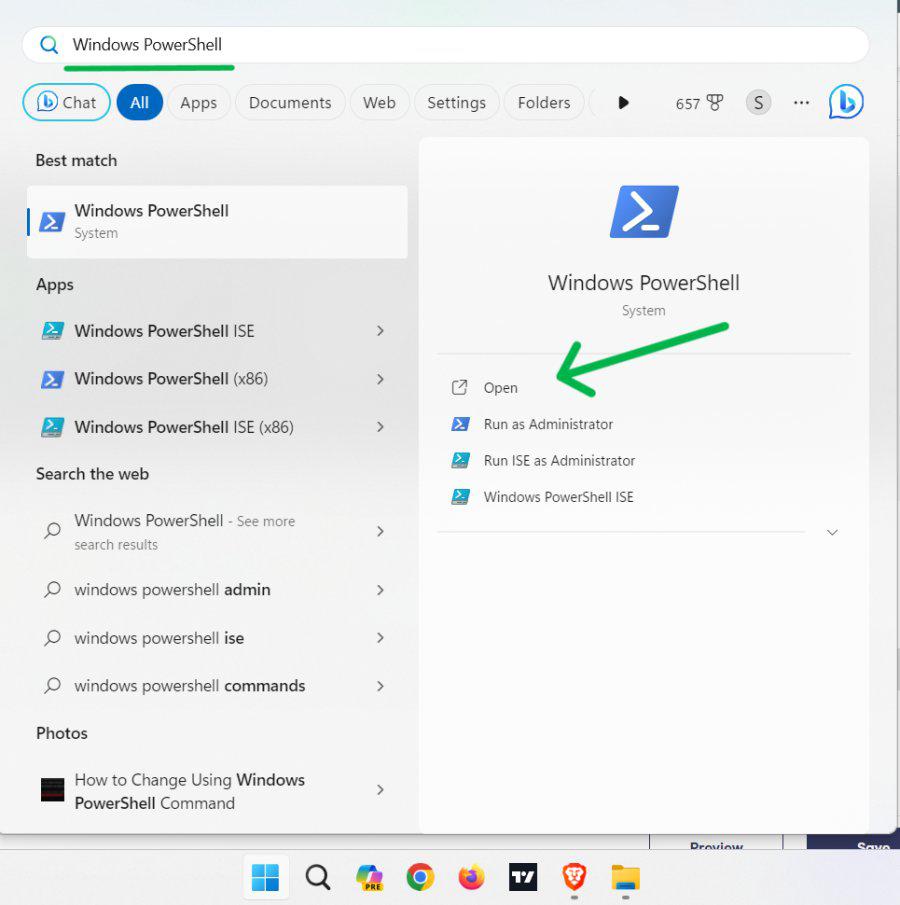
Method 4: Check your PC’s GPU Using PowerShellPowerShell is a command line tool, for inspecting your GPU details. If you want to check your GPU using PowerShell follow these steps; Step 1: Press Win + S then on the search bar type “PowerShell” then click on run as administrator
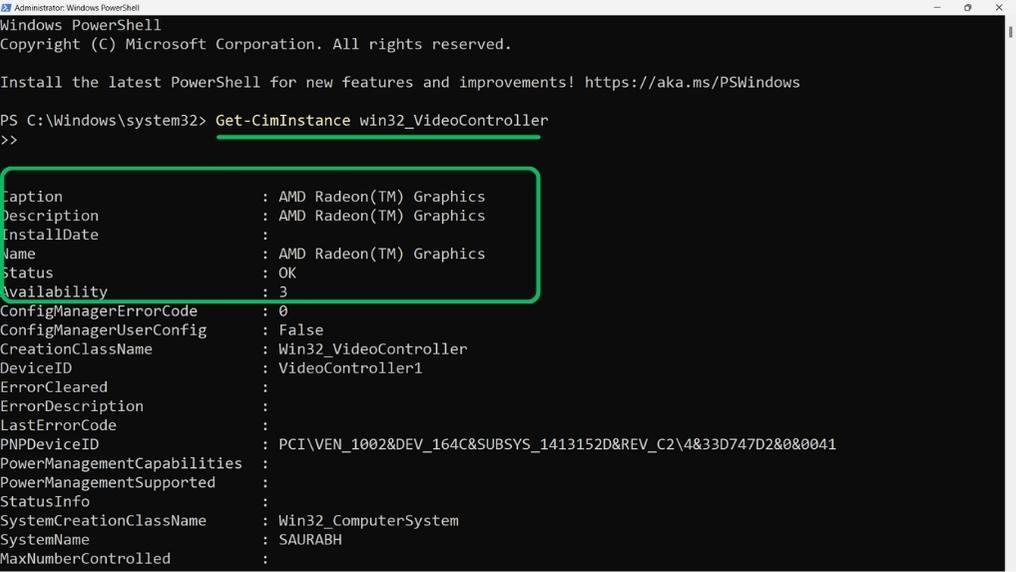
Step 2: Type the following command and hit Enter Get-CimInstance win32_VideoController
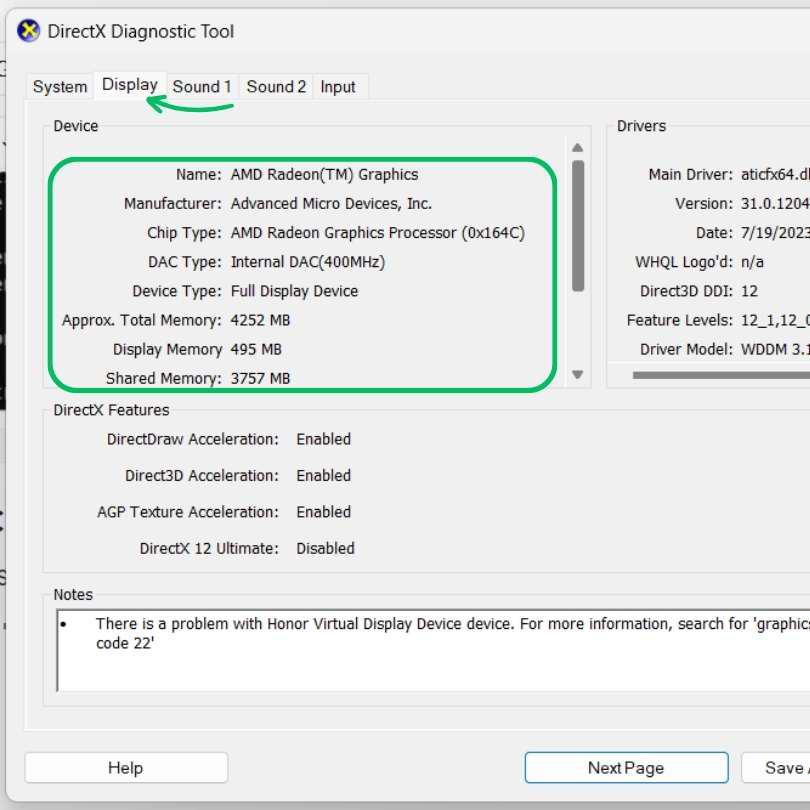
Method 5: Check your PC’s GPU Using the DirectX Diagnostic ToolStep 1: Press Win + S then on the search bar type “dxdiag” then click on Open Step 2: Navigate to the “Display” Tab. Under the Device section, you can see graphics cards and their info
Hence, We have shown you five ways to determine the graphics card (GPU) in your computer. You can utilize any of these methods to find the name, model, manufacturer, memory and other details, about your GPU. Also Read
FAQs: How to Check your PC’s Graphics Card (GPU)How to Check your PC’s Graphics Card (GPU)?
How do you check a graphics card using cmd?
Why is my graphics card not showing up?
|
Reffered: https://www.geeksforgeeks.org
| Geeks Premier League |
Type: | Geek |
Category: | Coding |
Sub Category: | Tutorial |
Uploaded by: | Admin |
Views: | 13 |