|
If you’re wondering, “How do I enable Grammarly in Google Docs?” then your search is over. In today’s digital age, ensuring your writing is error-free and polished is crucial for maintaining professionalism. Grammarly, a leading writing assistant, offers robust tools for grammar checking, spelling correction, and style enhancements which are used for professionals and students. Integrating Grammarly with Google Docs can significantly improve your writing efficiency and accuracy. In this article, we will be learning How to Install Grammarly in Google Docs and how to use Google Docs.
Table of Content How to Add Grammarly to Google DocsStep 1: Open Web Browser and Go to Chrome Web StoreOpen your web browser and type Chrome Web Store or Directly Click here to visit the official Chrome Web Store. 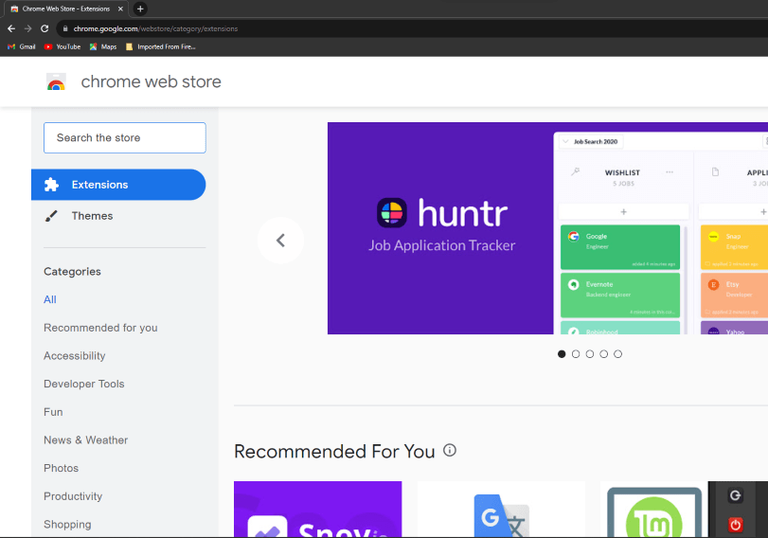 Opening Chrome Web Store Step 2: Search for GrammarlyAfter visiting the Chrome Web Store we need to Search for the Grammarly extension or add. Go to Search box and type “Grammarly for Chrome” in the search bar of the Web Store. 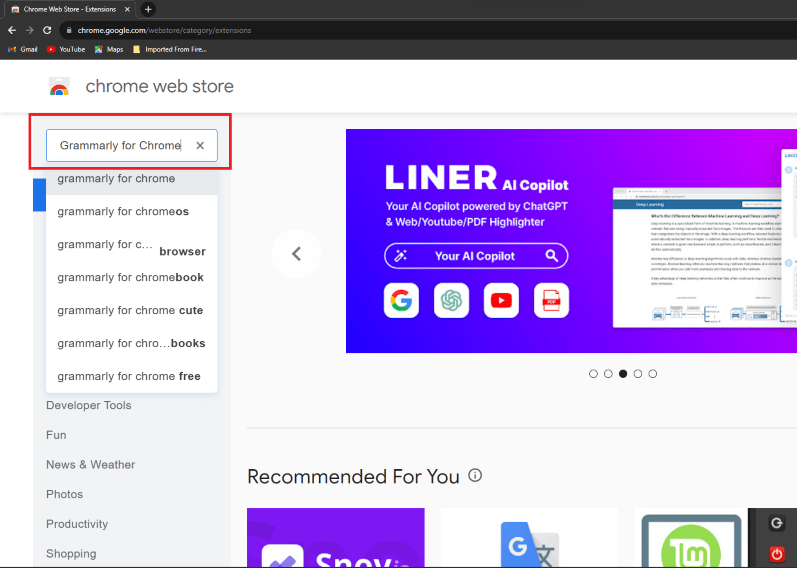 Searching for Grammarly Step 3: Click “Add to Chrome” buttonAfter receiving the results, we need to click on the correct extension and click on the “Add to Chrome” button which is shown in the below screenshot. 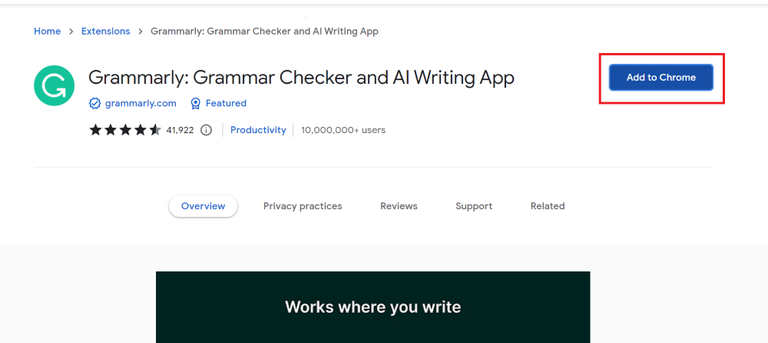 Install the Extension Step 4: Click on “Add Extension” and Confirm the InstallationAfter clicking on the “Add to Chrome” button, the browser will once again ask for confirmation. So, we need to confirm it and click on the “Add Extension” option which will be displayed on the screen. 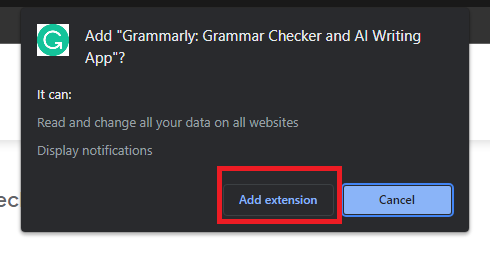 Confirming Installation Step 5: Sign in with your existing Grammarly account or Create one and get Signed inAfter the installation is completed, we need to log in or create a new account on Grammarly, so that we can use it in Google Docs without any problem. 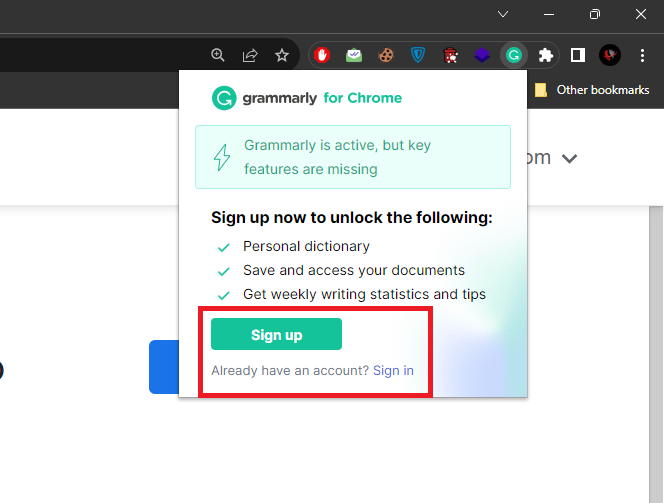 Login/Signup on Grammarly How to Enable Grammarly on Google DocsWith Grammarly successfully installed, the next step is to ensure that it’s enabled and ready for use within Google Docs. In the below steps we will be learning How to Get Grammarly on Google Docs. Step 1: Launch Google Docs and Open DocumentLaunch Google Docs and open the Google Document.  Opening Document Step 2: Click the Chrome Extension IconAfter opening the document in Google Docs, we need to click on the Extensions option which is located at the top right corner of the browser screen. 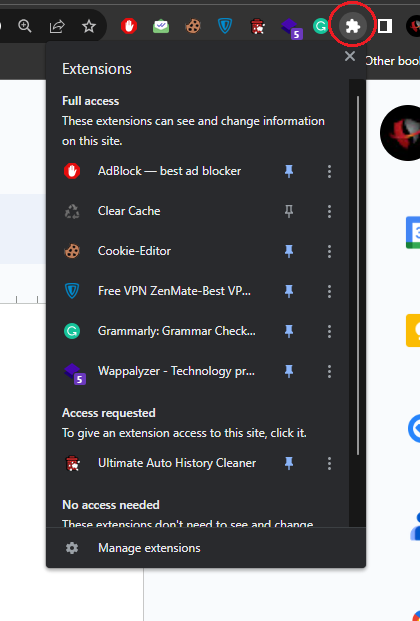 Clicking on the Extension Option Step 3: Enable Pin GrammarlyAfter clicking on the “Extensions” option, locate the Grammarly extension you installed in the previous section and click on it. Then, activate the pin icon. 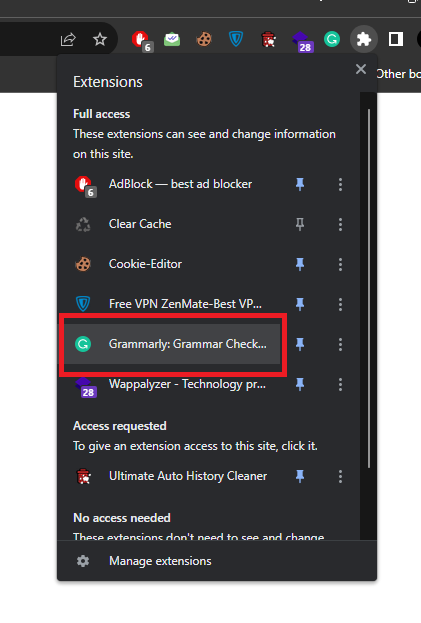 Selecting Grammarly Extension Step 4: Enable Grammarly on Google DocsUpon accessing the Grammarly extension, don’t forget to enable the “Check for writing suggestions on Google Docs” option. By doing so, you’ll enable Grammarly for use in your Google Docs documents, ensuring it’s prepared to enhance and improve your writing. 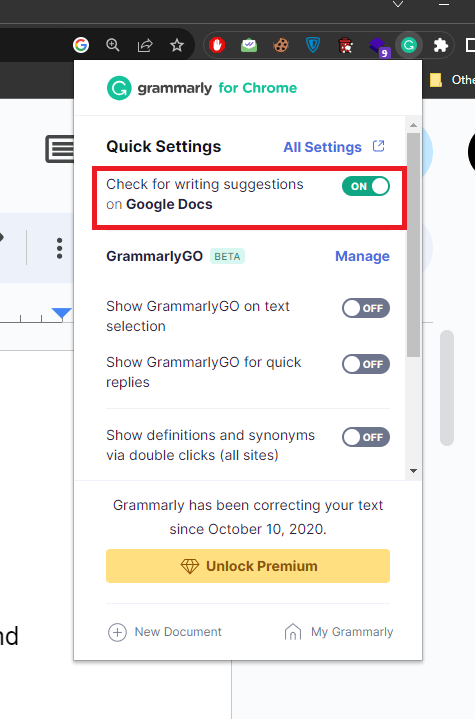 Enabling Grammarly on Google Docs How to Use Grammarly in Google DocsIn this section, we will learn how we can use Grammarly in Google Docs to resolve grammatical and spelling mistakes. Step 1: Click on the Red Underlined CharacterWhile typing the text, if the text or character becomes incorrect then it is been underlined in red color by Grammarly, so click on that character. 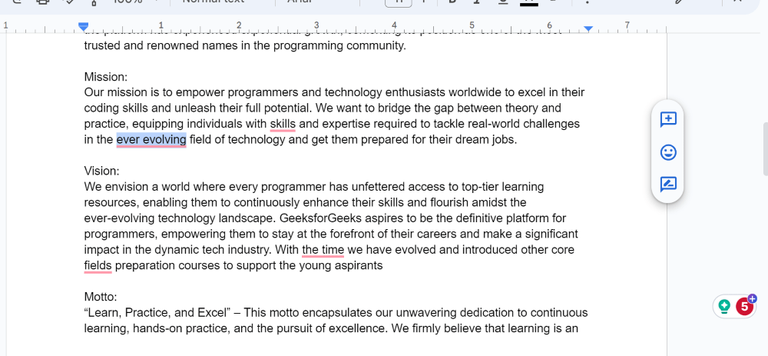 Selecting incorrect character Step 2: Click on SuggestionsAfter clicking on the character, the Grammarly tool suggests the correct word, so that our mistake can be resolved, as per our need, we can correct the incorrect word or ignore by selecting Dismiss option.  Correcting the incorrect character How to Set Goals on Grammarly in Google DocsIn this section, we will see how we can use our custom goal on Grammarly in Google Docs. Follow the below steps to set goals in Google Docs. Step 1: Click on the Grammarly IconOn the bottom of the page, there is the Grammarly Icon which indicates some number, so click on that icon to get the Grammarly sidebar to appear. 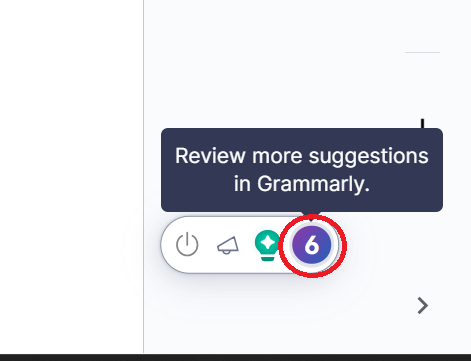 Clicking on the Grammarly Icon Step 2: Click on Adjust Goals IconA sidebar will get opened, so on that sidebar, we need to find the Adjust Goals Option and click on that option. In the below screenshot, you can see the proper navigation to find the Adjust Goals icon. 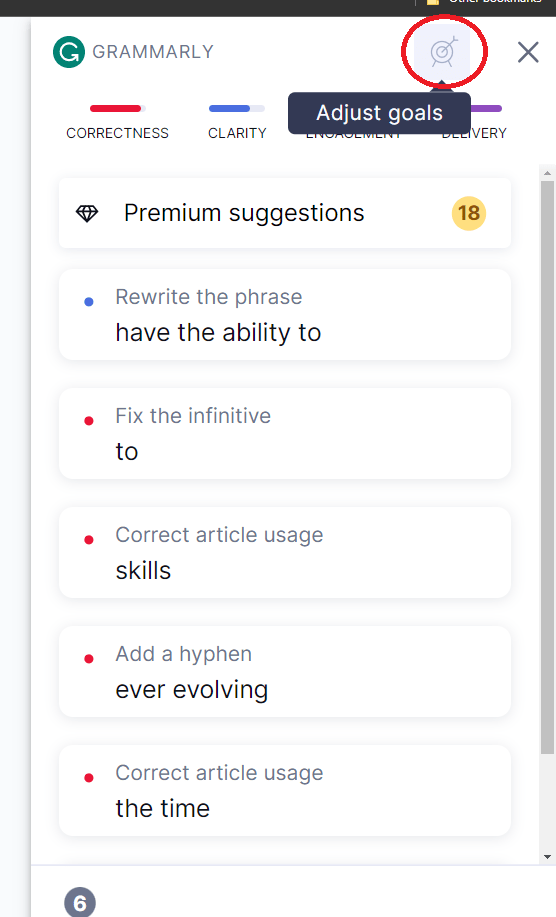 Clicking on the Adjust Goals Icon Step 3: Set Your GoalsAfter clicking on the Adjust Goals Icon, we can set or customize goals in various parameters like Domain, Intent, audience, etc. 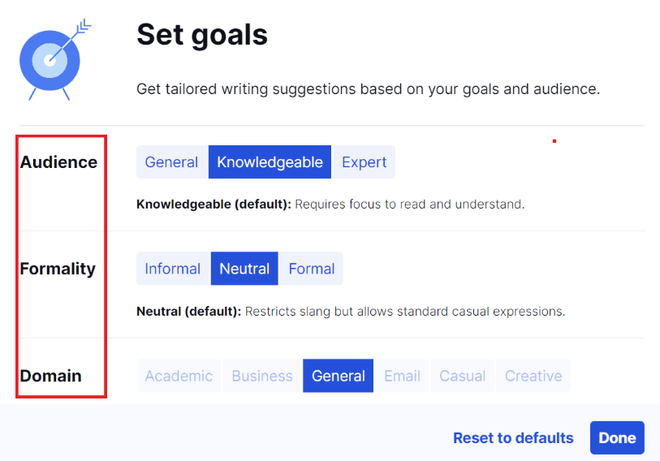 Setting Goals Step 4: Click on Done to SaveAfter deciding on the Goals, to apply it in Google Docs, we need to click the blue Done button which is at the bottom of the popup box that is displayed. 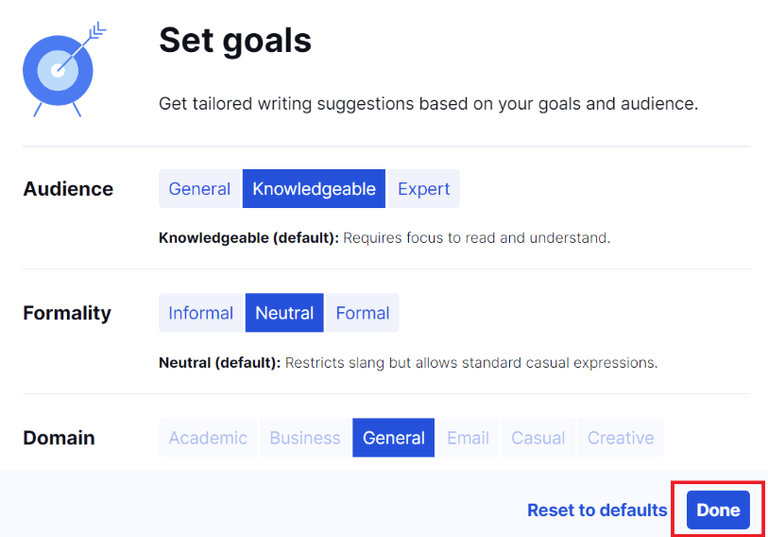 Clicking on the Done button ConclusionIn conclusion, Grammarly Software is an important tool for users while creating content in Google Docs, using this tool, users can properly create quality information and deliver it to the readers. Grammarly software properly analyzes the mistakes and suggests different grammatical and spellings, so that users can choose the appropriate word and replace it with the wrong word in the document. After enabling Grammarly in Google Docs you can also disable Grammarly, also you can activate Grammarly on Chromebook, iPad and Android. How to Enable Grammarly in Google Docs – FAQs
|
Reffered: https://www.geeksforgeeks.org
| Google Docs |
| Related |
|---|
| |
| |
| |
| |
| |
Type: | Geek |
Category: | Coding |
Sub Category: | Tutorial |
Uploaded by: | Admin |
Views: | 15 |