
|
|
Understanding the branch topology of your Git repository is important for effective collaboration and efficient management of your codebase. Visualizing branches helps you see how different branches relate to each other, track the progress of features, and identify merge points. In this article, we will learn about Effective Methods for Visualizing Branch Topology in Git. Table of Content Why Visualize Branch Topology?Visualizing branch topology offers several benefits:
Method 1: Git Log with Graph Options
Step 1: Open the terminal or command prompt. Step 2: Navigate to the Git repository. Step 3: Run the following command git log --graph --oneline --all --decorate
Output Visualizing branch topology using Git Log This command displays a compact graph with:
Step 5: Interpret the graph
Note: Use filters to filter the graph for a specific branch.
Method 2: GitkA dedicated Git repository viewer that offers a graphical representation of the commit history and branch structure. Step 1: Open the terminal or command prompt. Step 2: Navigate to the Git repository. Step 3: Run he following command gitk
This opens the Gitk graphical interface. Output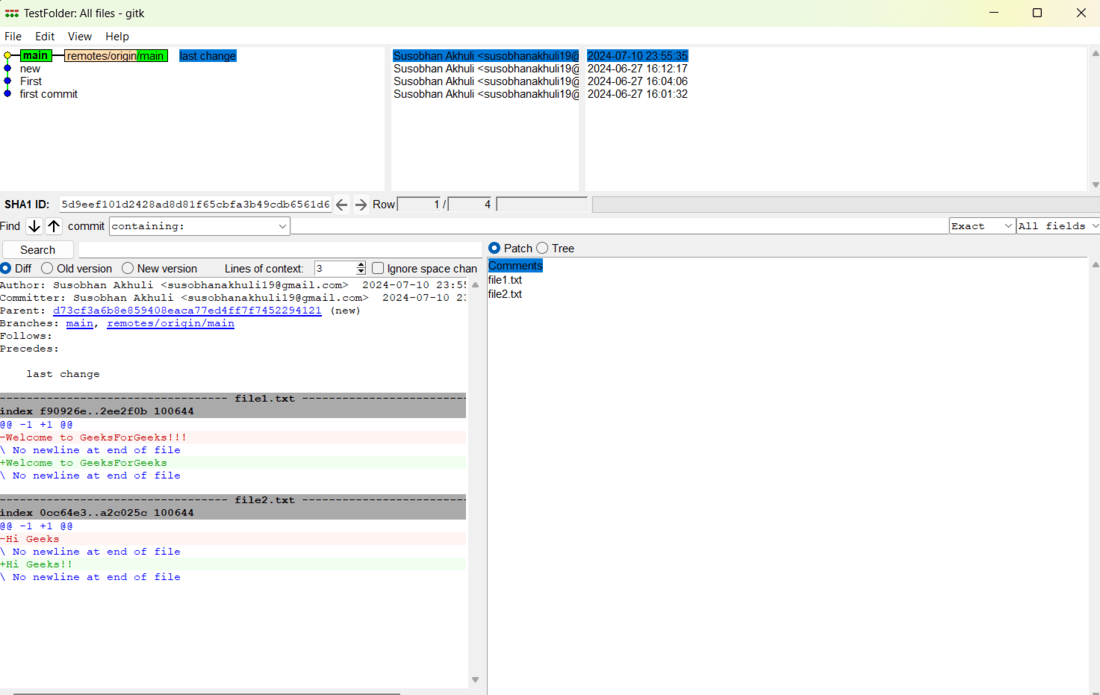 Visualizing branch topology using Gitk Step 4: Explore the graph:
Note: Use the toolbar buttons or keyboard shortcuts to navigate and interact with the graph.
Method 3: GUI ToolsMany Git GUI clients (e.g., GitHub Desktop, GitKraken, Sourcetree) have built-in branch visualization features. Step 1: Open preferred Git GUI client. Step 2: Clone or open the Git repository. Step 3: Navigate to the branch visualization view: This view generally shows the commit graph, branches, and merges in a user-friendly way. Specific features and interactions vary depending on the GUI tool. ConclusionIn conclusion, visualizing branch topology is important for effective Git workflow management. By using Git log commands, Gitk, or GUI tools, we can get information regarding our project’s history and structure which enabling us to make informed decisions about branching, merging, and collaboration. |
Reffered: https://www.geeksforgeeks.org
| Git |
Type: | Geek |
Category: | Coding |
Sub Category: | Tutorial |
Uploaded by: | Admin |
Views: | 21 |