|
To experience smooth transitions between the pages of your Next.js application, you can include a loading indicator that shows the progress of the page being loaded. This can be done by creating a custom spinner component and using it during page transitions.
In this article, we will create a custom spinner component and display it between page transitions in a Next.js application.
Approach to Handle Loading Between Page Changes in Next.js- Create the Spinner Component: Create a new file named loadingIndicator.js inside the pages. This is a simple component we bring the life to this component with our CSS.
- Style the Loading Indicator: Using CSS, we will style the above component that purely transforms itself into a spinner.
- Create another page to navigate and test our loading spinner while transitioning between pages.
- Integrating the Loading Indicator: To integrate the loading indicator, we will modify the _app.js file. This file acts as the top-level component in your Next.js app and is ideal for managing global states like a loading indicator.
- Modify _app.js: Open the pages/_app.js file and update it as follows:
- A delay of 2000 milliseconds is added before hiding the loading indicator. This ensures that the indicator is visible for a short period, even for fast transitions.
Steps to Create NextJS AppStep 1: Create a Next.Js project with the following commands in your desired location with the desired project name.
npx create-next-app demoapp
cd demoapp
Step 2: Start the Development Server:
npm run dev Step 3: Create the following files required to execute our example that shows how to handle loading between pages.
pages/loadingIndicator.js
pages/LoadingIndicator.module.css
pages/page2.js
Project structure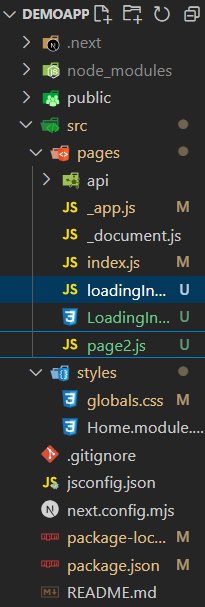 demoapp structure Example: Below is an example to handle loading between pafe changes in Next.js.
CSS
/* pages/LoadingIndicator.module.css */
.loadingindicator {
    position: fixed;
    top: 0;
    left: 0;
    width: 100%;
    height: 100%;
    display: flex;
    justify-content: center;
    align-items: center;
    background: rgba(255, 255, 255, 0.8);
    z-index: 9999;
    font-size: 20px;
    color: #000;
}

.spinner {
    border: 4px solid rgba(0, 0, 0, 0.1);
    border-left-color: #000;
    border-radius: 50%;
    width: 40px;
    height: 40px;
    animation: spin 1s linear infinite;
    margin-right: 10px;
}

@keyframes spin {
    0% {
        transform: rotate(0deg);
    }

    100% {
        transform: rotate(360deg);
    }
}
// pages/LoadingIndicator.js
import React from "react";
//Create a CSS file for styling
import style from "./LoadingIndicator.module.css";

const LoadingIndicator = () => (
    <div className={style.loadingindicator}>
        <div className={style.spinner}></div>
        Loading...
    </div>
);

export default LoadingIndicator;
// pages/page2.js

import React from "react";

function page2() {
    return (
        <div style={{
            height: "100vh",
            fontSize: "50px",
            backgroundColor: "grey"
        }}>
            <h2>this is page 2</h2>
        </div>
    );
}

export default page2;
// pages/_app.js

import "@/styles/globals.css";
import Router from "next/router";
import { useState, useEffect } from "react";
import LoadingIndicator from "./loadingIndicator";

function MyApp({ Component, pageProps }) {
    const [loading, setLoading] = useState(false);

    useEffect(() => {
        const handleStart = () => setLoading(true);
        const handleComplete = () => {
            // Adding a delay before setting loading to false
            setTimeout(() => setLoading(false), 2000); // 500ms delay
        };

        Router.events.on("routeChangeStart", handleStart);
        Router.events.on("routeChangeComplete", handleComplete);
        Router.events.on("routeChangeError", handleComplete);

        return () => {
            Router.events.off("routeChangeStart", handleStart);
            Router.events.off("routeChangeComplete", handleComplete);
            Router.events.off("routeChangeError", handleComplete);
        };
    }, []);

    return (
        <>
            {loading && <LoadingIndicator />}
            {!loading && <Component {...pageProps} />}
        </>
    );
}

export default MyApp;
// pages/index.js


import { useRouter } from "next/router";
import React from "react";

function Index() {
    const router = useRouter();
    return (
        <div style={{ fontSize: "50px" }}>
            <h2>This is page 1</h2>
            <input
                type="button"
                value="Click me"
                style={{ fontSize: "30px" }}
                onClick={() => {
                    router.push("/page2");
                }}
            />
        </div>
    );
}

export default Index;
Output:
Best Practices and Tips- Consistent User Experience: Ensure that the loading indicator is consistently shown during all page transitions. This provides a uniform user experience across your app.
- Performance Considerations: Be mindful of the performance impact. While the loading indicator enhances user experience, it should not significantly slow down transitions.
- Adjustable Delay: The delay time before hiding the loading indicator can be adjusted based on your app’s needs. Too short a delay may make the indicator flash briefly, while too long a delay might make transitions feel slow.
Alternative Approach Using External Packages1. Install nprogress:
npm install nprogress 2. Verify dependencies.
"dependencies": {
      "next": "14.2.3",
      "nprogress": "^0.2.0",
      "react": "^18",
      "react-dom": "^18",
      "web3": "^4.8.0"
  }
3. Set Up nprogress in _app.js:
JavaScript
//pages/_app.js

import "nprogress/nprogress.css";
import NProgress from "nprogress";
import Router from "next/router";
import { useEffect } from "react";
import "../styles/globals.css";

function MyApp({ Component, pageProps }) {
    useEffect(() => {
        const handleStart = () => NProgress.start();
        const handleComplete = () => NProgress.done();

        Router.events.on("routeChangeStart", handleStart);
        Router.events.on("routeChangeComplete", handleComplete);
        Router.events.on("routeChangeError", handleComplete);

        return () => {
            Router.events.off("routeChangeStart", handleStart);
            Router.events.off("routeChangeComplete", handleComplete);
            Router.events.off("routeChangeError", handleComplete);
        };
    }, []);

    return <Component {...pageProps} />;
}

export default MyApp;
Output:
Conclusion:Displaying a loading indicator during page transitions in Next.js significantly enhances user experience by providing visual feedback. Whether you implement a custom solution or use an external package like nprogress, ensure that your implementation is smooth and does not negatively impact performance. By following this guide, you can create a more polished and user-friendly application.
|