|
Windows 11 has an updated interface, enhanced performance, and improved security features. An interesting feature of Windows 11 is that it allows you to personalize the names of your drives – the partitions or storage devices where you store your files and programs. By changing the drive names you can effectively organize your data. Easily determine the purpose of each drive. In this article, we will show you six different methods to change a drive name on Windows 11. Table of Content
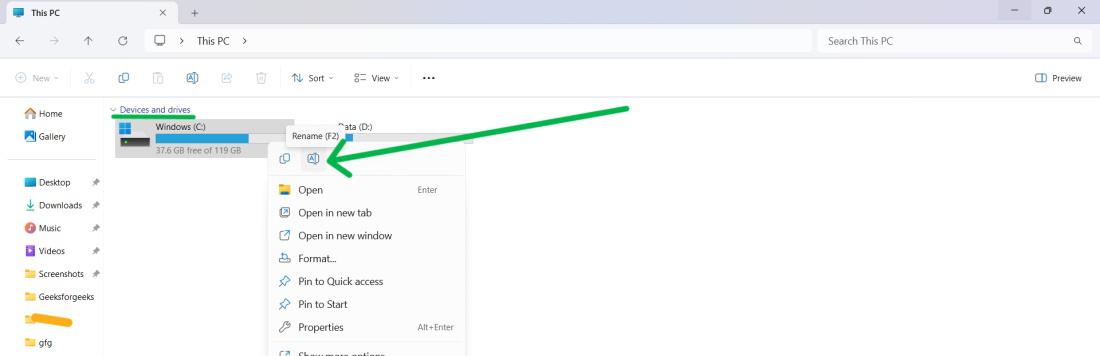
Method 1: Change a Drive Name on Windows 11 Using File ExplorerStep 1: Open File Explorer by pressing the Windows + E keys. Step 2: In the left pane, Click on This PC Step 3: Locate the drive that you want to rename, and right-click on it or select the drive then use shortcut F2. then click on Rename icon. \ Step 4: Type the new name for the drive. Press Enter to confirm the change.
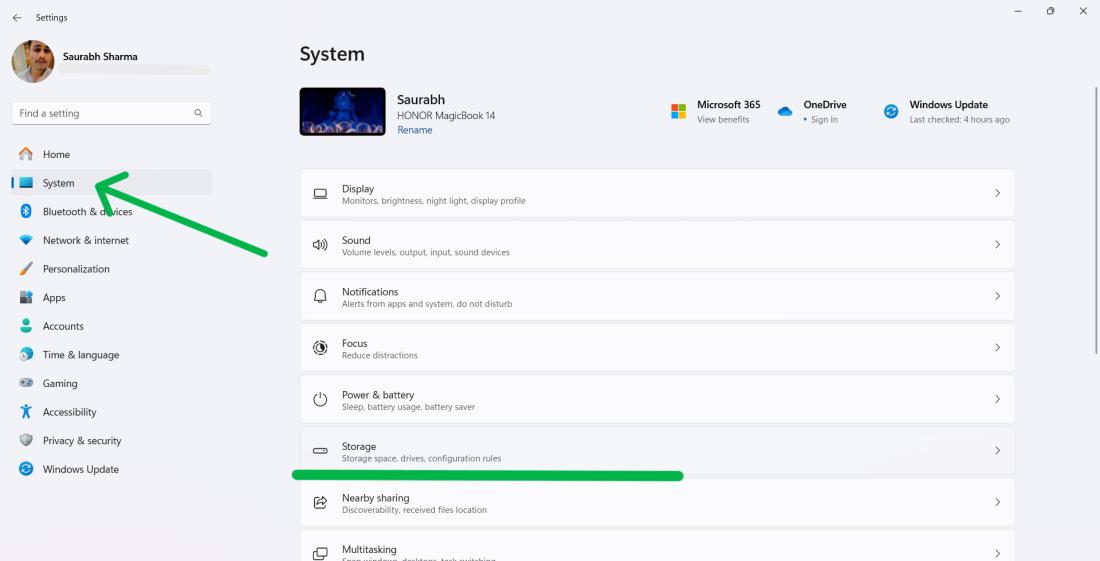
Method 2: Change a Drive Name on Windows 11 Using SettingsStep 1: Open Settings by pressing Windows + I keys. Step 2: Navigate to “System” and then click on “Storage.”
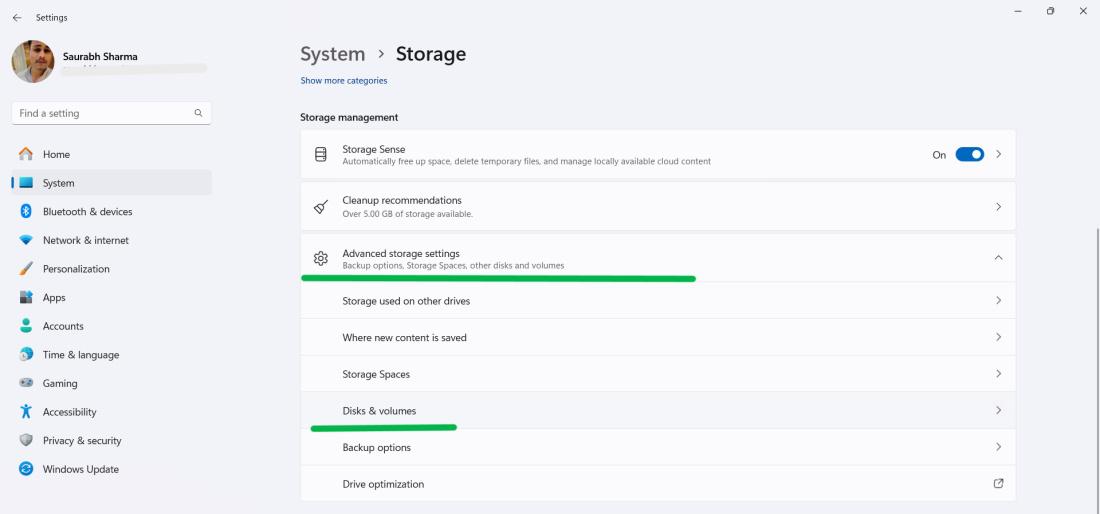
Step 3: Expand Advanced storage settings then, click Disks & volumes. Step 4: Choose the drive you want to rename and click “Properties.”
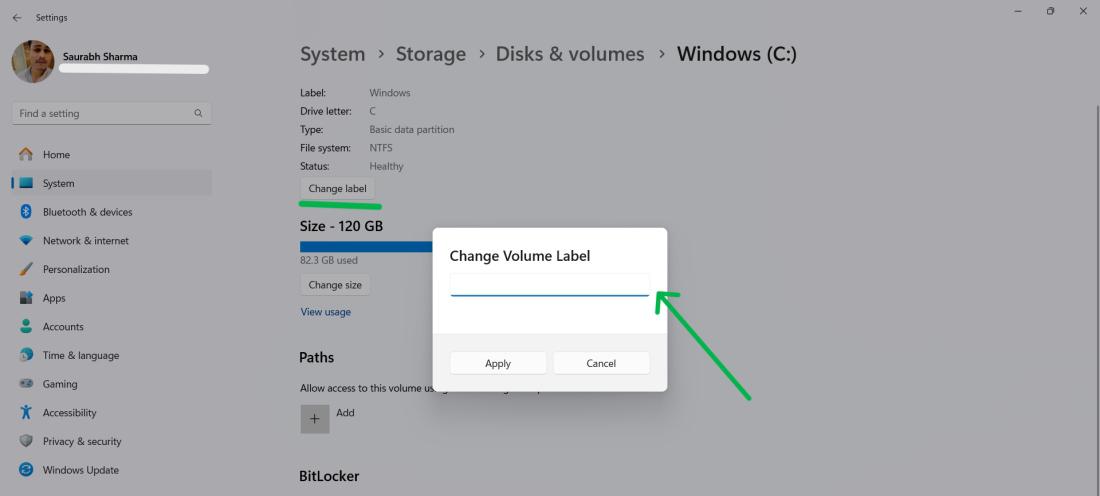
Step 5: Click the Change label button. Step 6: Enter your desired name in the “Volume label” field.
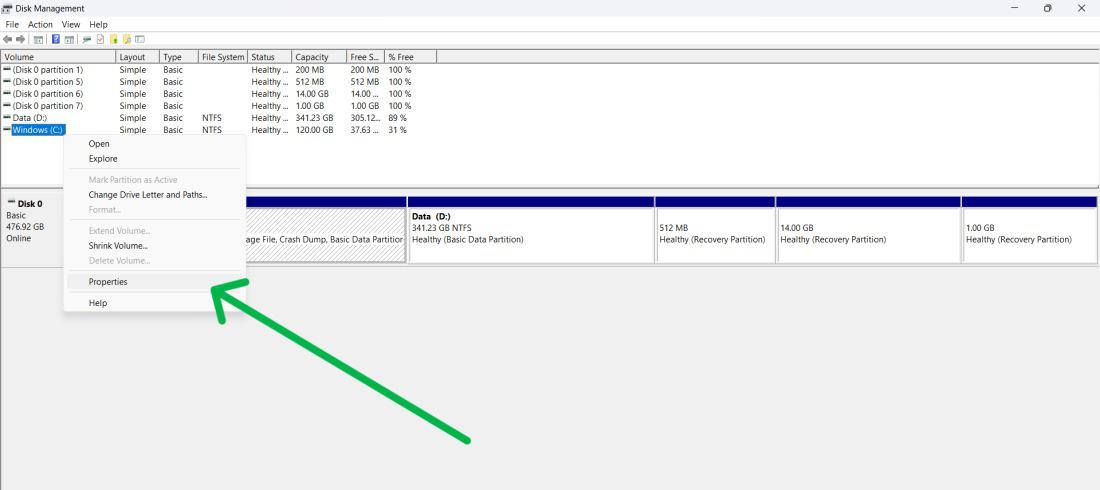
Step 7: Click “Apply” and then “OK” to save the changes. Method 3: Change a Drive Name Using Disk Management ToolStep 1: Click the Start button and then select “Disk Management.” Step 2: Right-click the drive you want to rename and choose “Properties.”
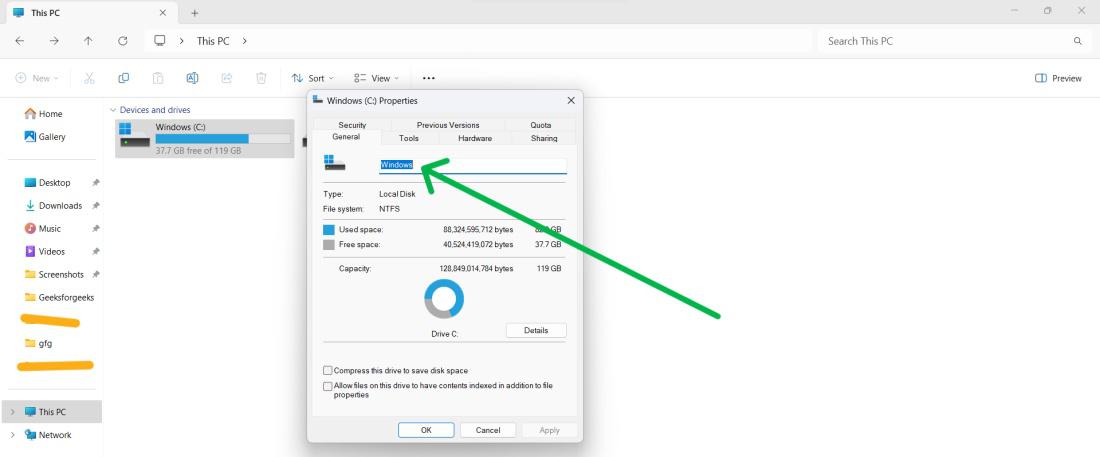
Step 3: In the window, go to the General tab, enter the new name in the top field
Step 4: Click on “Apply” and then “OK” Method 4: Change a Drive on Windows 11 Using Properties MenuStep 1: Open File Explorer by pressing Windows + E keys. Step 2: In the left pane, Click on This PC Step 3: Right-click the drive and choose “Properties” from the context menu.
Step 4: Under the “General” tab, type your desired name in the field.
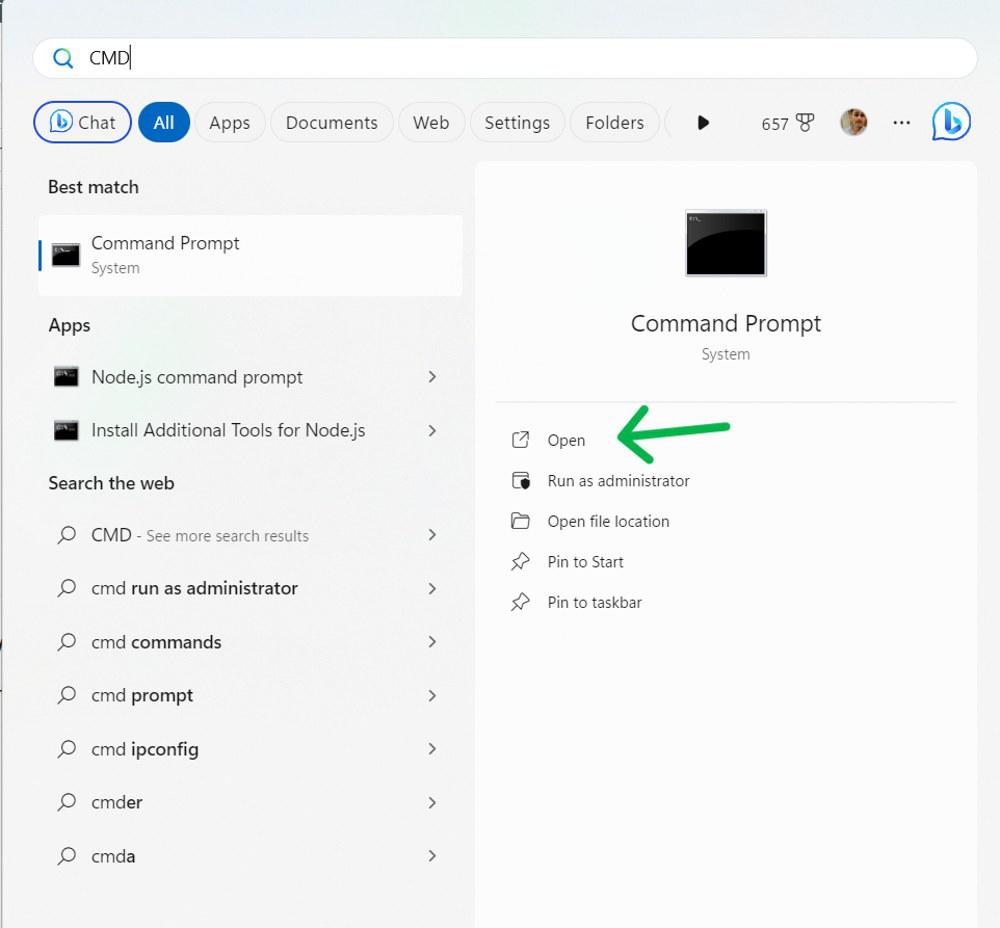
Step 5: Click “Apply” and then “OK” to save the changes. Method 5: How to Change a Drive Name Using Command PromptStep 1: To open command prompt. Press Win + S then on search bar type “CMD” then click on “Run as administrator”
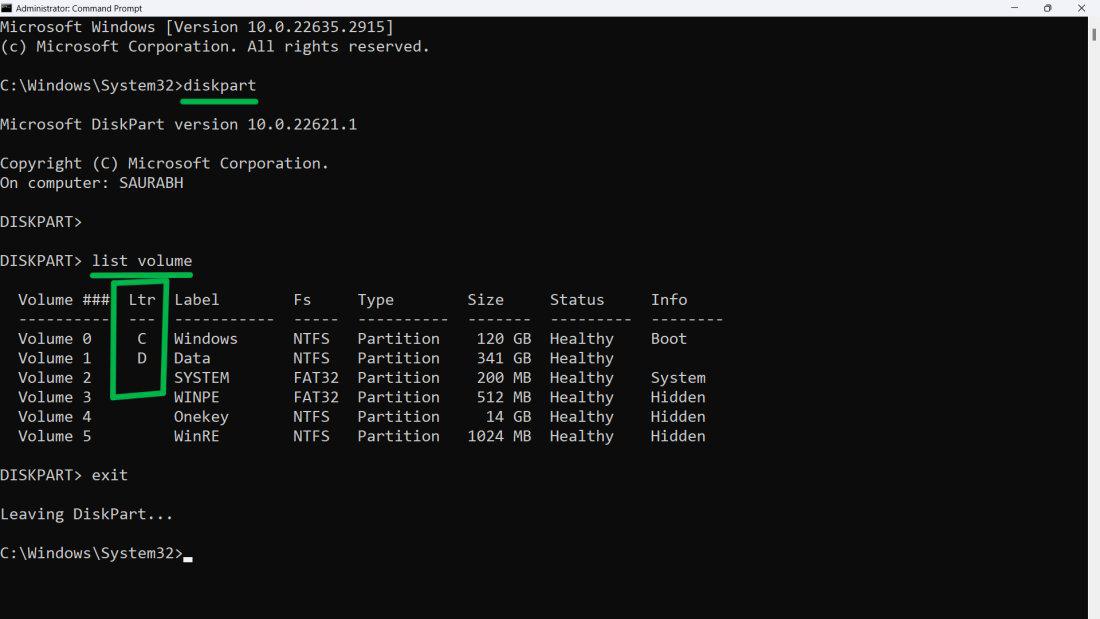
Step 2: Type these commands on CMD window diskpart
list volume
Step 3: Take note of the letter assigned to your drive in the Ltr column. Step 4: Type exit command to exit DiskPart.
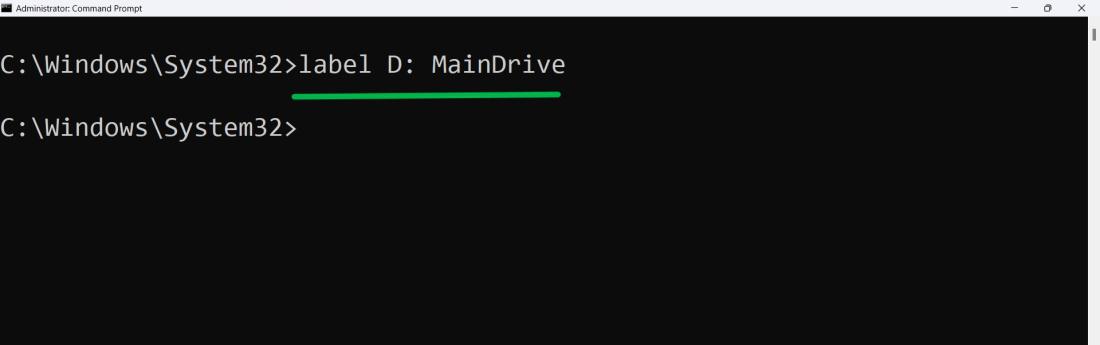
Step 5: Type this following command cmd label <DriveLetter>: <DriveName> Replace <DriveLetter> in the command with the previously noted drive letter. Similarly, substitute <DriveName> with your desired name.
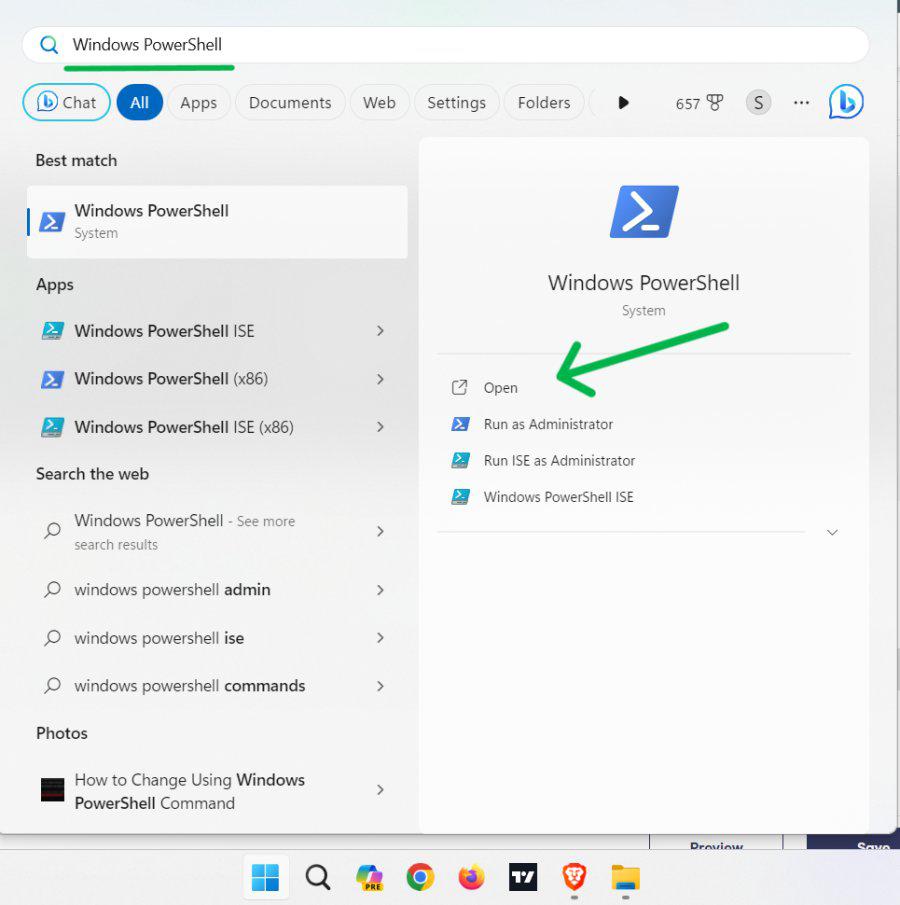
Method 6: How to Change a Drive Name Using PowerShellStep 1: To open Powershell. Press Win + S then on search bar type “PowerShell” then click on “Run as administrator”
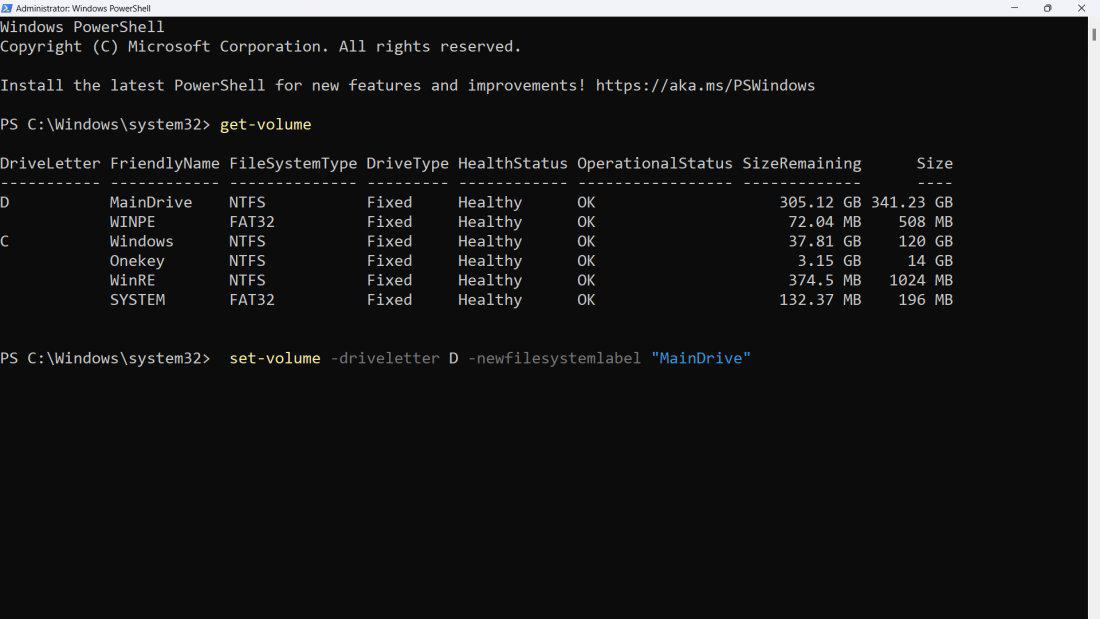
Step 2: Type these commands on Powershell get-volume
set-volume -driveletter <DriveLetter> -newfilesystemlabel "<DriveName>"
Replace <DriveLetter> in the command with the previously noted drive letter. Similarly, substitute <DriveName> with your desired name. set-volume -driveletter D -newfilesystemlabel "MainDrive"
ConclusionIn Conclusion, Here are six different methods we’ve shared for changing a drive name on Windows 11. These methods involve using tools and commands giving you the flexibility to choose the one that suits your preference and convenience. By customizing your drive names you can better organize your data. Easily identify the purpose of each drive. Also Read
FAQ’s: Change a Drive Name on Windows 11How to change a drive name on Windows 11?
How do I change the drive icon on Windows 11?
How do I format a drive on Windows?
How do I optimize a drive on Windows 11?
|


Reffered: https://www.geeksforgeeks.org
| Geeks Premier League |
Type: | Geek |
Category: | Coding |
Sub Category: | Tutorial |
Uploaded by: | Admin |
Views: | 14 |