
|
Matrices are used in Mathematics and allied areas to represent a set of values. They usually come in handy while simplifying complex equations. But are you wondering how to insert matrices in Google Docs? Google Docs is a widely used word processor, but sadly there is no direct method of inserting a matrix in Google Docs. However, we can make use of many other Google Docs tools to get the same result. So, in this article, we will explore 3 different methods in which we can insert a matrix in Google Docs.
How to Make a Matrix in Google Docs by Using Equations
Step 1: Go to Insert and Select EquationsGo to the “Insert” tab and click on the Equation option. 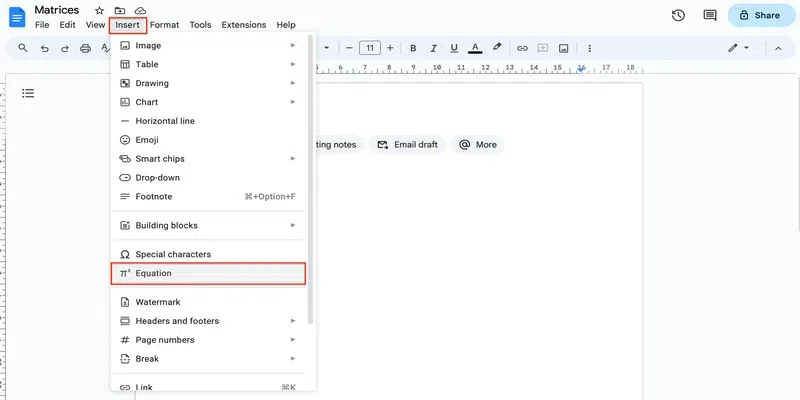 insert equation Step 2: Click on “Mathematical operators” and select “Square brackets”In the equation ribbon that opens, go to the Maths operation drop-down and click on the square brackets to insert them. 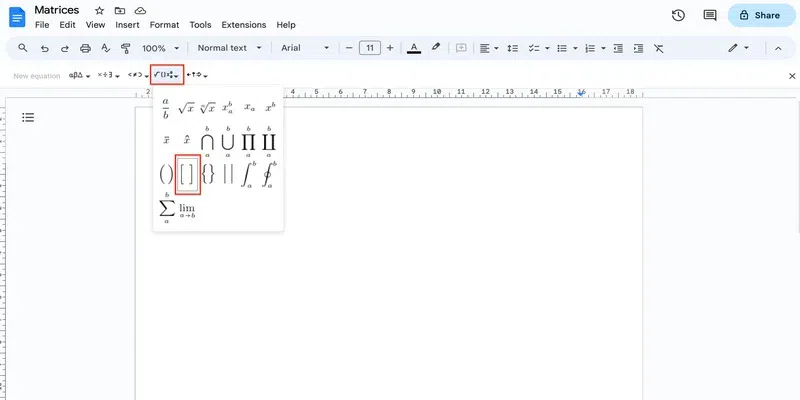 square brakcets Step 3: Go to “Mathematical operators” and select “xba”If the matrix contains only 1 row, you can simply type the values with spaces:  matrix with one row But for getting two rows, you must place the cursor inside the matrix and then select the xba equation from the Maths operation drop-down. 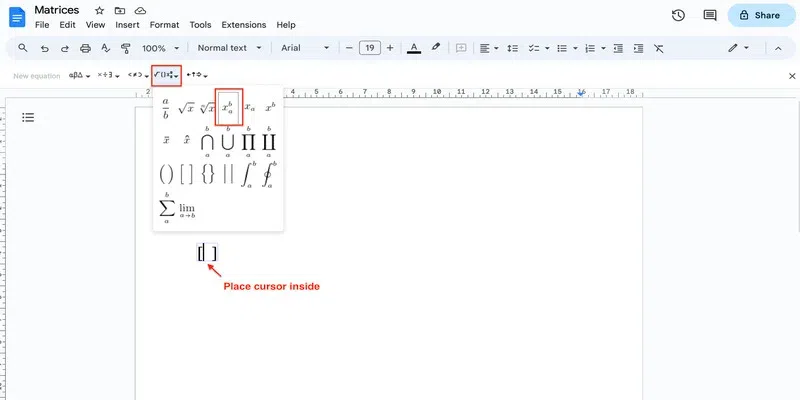 select xba equation Step 4: Enter the numbersTo add the first column, click on the right arrow on your keyboard so that the cursor moves to the subscript. Type the first value. Then insert the second Value 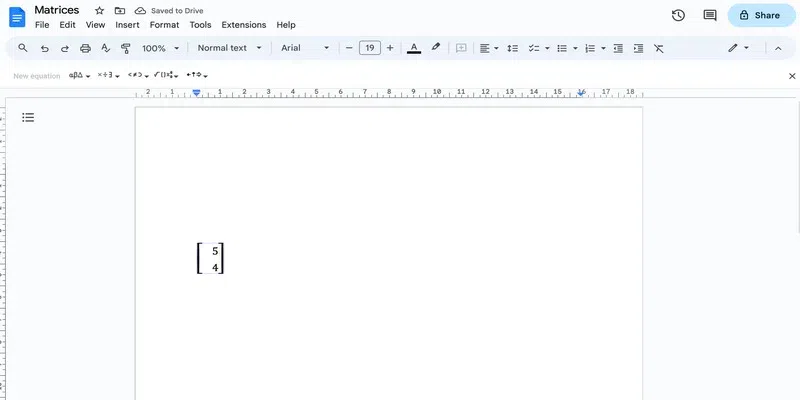 insert the second value Once that’s done, press Enter. You will see that the cursor changes to cover the entire length of the matrix: 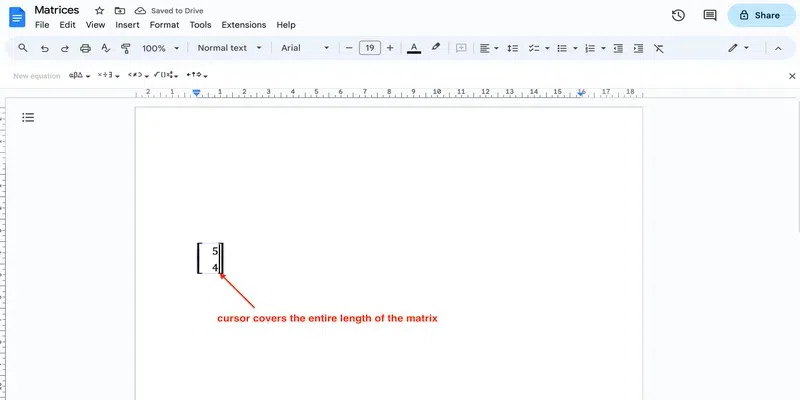 entire length Step 5: Press the SpacebarFirst press space so that the cursor looks like this: 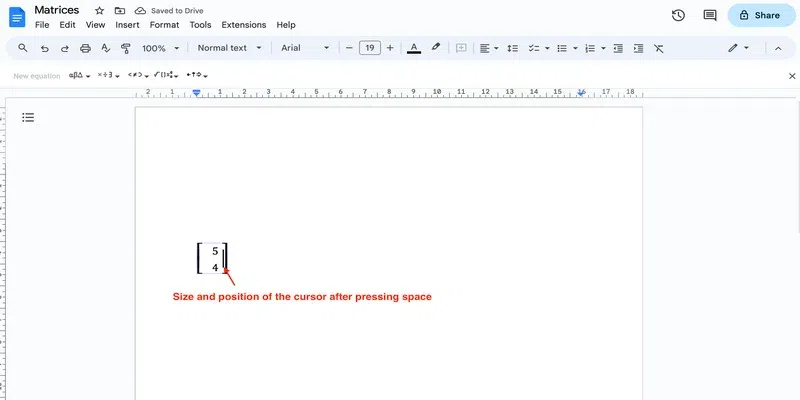 cursor after space Now, you can repeat the step 4 to add more columns in the matrix: 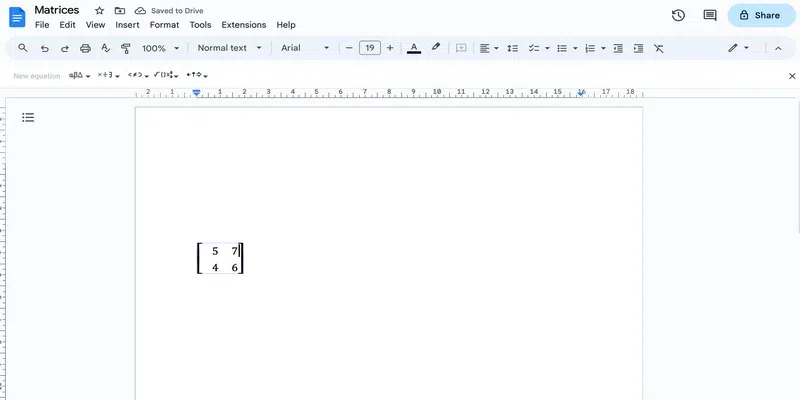 add all the values How to Make a Matrix in Google Docs Using TablesUsing equations to insert a matrix in Google Docs is quite easy. However, they are quite limited in the way that they only allow us to add 2 columns to the matrix. Thus, in order to add as many columns and rows as you desire, you can use tables to insert matrix in Google Docs. Step 1: Go to Insert and Select TableGo to the “Insert” tab and insert a table.
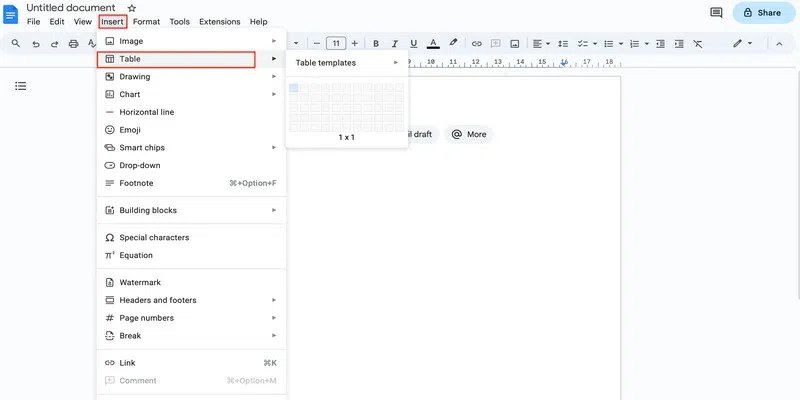 insert table Step 2: Select the table sizeSince we are creating a 4 x 3 matrix here, we need 3 columns plus 2 more. So, we will insert a 5 by 1 table. 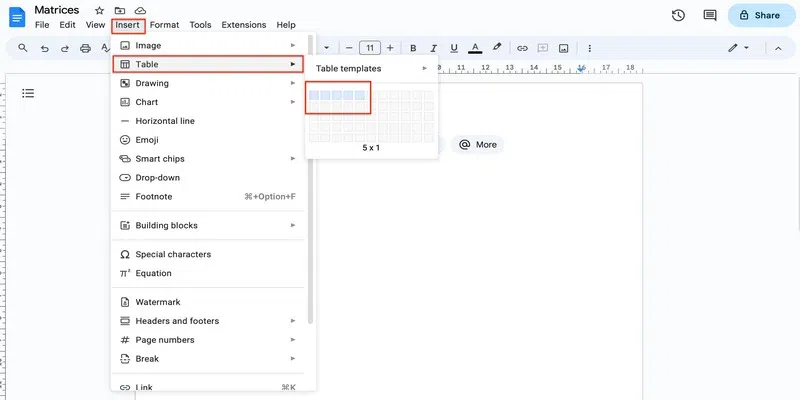 insert table Step 3: Add the numbersInsert the values in the table using the enter key in this manner:  add all the values Step 4: Increase the width of the table borderClick anywhere inside the table and go to Table options by clicking on the three dots in the top-right corner. 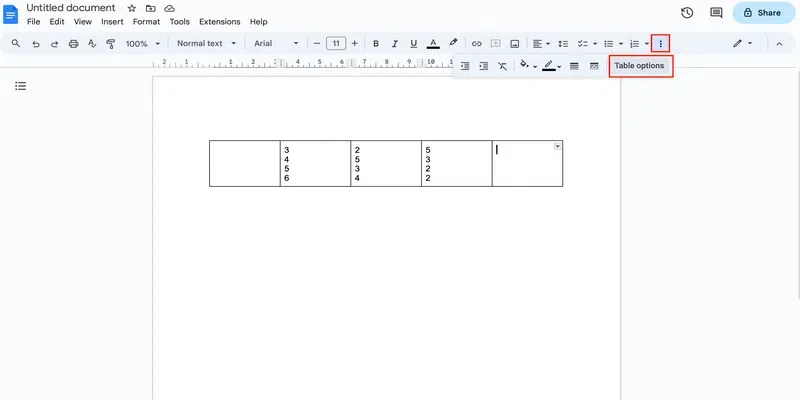 table options In the side pane that opens, click on the Color drop-down and select thickness from the Table border drop-down 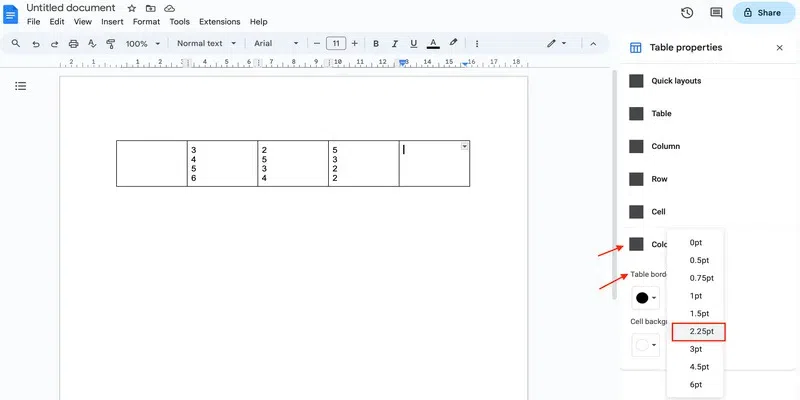 table-border Step 5: Compress the columnsHover over each column border and once it changes to an arrowhead, drag the border to bring the matrix close together. 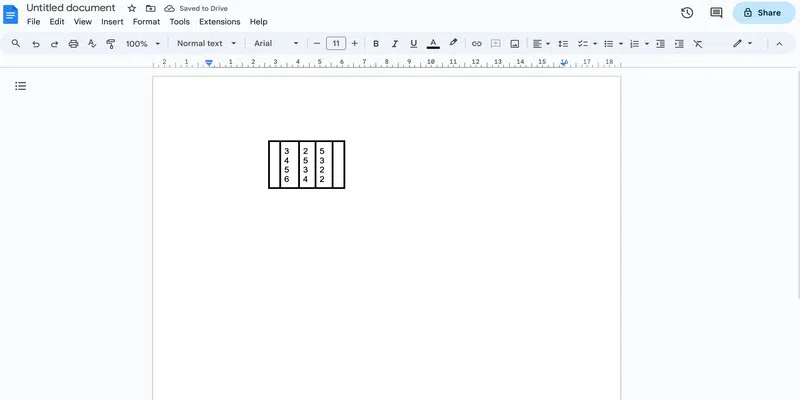 compress table Step 6: Remove the inner bordersTo get a matrix structure, you must now remove the column borders highlighted below: 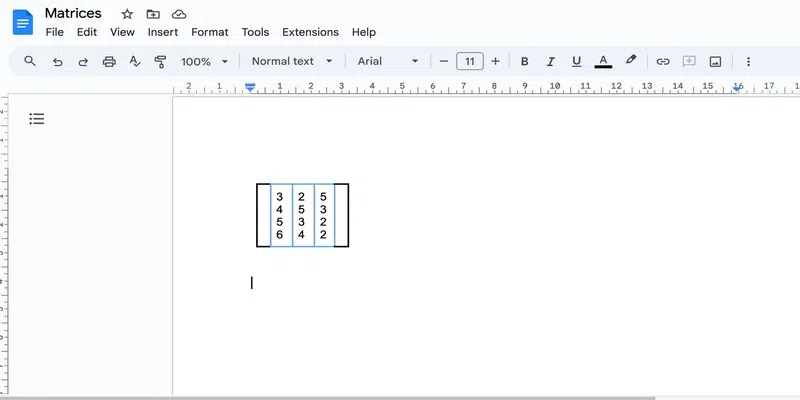 remove highlighted borders To remove a border, simply click on it, and choose 0pt from the Column Border menu in the ribbon. 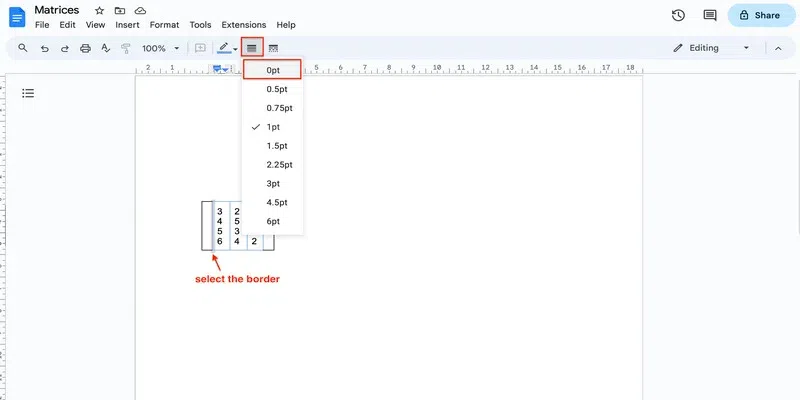 change border width And there you have your matrix: 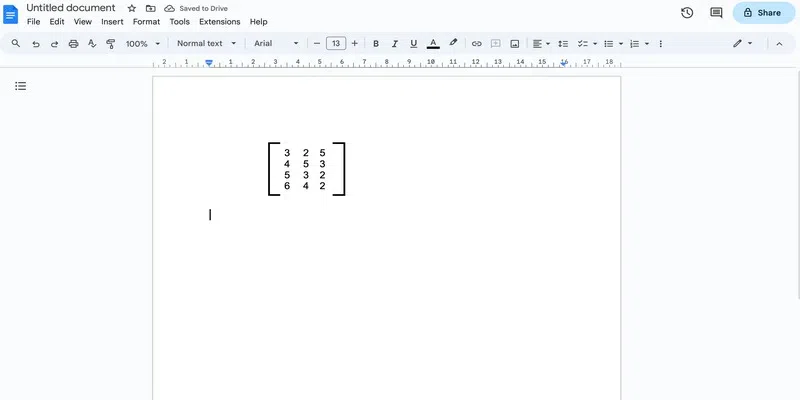 result
 copy paste How to Make a Matrix in Google Docs by Using a Free Add-onStep 1: Go to the Google Workspace marketplaceFollow this link to go to the Google Workspace Marketplace.  Google marketplace Step 2: Search for the Hypatia and create an extensionSearch for Hypatia create (an extension) and click on the first extension that shows up.  Search for the extension Step 3: Install the extensionClick on the “Install” option to start the installation. Sign in and give permission to allow the download like you normally do.  install the extension Step 4: Go to the Insert optionGo to the Google Docs file and open the Hypatia create extension drop-down from the Extension tab. Choose the Insert/Edit Math option from the drop-down. 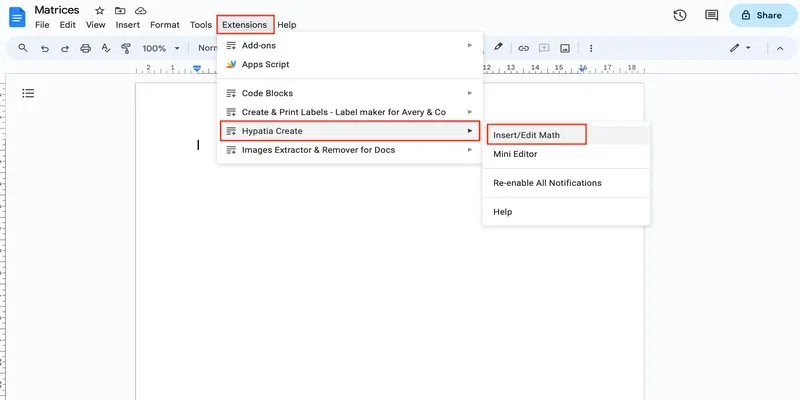 insert/edit math Step 5: Search for the matrixIn the dialog box that opens, click on the search icon present at the bottom right corner and search for matrix. 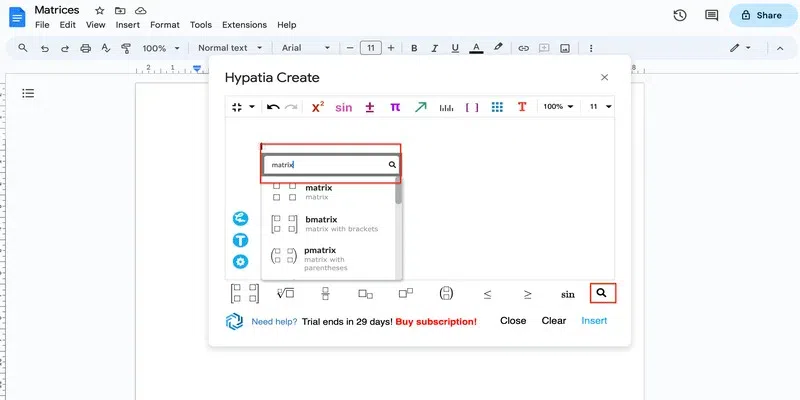 Search for the matrix Step 6: Insert the matrixScroll to see the available matrices and click on the one you wish to insert and click “Insert“. 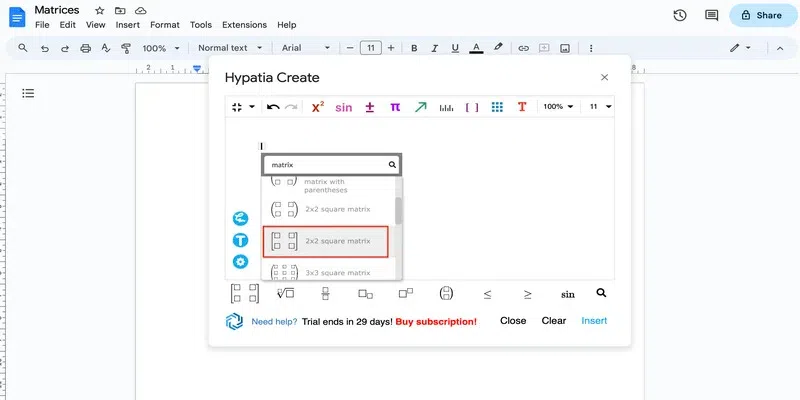 choose and insert the matrix Step 7: Add valuesIn the dialog box itself, you can add the values of the matrix. Use the arrow keys to move between the different indices. 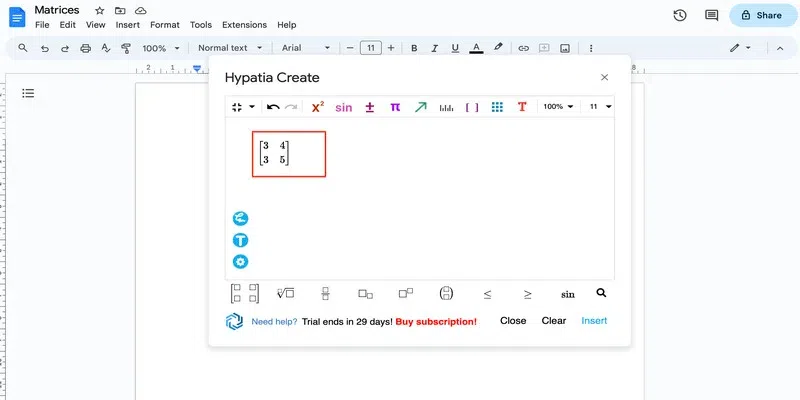 add the values Step 8: Click InsertOnce you are satisfied with the matrix, insert it in the Google Docs using the Insert option present at the bottom right corner. 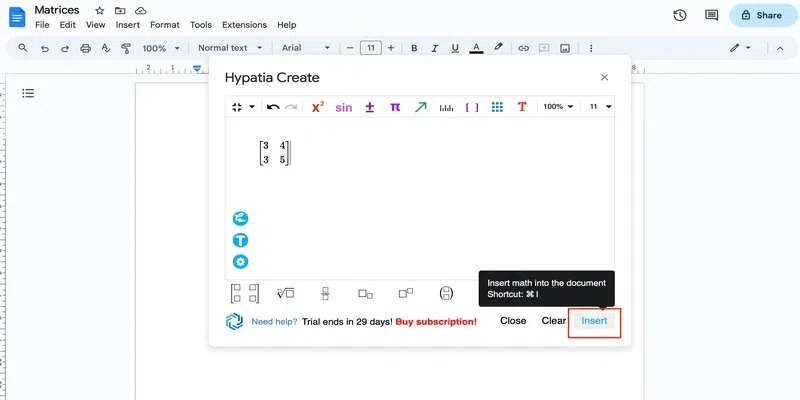 insert the matrix And here you have your matrix: 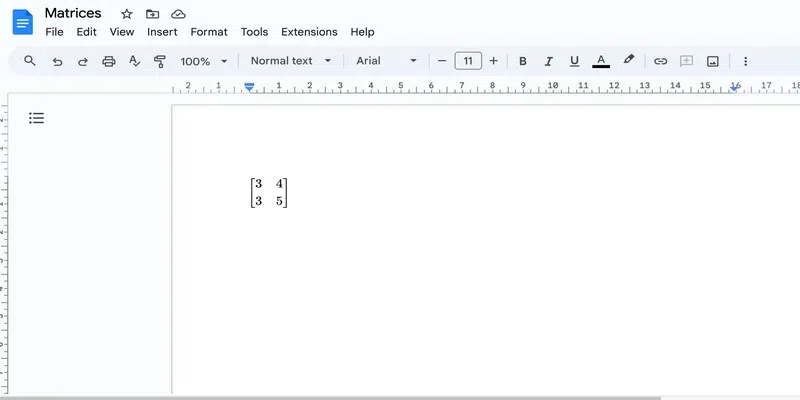 resultant matrix ConclusionIn conclusion, we looked at the different methods in which we can add matrices in Google Docs. Although you can copy and paste a matrix from Google or some other place into your Google Doc, it is not easy to find them as text online. You will see that the matrices are often inserted on the web as an image. So, rather than taking the pain of editing images, you can simply create a matrix of your own using the methods we discussed in this post. It’s just a matter of creating a few matrices and you can then copy-paste the structure for further matrices. How To Insert Matrix In Google Docs – FAQsHow to write a matrix in Google Docs?
How to insert a 3 x 3 matrix in Google Docs?
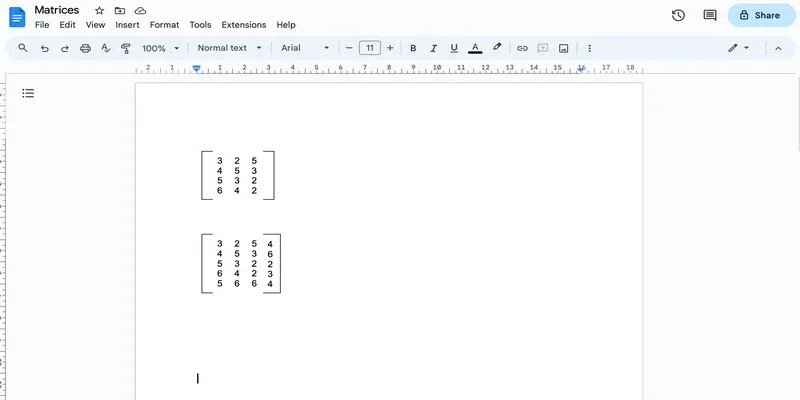
Insert 4 x 3 matrix in Google Docs.
How do you make a Google Matrix?
How is a matrix used in Google?
|
Reffered: https://www.geeksforgeeks.org
| Geeks Premier League |
Type: | Geek |
Category: | Coding |
Sub Category: | Tutorial |
Uploaded by: | Admin |
Views: | 15 |