|
The MERN stack, comprising MongoDB, Express, React, and Node is a powerful combination for building full-stack web applications. In this article, we’ll see how we can create a Summarizer Website using MERN stack.
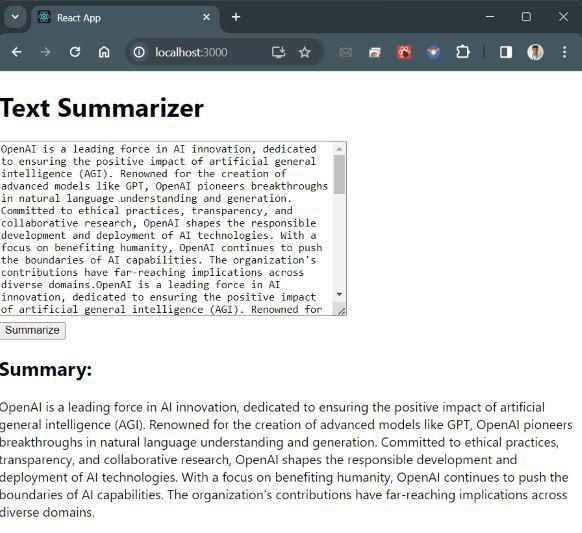
Project Preview: Let us have a look at how the final output will look like.
 Project Preview Pre-requisites:Approach to create Summarizer Website:- Firstly, we need to generate an OpenAI API Key to use OpenAI API.
- Post that, we need to setup our MERN project in any IDE(like Visual Studio Code, etc) of your choice.
- Then we’ll integrate the OpenAI API Key into the application server side codebase.
- Finally we’ll launch our application.
Steps to generate OpenAI API KeyStep 1: Firstly you have to login to OpenAI website.
- Open the OpenAI platform link ( https://beta.openai.com/signup ) on your browser,
- Now, Create a brand new account or login together with your current account,
- After login you need to go to the OpenAI dashboard.
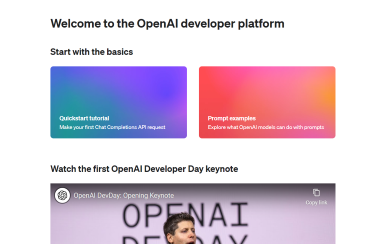 OpenAI Dashboard
Step 2: Generate API Key
Now, hover on the left sidebar and click on ‘API Keys’, there click on ‘+ Create new secrete key’.
Note: Now Save this API Key at safe place, we will require this API Key in future.
Steps to create the projectStep 1: Create your React App and install required dependencies by running the commands below.
npx create-react-app summarizer-app
cd summarizer-app
npm install axios
Step 2: Create a .env file inside the root listing of the React app you just created
REACT_APP_BACKEND_URL=http://localhost:5000
Folder Structure:
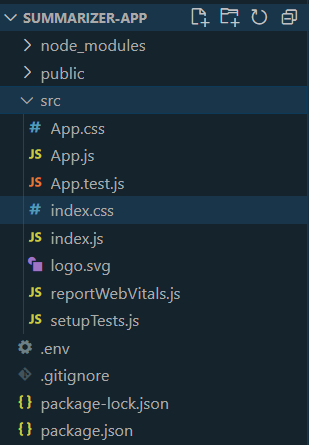 Frontend Folder Structure The updated dependencies in package.json file will look like:
 "dependencies": {
    "@testing-library/jest-dom": "^5.17.0",
    "@testing-library/react": "^13.4.0",
    "@testing-library/user-event": "^13.5.0",
    "axios": "^1.6.3",
    "react": "^18.2.0",
    "react-dom": "^18.2.0",
    "react-scripts": "5.0.1",
    "web-vitals": "^2.1.4"
}
Step 3: To create a simple UI for the summarizer. Enter the below code in src/App.js file:
JavaScript
// src/App.js
import axios from 'axios';
import React, { useState } from 'react';

const App = () => {
  const [inputText, setInputText] = useState('');
  const [summary, setSummary] = useState('');

  const summarizeText = async () => {
    try {
      const response = await axios.post(
        `${process.env.REACT_APP_BACKEND_URL}/api/summarize`,
        { text: inputText }
      );
      setSummary(response.data.summary);
    } catch (error) {
      console.error('Error calling backend API:', error);
    }
  };

  return (
    <div>
      <h1>Text Summarizer</h1>
      <textarea
        rows="10"
        cols="50"
        value={inputText}
        onChange={(e) => setInputText(e.target.value)}
      ></textarea>
      <br />
      <button onClick={summarizeText}>Summarize</button>
      <h2>Summary:</h2>
      <p>{summary}</p>
    </div>
  );
};

export default App;
Step 4: Set up Express Server and install required dependencies
mkdir server
cd server
npm init -y
npm install express axios body-parser dotenv
Step 5: Now create a file with name .env in the server folder and populate it with the under code:
OPENAI_API_KEY=your_openai_api_key
MONGODB_URI=your_mongodb_connection_uri
Replace ‘your_openai_api_key’ and ‘your_mongodb_connection_uri’ with the API Key that we generated above from OpenAI and MongoDB URI respectively.
Folder Structure:
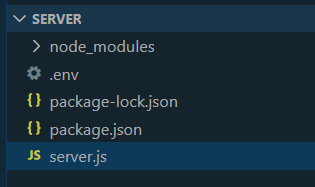 The updated dependencies in package.json file will look like:
"dependencies": {
    "axios": "^1.6.5",
    "body-parser": "^1.20.2",
    "dotenv": "^16.3.1",
    "express": "^4.18.2",
    "mongoose": "^6.1.12",
    "cors": "^2.8.5"
}
Example: Create the ‘server.js’ file in the server directory:
JavaScript
// server/server.js

require("dotenv").config();
const OpenAI = require("openai");
const express = require("express");
const axios = require("axios");
const bodyParser = require("body-parser");
const mongoose = require("mongoose");
const cors = require("cors");

const app = express();
const PORT = process.env.PORT || 5000;

app.use(bodyParser.json());

app.use(cors());

const OPENAI_API_KEY = process.env.OPENAI_API_KEY;

// Connect to MongoDB
mongoose.connect(process.env.MONGODB_URI, {
    useNewUrlParser: true,
    useUnifiedTopology: true,
});

// Define a schema for summaries
const summarySchema = new mongoose.Schema({
    text: String,
    summarizedText: String,
});

// Define a model for the schema
const Summary = mongoose.model("Summary", summarySchema);

app.post("/api/summarize", async (req, res) => {
    const { text } = req.body;

    const openai = new OpenAI({
        apiKey: OPENAI_API_KEY,
    });

    try {
        const response = await openai.chat.completions.create({
            model: "gpt-3.5-turbo",
            messages: [
                {
                    role: "system",
                    content:
                        `Summarize content you are provided with
                         for a second-grade student.`,
                },
                {
                    role: "user",
                    content: text,
                },
            ],
            temperature: 0.7,
            max_tokens: 64,
            top_p: 1,
        });

        const summarizedText = String(response.choices[0].message.content);

        // Save the summary to MongoDB
        const newSummary = new Summary({ text, summarizedText });
        await newSummary.save();

        res.json({ summary: summarizedText });
    } catch (error) {
        console.error("Error calling OpenAI API:", error);
        res.status(500).json({ error: "Internal Server Error" });
    }
});

app.listen(PORT, () => {
    console.log(`Server is running on port ${PORT}`);
});
Step 6: Start the Development Servers
In one terminal window, navigate to the server directory and start the Express server by entering the below command in the terminal:
cd server
node server.js
In another terminal window, navigate to the root directory of your React app and start the React development server by entering the below command in the terminal:
cd summarizer-app
npm start
Output:
Visit http://localhost:3000 in your browser to see the summarizer website.
|