|
|
In the given article we will learn via demonstration how to use Azure DevOps, its concept, primary technologies and step-by-step process with proper examples including diagrams and screenshots for better understanding. Followed by some FAQ’s with solutions. In simple words, The concept of Azure DevOps is based on Software as a service (SaaS) which aims to reduce human efforts by automating the development and testing of an application. DevOps is not just a role, job title, methodology, or piece of software. DevOps is a field that takes skills from Development and Operations to create and run applications more effectively. Azure DevOps is a comprehensive platform that encompasses various primary technologies and services to support the software development lifecycle. These technologies include:
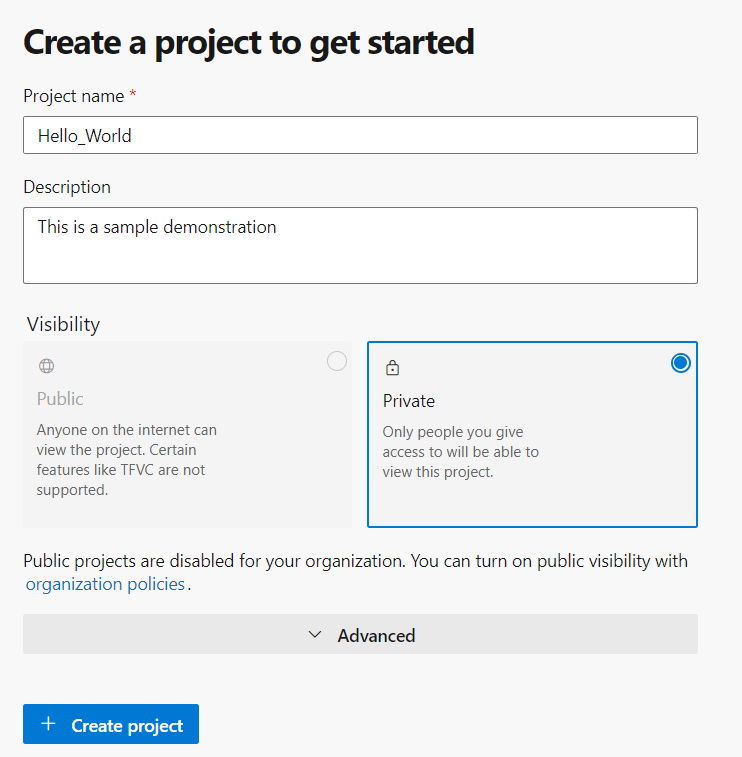
How to Use Azure DevOpsNow we’ll see via demonstration, how we actually use Azure DevOps step-by-step process from scratch by considering a simple html code. Assuming we have successfully created a free Azure DevOps account. Step 1: After creating a free Azure DevOps account for free, create a project to get started.
Step 2: After creating project we can see the primary technologies on the left bar as we have discussed. We go the repos to add the code/application to the Azure DevOps via multiple options such as shown below.
For the demonstration we are considering a single page HTML as an application to proceed and get more insights about the DevOps rather than focusing on the application. Step 3: After importing the code, it will reflect into the repos section as follows:
Step 4: Now we head onto the boards section, Here we can add a new task in New work item section. For example we want to add contact us page, so we add it as a task with suitable description and save it.
Now under the boards, we get 3 columns, where we can maintain our issue and slide it to “doing” & “done” section as per progress. Step 5: In the repos file, we can have a track over the branches to the master with the implemented changes that were given as task which can be reviewed and merge to the master , and in the commit section we can see the timestamped changes. Step 6: Once we have integrated everything and done with the coding part then we can create a pipeline which will push this piece of code which will actually reach out to the user. First we connect our final code,
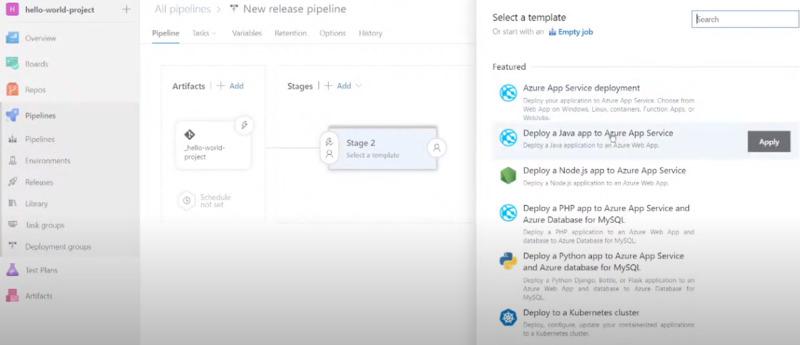
Afterwards we select then configure the code and then we review before final save & run. This is how we create a pipeline and the job is queued now.To release the pipeline, we go to the releases under pipelines section, click on new pipeline then add an Artifacts and select the project as follows:
After that we options to add stage where we can use multiple features like Azure App Service deployment and many other as follows:
Step 7: Test Plans- It is not included with the free account, with the use of it we can do the actual browser testing which is available by the Microsoft Azure. Step 8: Artifacts- Suppose we have our own piece of code which we want to integrate, we go to “connect to feed” from there we add our piece of code to the azure project we are dealing with. As follows:
That was all for the work flow done in step by step in Microsoft Azure DevOps handling both development and operational parts. Frequently Asked Questions (FAQs)1. How does Azure Pipelines support CI/CD?
2. What is the difference between Azure DevOps Services and Azure DevOps Server?
3. How can I integrate third-party tools with Azure DevOps?
4. What is the pricing model for Azure DevOps?
5. What is Azure Repos, and how does it handle version control?
|


Reffered: https://www.geeksforgeeks.org
| Microsoft Azure |
Type: | Geek |
Category: | Coding |
Sub Category: | Tutorial |
Uploaded by: | Admin |
Views: | 11 |