|
|
Google Docs is renowned for its user-friendly interface and seamless document creation capabilities. Yet, when it comes to certain advanced formatting features, such as adding a comprehensive page border, some users might encounter a few limitations. Unlike more robust word processors like Microsoft Word, Google Docs doesn’t offer a direct, built-in option for creating page borders. However, this doesn’t mean you’re left without a solution. In this article, we’ll delve into the art of adding borders to your Google Docs documents, even though it’s not a native feature. With a clever workaround, you can achieve the polished and professional look of a bordered document. So, let’s unlock the hidden potential of Google Docs and learn how to enhance your documents with stylish borders.
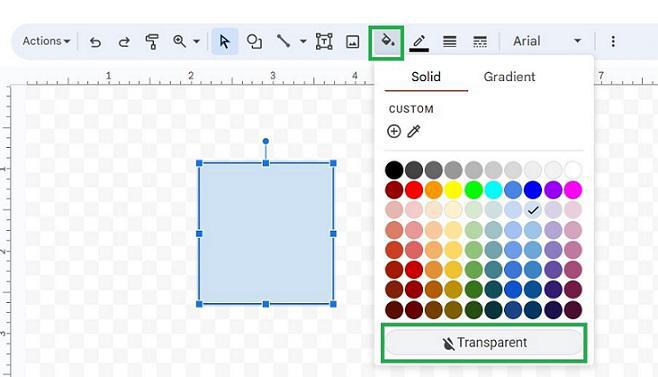
What are Borders in Google DocsThe border of a page is a representation of the outer edge of the page in a document. The Border can be a thin or thick line of the desired width with the desired color. Borders can be in any style such as solid plain style, dotted form, dashed form, and many more. Borders can not only be placed on the page. It can also be added around a particular paragraph or image. It is basically used to bring more attention and attraction to the page visually. Important paragraphs and images can be added with borders to grab the attention of viewers of the document. How to Add a Border in Google Docs using DrawingStep 1: Launch Google DocsOpen Google Docs in your web browser. Step 2: Open Google DocumentOpen the document to which you need to add a border. 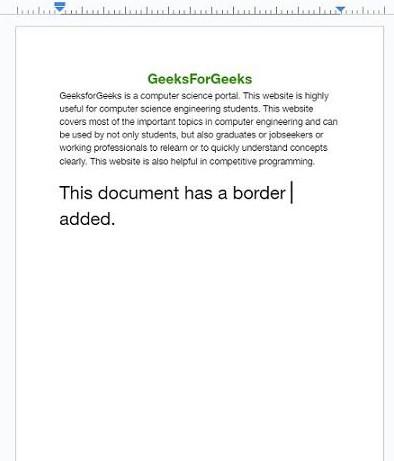 Open the Document Step 3: Go to Insert, Select Drawing, and Click on NewNavigate to the menu bar in your Google Doc, click on “Insert,” and then choose “Drawings” from the dropdown menu. Afterward, select “New. 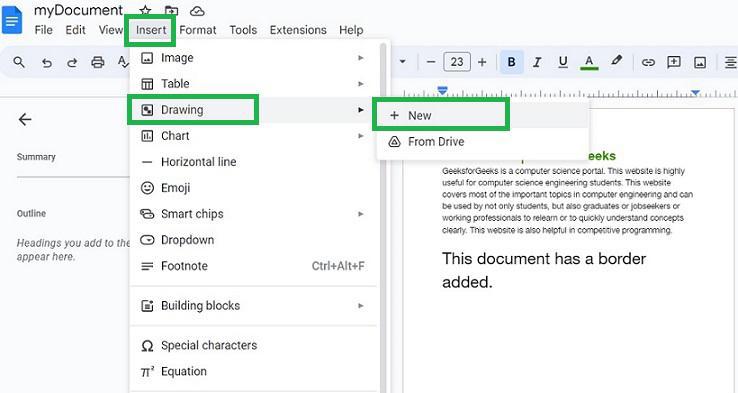 Insert -> Drawing ->New Step 4: Start Drawing in Google DrawingOnce you’ve clicked the “New” button, Google Drawing will open, allowing you to start your drawing. Step 5: Click on the Shape Icon and Select RectangleNext, open the Toolbox and select the rectangle shape icon. Choose the first rectangle in the sub-menu that appears.  Select shape Icon -> Select Rectangle Step 6: Draw a Medium Size RectangleAfterward, when you draw, a tooltip in the shape of a plus sign (+) will appear. Use this tool to draw a rectangle of your preferred size, specifically a medium-sized one. 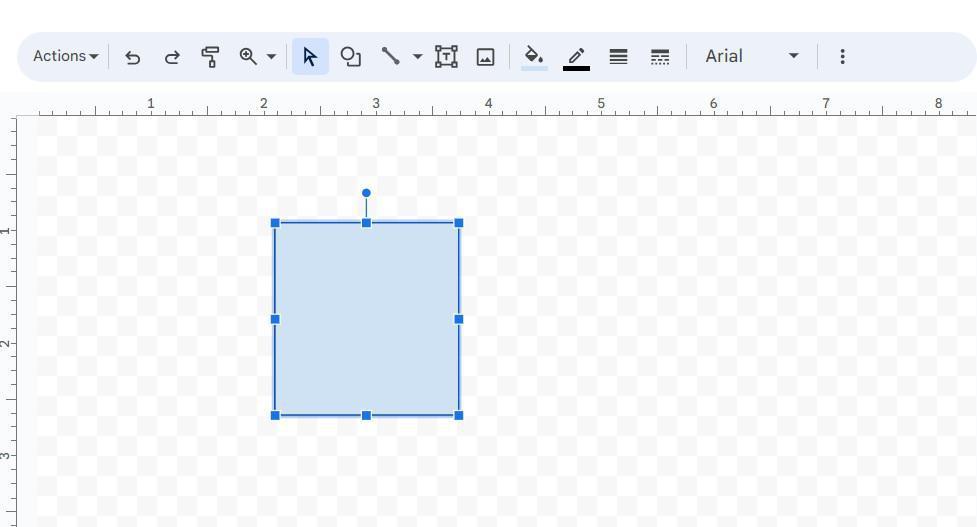 Draw a Medium Sized Rectangle Step 7: Remove the Default Fill Color from RectangleAt this stage, you’ll notice that the newly created rectangle comes with a default black border and a blue fill. To eliminate the fill color, just click on the “Color Fill” icon in the toolbar. Step 8: Click on TransparentOnce you’ve clicked on the color box icon, a dropdown menu will appear. From this menu, choose the “Transparent” option.
Step 9: Preview the Changes in the RectangleNow you will notice that your rectangle will become transparent. 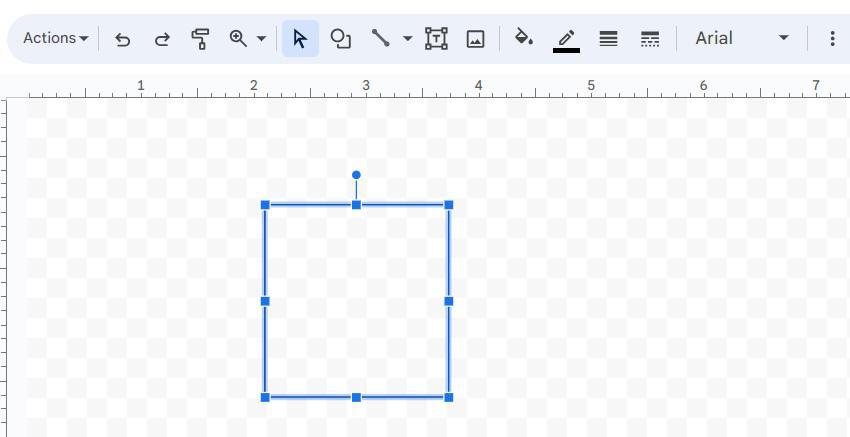 Preview the Changes in the Rectangle Step 10: Customize your BorderTo customize your border, go to the top toolbar and click on the “Border Weight” icon, as shown in the image below. Then, choose your preferred border size. 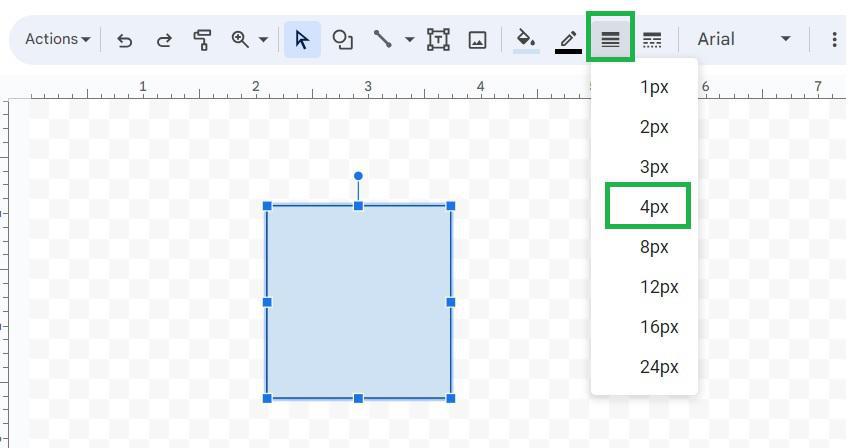 Customize your Border Step 11: Click Save and CloseNow, the border weight has been adjusted according to your selected preference. To save your changes, click on the “Save and close” button located in the top-right corner of the Drawing dialog box. 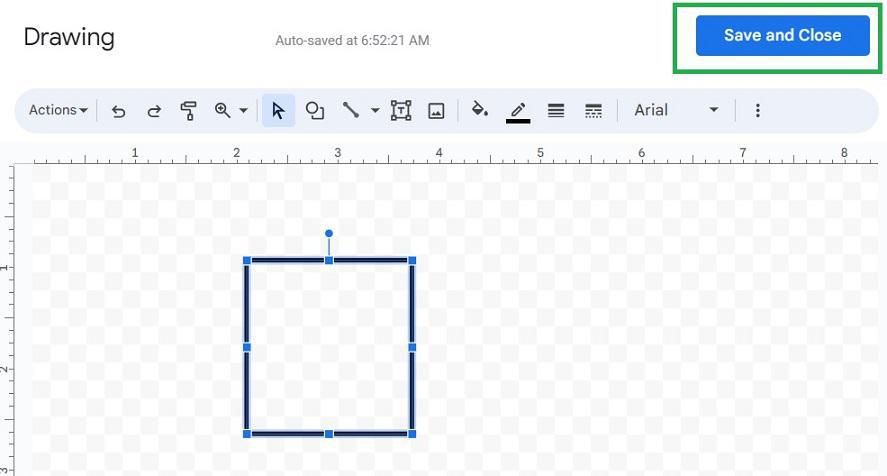 Click Save and Close Step 12: Preview Rectangle Shape in Google DocumentNow the rectangle shape is added to the document’s top left corner.
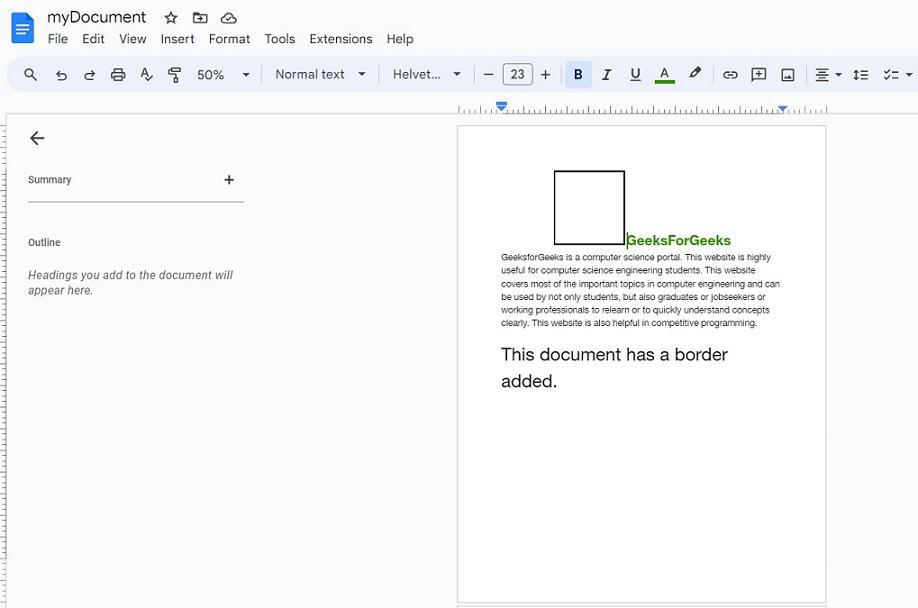 Preview Rectangle Shape Step 13: Select the Rectangle and Choose OptionsClick on the rectangle, and a set of image options will appear just beneath it. Opt for “Behind text” to ensure that the page’s content remains visible and is not obscured by the rectangle or its border. 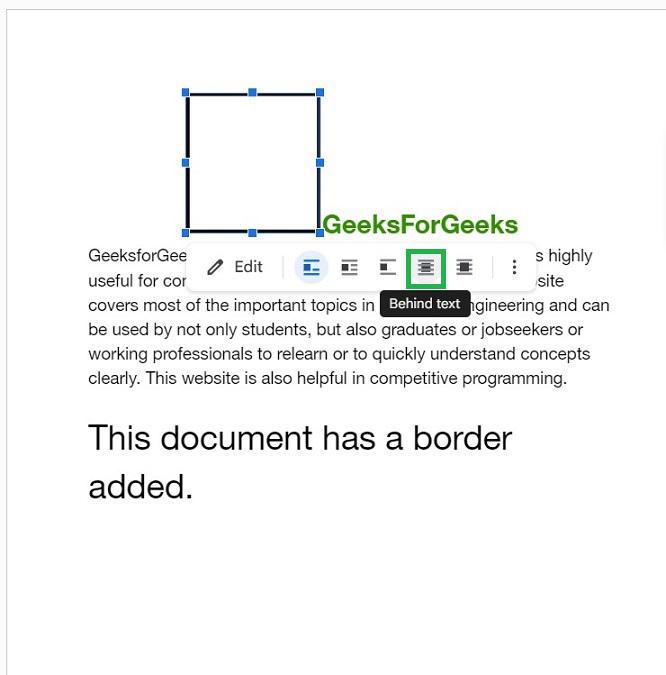 Select the Rectangle and Choose options Step 14: Preview the Rectangle Behind the TextNow the rectangle will be visible behind the text in your Google Document. 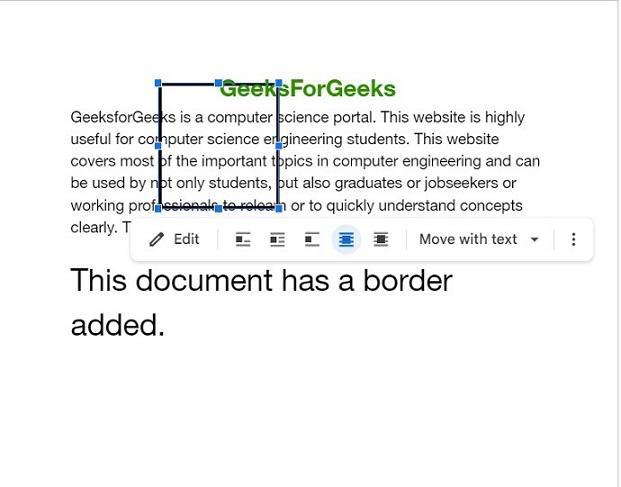 Rectangle behind the Text Step 15: Change the Rectangle Fix Position on the PageSelect “Fix position on page” in the rectangle’s image options to adjust the border’s position as you like. This keeps the content inside the border and the border in a fixed position. 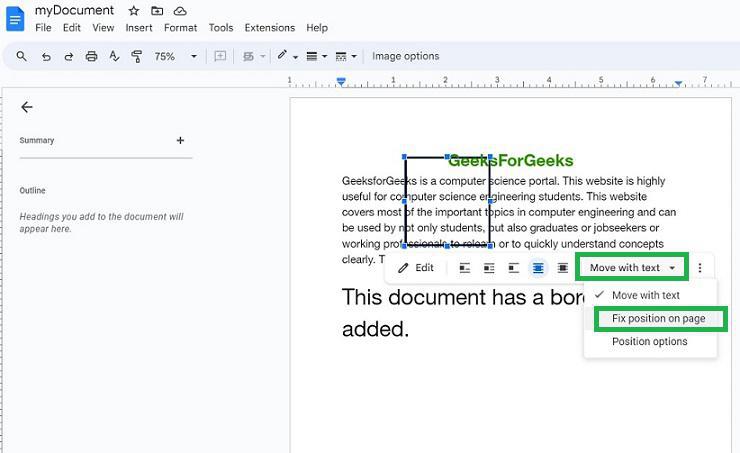 Change the rectangle fix on page Step 16: Extend the Rectangle to Create a Page Border EffectNow stretch the rectangle shape to make it look like a border on the page. Step 17: Preview the Border around the PageThe document now includes a border effectively. 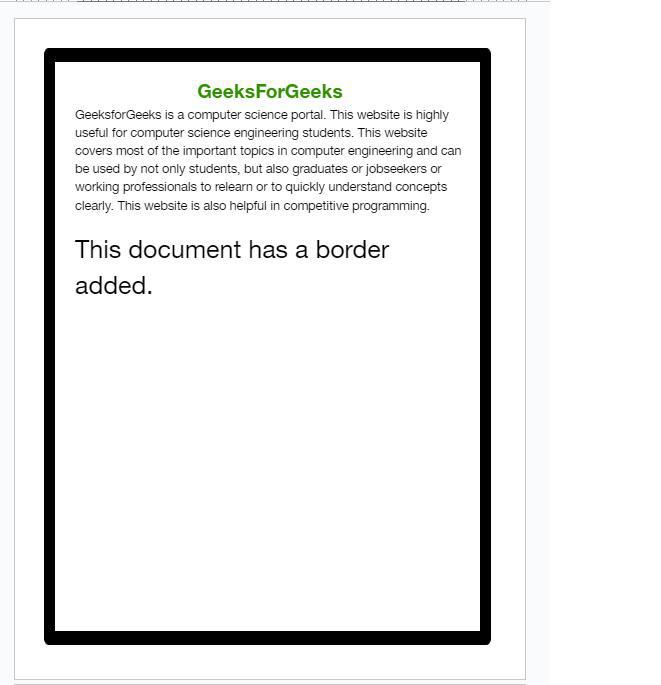 Border added successfully How to add a border in Google Docs using a table
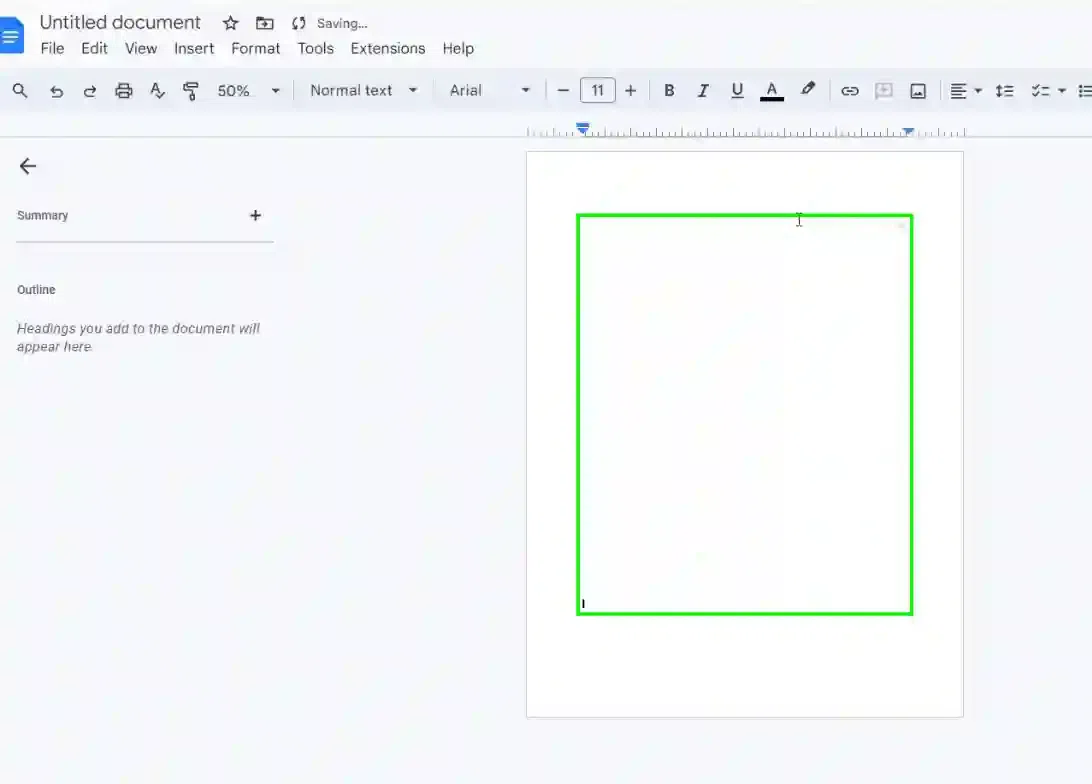
Step 1: Open Google DocumentCreate a new Google Docs document. A blank window will appear in Google Docs. Now, let’s swiftly apply a border to this document and then proceed to add content within it. Step 2: Go to Insert, Select Table, and Select 1×1 TableNavigate to the “Insert” tab located in the menu bar within Google Docs. From the dropdown menu that appears, Select table with dimensions set to 1 by 1, signifying a single-cell table. 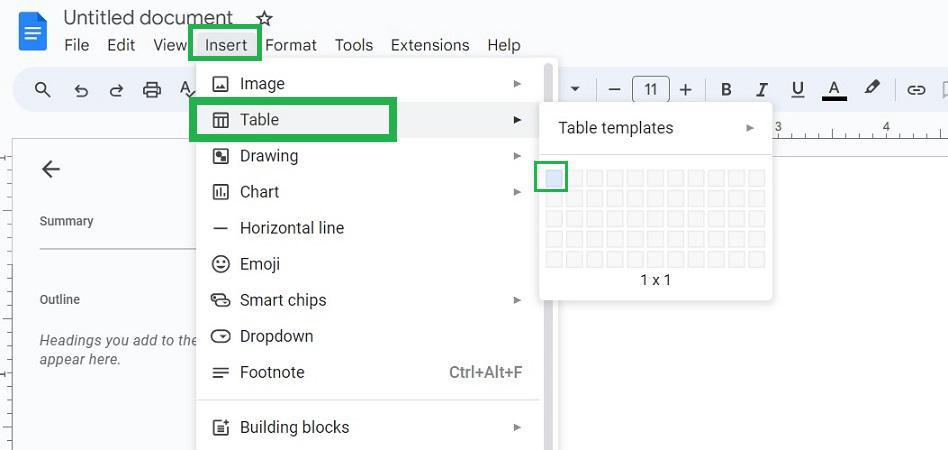 Select Insert -> Table Step 3: Preview the DocumentNow a single cell table has been added to the document. 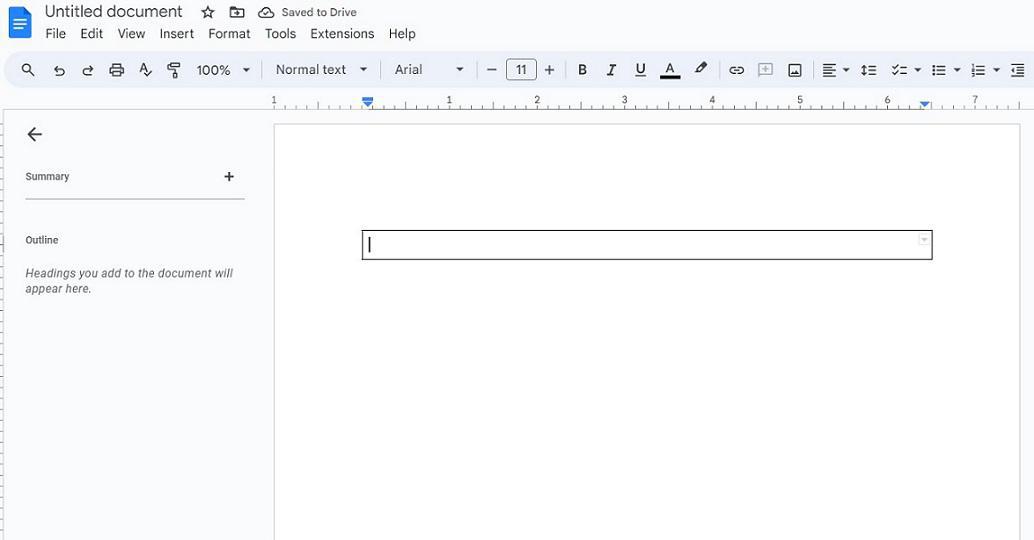 Single-cell Added Step 4: Go to Format, Select Table and Click Table PropertiesYou can modify the border width and border color. To do so, position the cursor inside the cell and Click on the “Format” tab within the menu bar. In the dropdown menu, choose “Table,” and then, select “Table properties.” 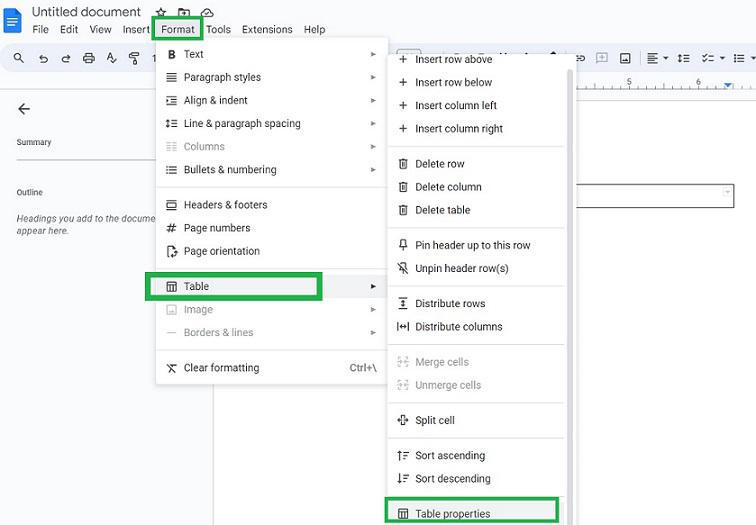 Click Format -> Table -> Table Properties Step 5: Preview Table PropertiesA section appears to the right side of the page. From there, we can customize the border color and border width of this single-cell table. 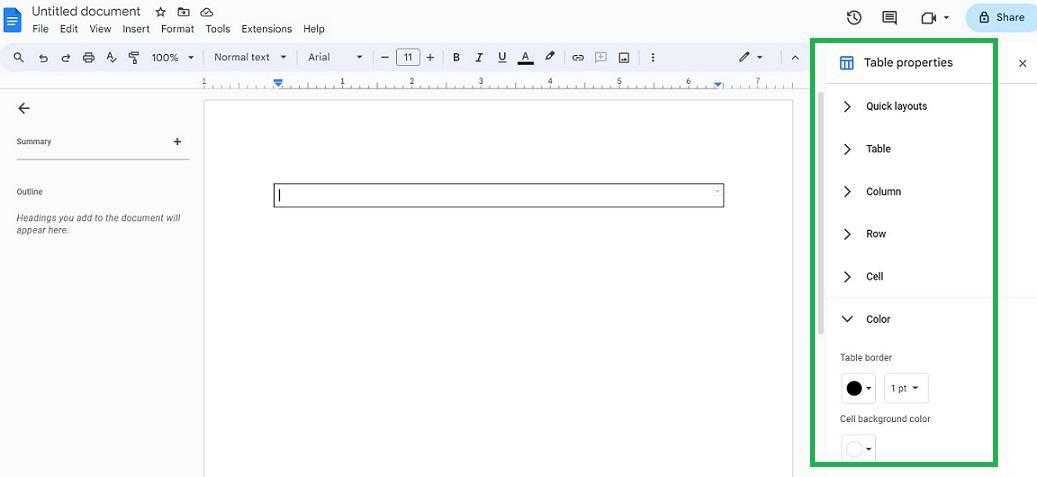 Table Properties Step 6: Change the Border ColorWithin the “Color” section, you have the capability to alter the border color. (In this instance, we are adjusting the border color to green). .png) Border color changed Step 7: Expand the Table WidthSelect the border width according to your preference from the available dropdown options, as shown in the image below (in this case, the border width is configured to 4.5 pt). .webp) Change border width Step 8: Expand the CellAfter Changing the color and Width of the cell, Expand this single cell to achieve a border-like appearance. 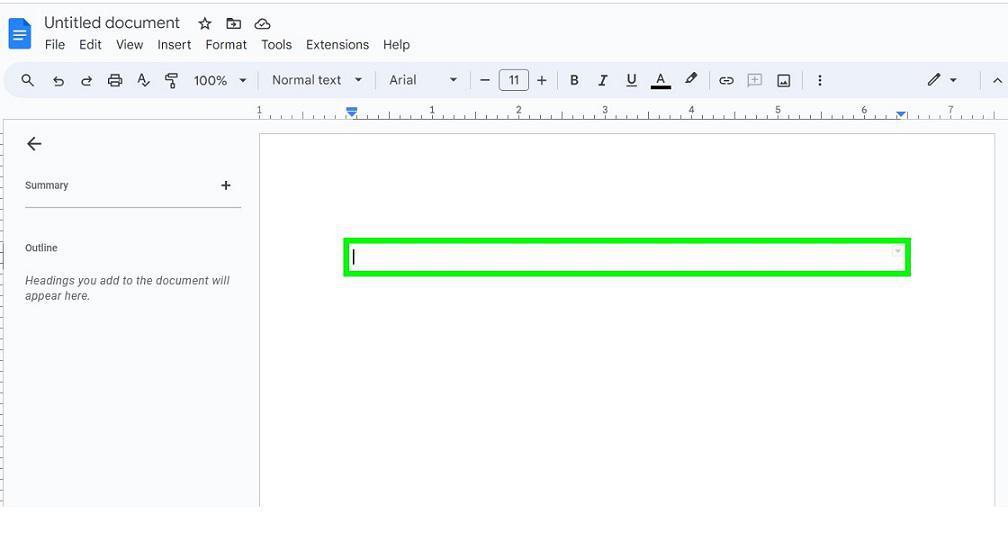 Stretch the Cell Step 9: Expand it to Full PagePosition the cursor inside this cell and use the “Enter” key on the keyboard to increase the cell’s height. Continue pressing it until the cell reaches the bottom of the current page.
 Expand the page Step 10: Preview the DocumentNow border has been added to the document. 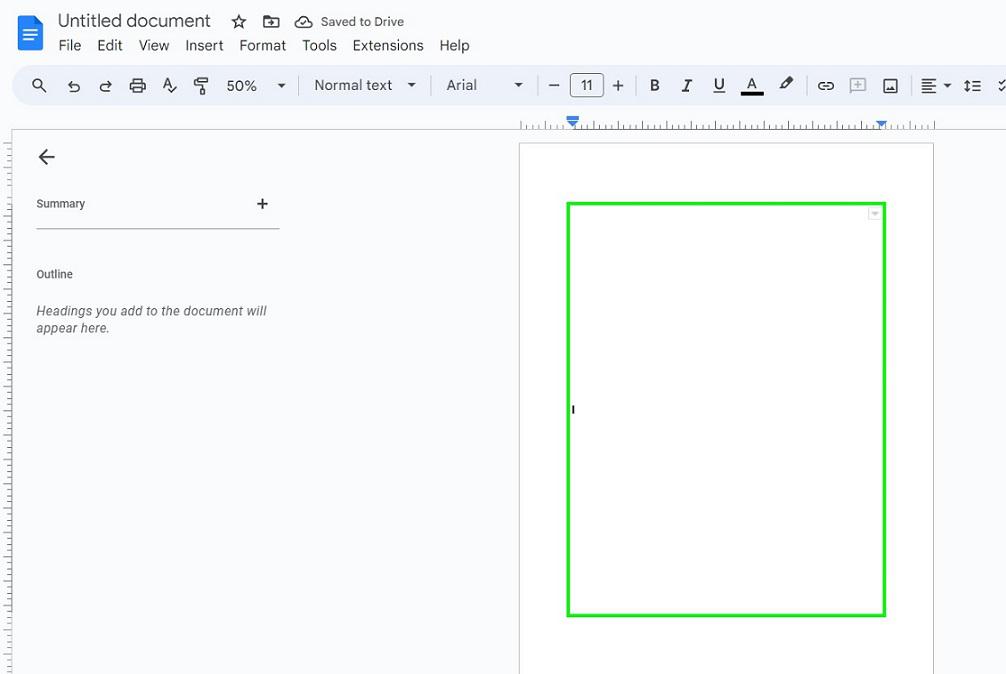 Border added Step 11: Add ContentNow we can include the content within this border. After inputting some text, the document, complete with the newly added border, appears as follows. The border has been successfully added in Google Docs. 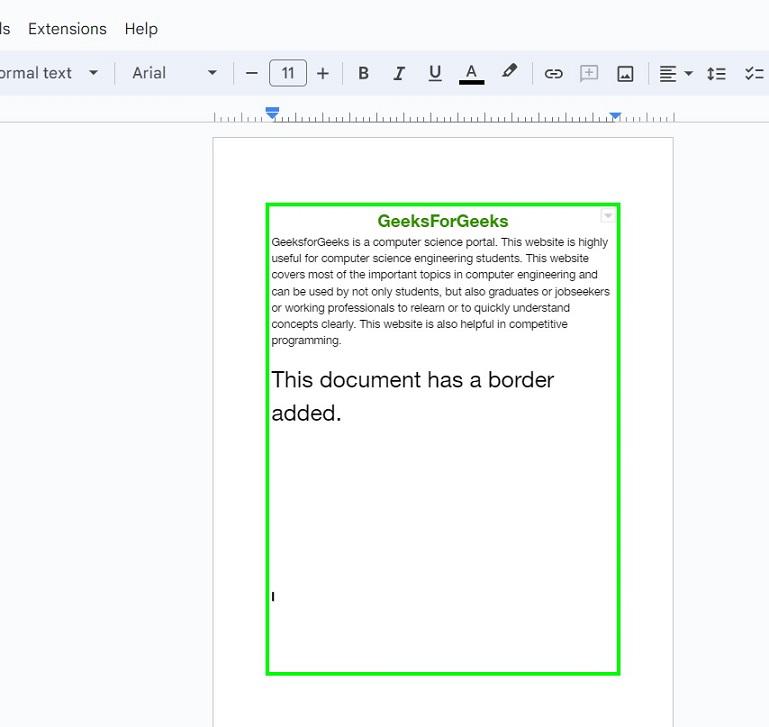 Content added to the document after adding border How to Add Borders in Google Docs Around a ParagraphStep 1: Open Google DocumentOpen the document in Google Docs and select the paragraph around which you need to add a border.  Paragraphs selected in the document opened in Google Docs Step 2: Go to Format and Select Paragraph StylesSelect ‘Format’ in the menu bar. A dropdown appears, select ‘Paragraph styles‘. Another sub dropdown opens. Select ‘Borders and Shading’. 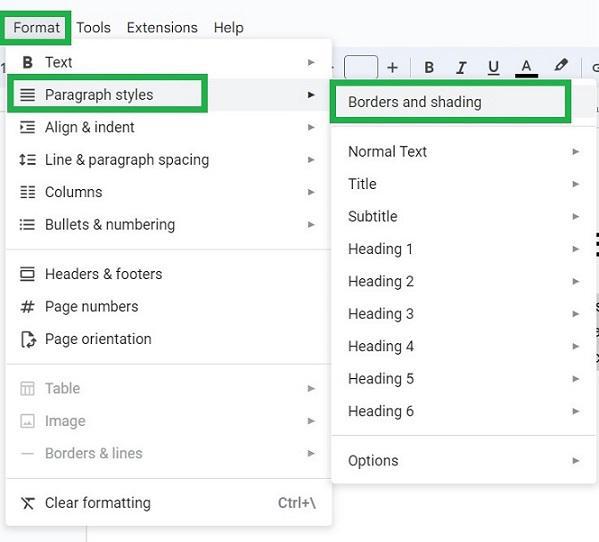 Format -> paragraph styles ->Borders and Shading Step 3: Edit Border WidthA dialog box will appear. Choose your preferred border width. By default, the border width is set at 0pt. (In the below image, we are choosing the border width to 3pt). 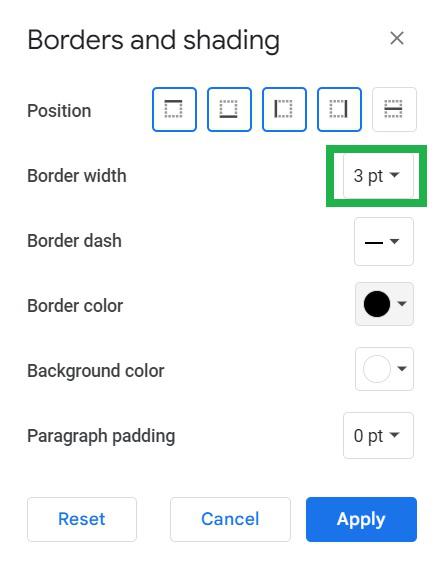 Select border width in this dialog box Step 4: Select the Border StyleChoose the border style you want to apply.
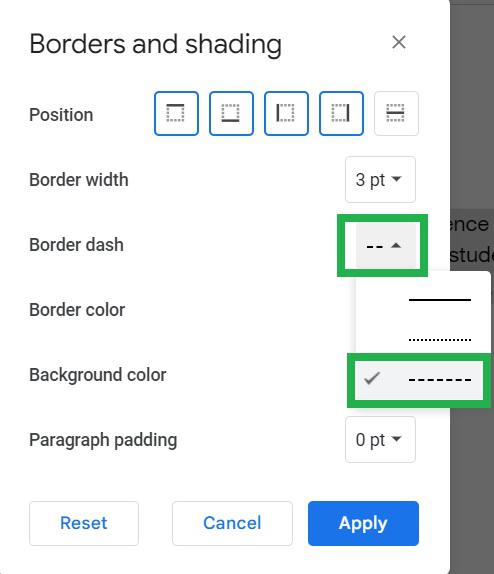 Select border dash Step 5: Choose the Border ColorClick on “border color,” and a dropdown menu will appear. You can select a color from the 80 available options or choose a custom color using a HEX color code. The default border color is black. 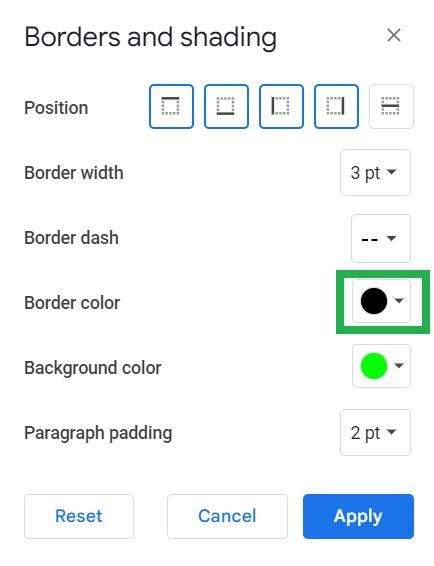 Select border-color Step 6: Choose the Background ColorClick on “background color,” and a dropdown menu will appear. You can select a color from the 80 available options or choose a custom color using a HEX color code. The default background color is white. In this case, we are selecting the color green. 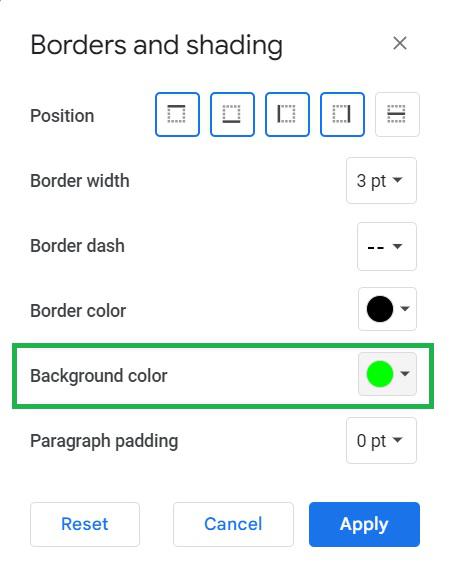 Select background color Step 7: Select the Paragraph PaddingIt is possible to set padding of the paragraph around the border. By default, it is 0. Here we are setting to 2pt. 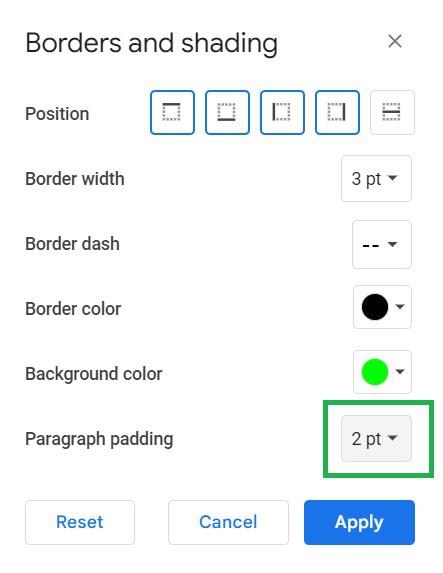 Select paragraph padding for border Step 8: Change the Border PositionYou have the option to choose where the border should be positioned. You can decide whether the border should encompass all four sides (top, left, right, bottom) or a specific position. By default, all four sides are selected. 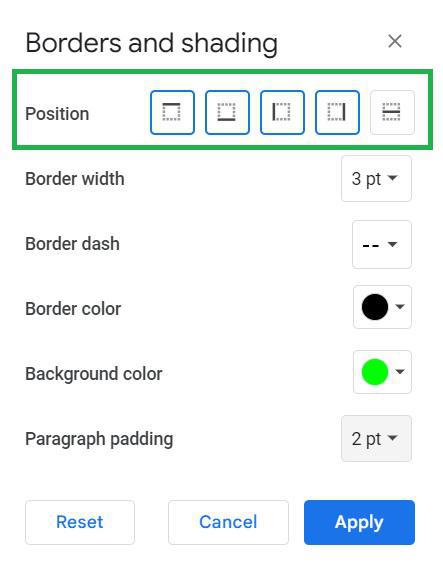 choose border position Step 9: Click ApplyPress the ‘Apply’ button located at the bottom of the dialog box.
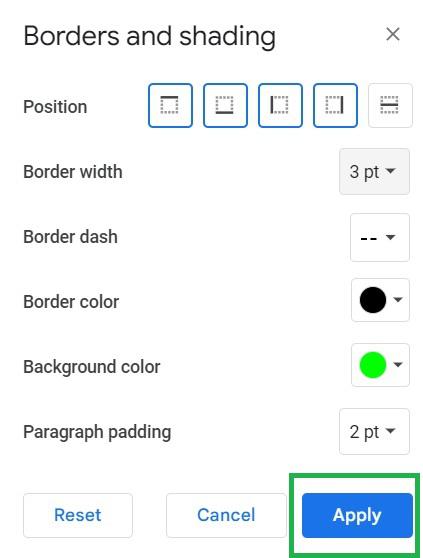 Click Apply at the bottom of the dialog box Step 10: Preview the ParagraphNow border is added around the selected paragraph with the desired border settings successfully. 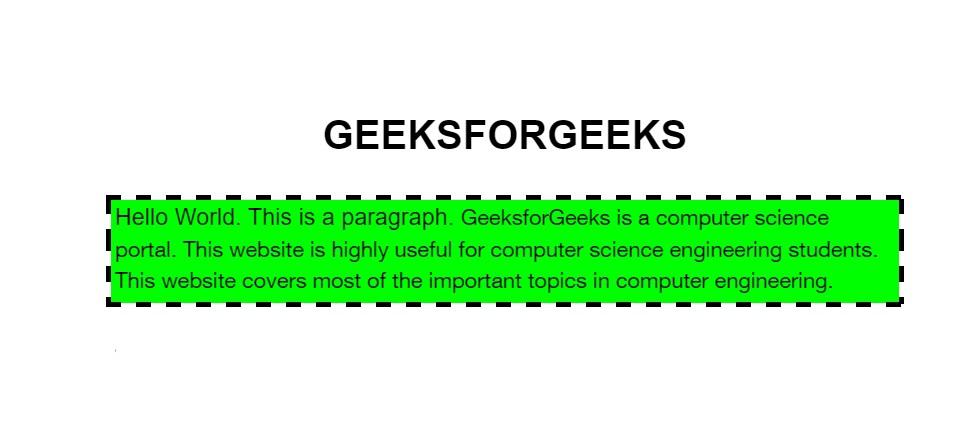 Border added around paragraph How to Add Border Around an Image in Google DocsStep 1: Open the Google DocumentOpen the document in Google Docs to which you need to add a border around an image.  Document opened Step 2: Select the ImageSelect the image in the document in Google Docs. 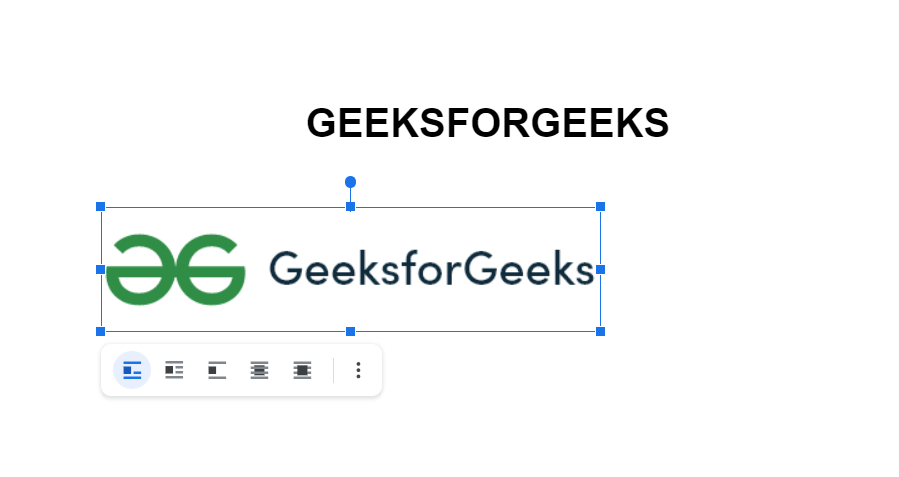 Select the image to surround with a border Step 3: Go to the Image options that Appear in the ToolbarOn selecting the image in the document around which the border has to be added, a list of image options appears in the toolbar of Google Docs. 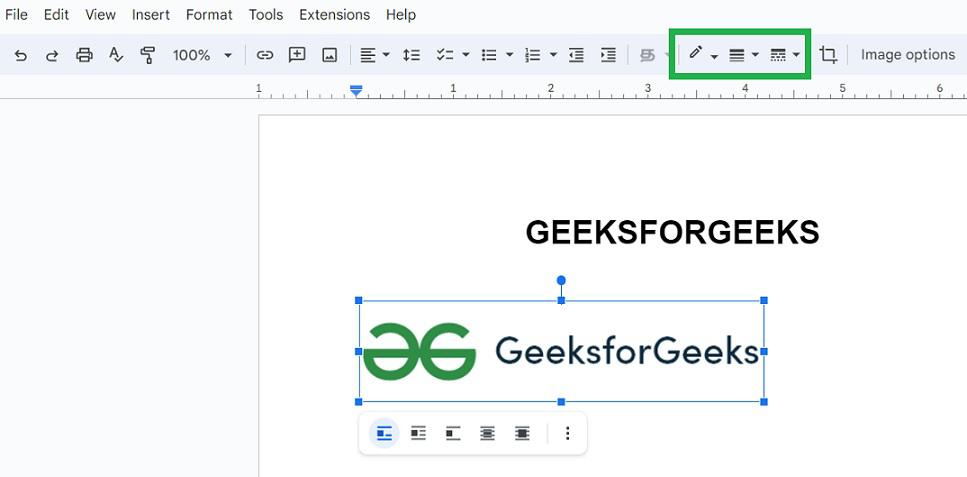 Image options appear in tool bar Step 4: Choose Border ColorSelect a border color by clicking on the border color icon. Here, we are opting for green as the border color from the dropdown menu. 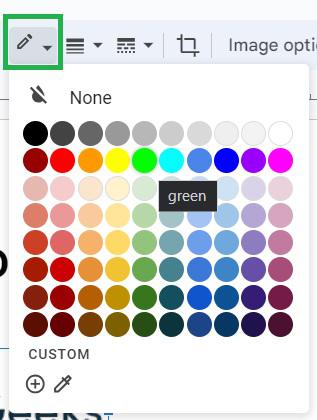 choose border-color Step 5: Choose Border WidthPick a border width by clicking on the border width icon. Here, we are selecting 4pt as the border width from the dropdown menu. 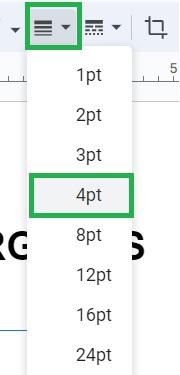 choose border width Step 6: Choose Border StyleSelect a border dash style by clicking on the border dash icon. Here we are choosing dotted as border dash from the dropdown.
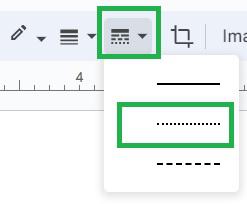 choose border dash Step 7: Preview the ImageA border with a green color and a dotted border dash has now been applied around the selected image within the Google Docs document.  Border added around the image ConclusionIn this article, we have discussed how to insert a border into Google Docs. Although there is no direct way to add a border to Google Docs, alternative methods are available to achieve this. Borders can be added using the Drawing tool, allowing you to incorporate them after the content has been typed into the document. Another method involves inserting a single-cell table, which offers a quicker way to add a border; however, the initial step involves adding the border to the document first. Once the border is added, the content can then be placed inside it. Additionally, we have explored how to add borders around paragraphs and images, a task that can be accomplished swiftly in Google Docs. FAQs – Add a Border in Google DocsHow to add a decorative border in Google Docs?
Does Google Docs have decorative borders?
|
Reffered: https://www.geeksforgeeks.org
| Google Workspace |
| Related |
|---|
| |
| |
| |
| |
Type: | Geek |
Category: | Coding |
Sub Category: | Tutorial |
Uploaded by: | Admin |
Views: | 16 |