|
The Feedback Collection System includes operations such as collecting feedback from end users, displaying the feedback on the dashboard, and providing feedback categorization and analysis. In this article, we will learn about the Feedback Collection System. This Spring Boot web application primarily handles feedback data. Through the application, we can collect feedback along with various user information. Once the data is saved into MongoDB, a confirmation alert is displayed, and an alert message is shown for errors occurring while submitting the feedback. After that, we design a dashboard page to display all feedback information in a table format and perform feedback categorization and analysis.
Feedback Data:In this Feedback Collection System Application, we collected Feedback data with different fields like,
- Username
- Email address
- Category of feedback
- Product feedback
- Customer feedback
- Review feedback
- Others
- Feedback message
- Time and Date of feedback
Through this application, we focus on collecting feedback from end users. On successful submission of feedback, an alert message is displayed. Similarly, an alert message is shown for any errors encountered while submitting the feedback. Below, we provide the entire logic for your reference. In the Feedback Collection System, we have used the Bootstrap framework for responsive web design and employed models. The Bootstrap modal is used for dynamic HTML content.
Prerequisites:To understand this Feedback Collection System application, you need basic knowledge of below technologies:
- Spring Boot
- Thymeleaf
- MongoDB
- Other Spring MVC Patterns
- Bootstrap Framework
The Spring Boot is used for creating web applications with MVC pattern. Thymeleaf is used for generating dynamic HTML content in the web pages as well and the main purpose is integrating the HTML pages with Spring framework, and MongoDB is used for Data Storage.
Requirements:- Spring Boot
- Java
- Thymeleaf ( reference )
- MongoDB
- Bootstrap
- Knowledge about Spring MVC
- Gradle
- Spring Tool Suite IDE
Project Steps:- Create a Spring Stater Project (reference).
- Create packages for controller, POJO, repository in main application package.
- Now, implement the Controller layer code, after that POJO class and other one interface also we need to implement.
- Once completed, the back-end functionalities, then develop the Front-End web pages.
- After that, integrate both Back-End and Front-End by using Thymeleaf.
- After that, run the entire project as Spring Boot App (reference).
Project DependenciesGradle Dependencies:
dependencies {
    implementation 'org.springframework.boot:spring-boot-starter-data-mongodb'
    implementation 'org.springframework.boot:spring-boot-starter-thymeleaf'
    implementation 'org.springframework.boot:spring-boot-starter-web'
    compileOnly 'org.projectlombok:lombok'
    developmentOnly 'org.springframework.boot:spring-boot-devtools'
    annotationProcessor 'org.projectlombok:lombok'
    testImplementation 'org.springframework.boot:spring-boot-starter-test'
    testRuntimeOnly 'org.junit.platform:junit-platform-launcher'
}
Note: These Project Dependencies are available in build.gradle file once project is created. For this project, we have used these dependencies.
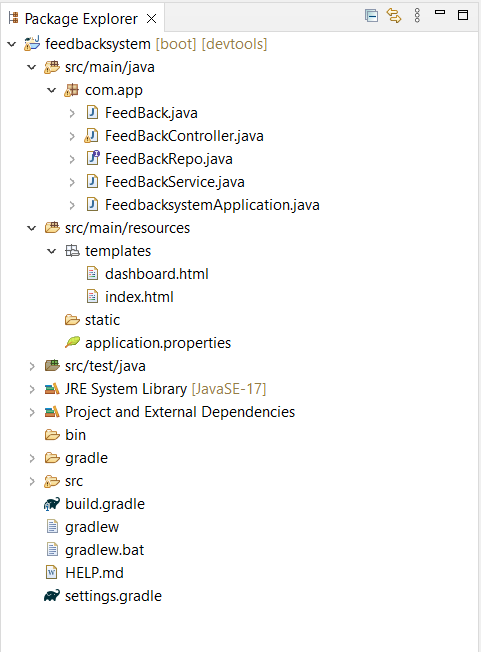
Project Folder Structure:After setting all metadata, the project structure will be like the below image:
Implementation of Feedback Collection System using Spring BootFirst, we create a Spring Starter Project using the dependencies mentioned above. Once the project is created, we develop the logic in different layers following the Spring MVC pattern. Below, we provide the related application development logic.
Database Connection:In Spring Boot, there is a file called application.properties that is used for database connection in this project. In this project, we used MongoDB. Based on that, we wrote some properties in this file for database connection. We also configured Thymeleaf in this file.
- host: localhost
- port: 27017
- database name: feeedbackdb
spring.application.name=feedbacksystem

# database properties
spring.data.mongodb.host=localhost
spring.data.mongodb.port=27017
spring.data.mongodb.database=feedbackdb

# thymeleaf configuration
spring.thymeleaf.prefix=classpath:/templates/
spring.thymeleaf.suffix=.html
Model LayerOnce the database connection was completed, we created a POJO or Domain class in the main package of the project folder named FeedBack. In this class, we defined some fields to gather feedback information from the end user, and we used Lombok for setters, getters, and other data handling purposes while performing database operations. You can observe all these details in the Java code below.
FeedBack.java:
Java
package com.app;

import java.time.LocalDateTime;

import org.springframework.data.annotation.Id;
import org.springframework.data.mongodb.core.mapping.Document;

import lombok.AllArgsConstructor;
import lombok.Data;
import lombok.NoArgsConstructor;

@AllArgsConstructor
@NoArgsConstructor
@Data
@Document(collection = "feedbackdata")
public class FeedBack {

    @Id
    private String id;

    private String fullName;
    private String email;
    private String category;
    private String message;
    private LocalDateTime date;
}
View LayerGenerally, the HTML, JSP, and other front-end technologies fall under the View layer in Spring MVC. For this Feedback Collection System, we used HTML as a View for displaying the data to end users with the help of Thymeleaf. In this HTML page, we created four dynamic forms for handling the application from the front end. Each page performs a unique operation based on its use.
index.html:Here we created a responsive home page to collect feedback from the end user. On this page, we provide a navbar for navigation and a button in the navbar to redirect to the dashboard page with a unique design featuring color coding. Additionally, we designed a form for collecting information. We used Bootstrap for responsive design and Thymeleaf for rendering dynamic data. Below, we provide the output image for your understanding.
HTML
<!DOCTYPE html>
<html xmlns:th="http://www.thymeleaf.org">

<head>
    <link href="https://cdn.jsdelivr.net/npm/[email protected]/dist/css/bootstrap.min.css" rel="stylesheet">
    <link rel="stylesheet" href="https://cdnjs.cloudflare.com/ajax/libs/font-awesome/4.7.0/css/font-awesome.css">
    <link rel="shortcut icon" href="https://cdn-icons-png.flaticon.com/512/2029/2029907.png">
    <script src="https://cdn.jsdelivr.net/npm/[email protected]/dist/js/bootstrap.bundle.min.js"></script>
    <meta charset="UTF-8">
    <title>Feedback System</title>
</head>

<style>
    nav {
        background-color: rgb(5, 182, 5);
    }

    .navbar-brand {
        font-weight: bold;
        color: white !important;
    }

    .head1,
    .fa {
        color: rgb(5, 182, 5);
        font-weight: bold;
    }

    form {
        border-radius: 4px !important;
        box-shadow: rgba(0, 0, 0, 0.1) 0px 0px 5px 0px, rgba(0, 0, 0, 0.1) 0px 0px 1px 0px;
        max-width: 1000px;
        height: auto;
        margin: auto;
    }

    label {
        text-align: left !important;
        color: black;
        font-weight: 500;
        margin-bottom: 5px;
    }

    .btn {
        background-color: rgb(5, 182, 5) !important;
        font-weight: 600;
    }
    #dashboard_link{
        text-align: center;
        color: rgb(5, 182, 5) !important;
        background-color: white !important;
    }
</style>

<body>
    <nav class="navbar navbar-expand-sm navbar-light">
        <div class="container">
            <a class="navbar-brand" href="#"><i class="fa fa-commenting" aria-hidden="true" style="color: white;"></i>
                FeedBack System</a>
            <a th:href="@{/feedbacks}" class="btn" type="button" id="dashboard_link"><i class="fa fa-cube" aria-hidden="true"></i> Dashboard</a>
        </div>
    </nav>

    <main>
        <div class="container p-3 mt-3">
            <div class="d-flex justify-content-center">
                <form th:action="@{/}" method="post" class="form-control p-4">
                    <h4 class="text text-success text-center p-1"><strong>Give your Feedback</strong></h4>
                    <div th:if="${success}" class="alert alert-success alert-dismissible fade show" role="alert">
                        <strong><span th:text="${success}"></span></strong>
                        <button type="button" class="btn-close" data-bs-dismiss="alert" aria-label="Close"></button>
                    </div>

                    <div th:if="${error}" class="alert alert-danger alert-dismissible fade show" role="alert">
                        <strong><span th:text="${error}"></span></strong>
                        <button type="button" class="btn-close" data-bs-dismiss="alert" aria-label="Close"></button>
                    </div>

                    <div class="mb-2 mt-4">
                        <label for="email"><i class="fa fa-user" aria-hidden="true"></i> User Name</label> <input
                            type="text" id="email" name="fullName" class="form-control" required>
                    </div>

                    <div class="mb-2 mt-4">
                        <label for="email"><i class="fa fa-envelope" aria-hidden="true"></i> Email Address</label>
                        <input type="text" id="email" name="email" class="form-control" required>
                    </div>


                    <div class="mb-2 mt-4">
                        <label for=""><i class="fa fa-question-circle-o" aria-hidden="true"></i> Feedback Type</label>
                        <select id="role" class="form-control form-select" name="category" required>
                            <option>select feedback</option>
                            <option value="Product feedback">Product feedback</option>
                            <option value="Customer feedback">Customer feedback</option>
                            <option value="Review feedback">Review feedback</option>
                            <option value="others">others</option>
                        </select>
                    </div>


                    <div class="mb-2 mt-4">
                        <label for=""><i class="fa fa-comments" aria-hidden="true"></i>
                            Comment</label>
                        <textarea name="message" id="" cols="30" rows="5" class="form-control" required></textarea>
                    </div>

                    <div class="mb-3 mt-4">
                        <button class="btn form-control text-white" type="submit">Submit</button>
                    </div>

                </form>
            </div>
        </div>
    </main>

</body>

</html>
Output:Below is the Index Page Screen.

dashboard.html:Here we created a responsive dashboard page to display feedback information. On this page, we provide a navbar for navigation and use a table to display the information. Additionally, we created some cards to analyze the feedback information with a unique design featuring color coding. We designed a form for collecting information. We used Bootstrap for responsive design and Thymeleaf for rendering dynamic data. Below, we provide the output image for your understanding.
HTML
<!DOCTYPE html>
<html xmlns:th="http://www.thymeleaf.org">

<head>
    <link href="https://cdn.jsdelivr.net/npm/[email protected]/dist/css/bootstrap.min.css" rel="stylesheet">
    <link rel="stylesheet" href="https://cdnjs.cloudflare.com/ajax/libs/font-awesome/4.7.0/css/font-awesome.css">
    <link rel="shortcut icon" href="https://cdn-icons-png.flaticon.com/512/2029/2029907.png">
    <script src="https://cdn.jsdelivr.net/npm/[email protected]/dist/js/bootstrap.bundle.min.js"></script>
    <meta charset="UTF-8">
    <title>Feedback System</title>
    <style>
        nav, .card {
            background-color: rgb(5, 182, 5);
        }

        .navbar-brand {
            font-weight: bold;
            color: white !important;
        }

        .head1,
        .fa {
            color: rgb(5, 182, 5);
            font-weight: bold;
        }

        form {
            border-radius: 4px !important;
            box-shadow: rgba(0, 0, 0, 0.1) 0px 0px 5px 0px, rgba(0, 0, 0, 0.1) 0px 0px 1px 0px;
            max-width: 1000px;
            height: auto;
            margin: auto;
        }

        label {
            text-align: left !important;
            color: black;
            font-weight: 500;
            margin-bottom: 5px;
        }

        .btn {
            background-color: rgb(5, 182, 5) !important;
            font-weight: 600;
        }

        #dashboard_link {
            text-align: center;
            color: rgb(5, 182, 5) !important;
            background-color: white !important;
        }
        table{
            border:1px solid rgb(5, 182, 5) !important;
        }
        th, #text_analysis {
            color: rgb(5, 182, 5) !important;
        }
    </style>
</head>

<body>
    <nav class="navbar navbar-expand-sm navbar-light">
        <div class="container">
            <a class="navbar-brand" href="#"><i class="fa fa-commenting" aria-hidden="true" style="color: white;"></i>
                FeedBack System</a>
        </div>
    </nav>
    <main>
        <div class="container">


            <div class="table-responsive mt-5 mb-4">
                <table class="table table-bordered">
                    <thead class="bg-light">
                        <th>SI.NO</th>
                        <th>User Name</th>
                        <th>Email</th>
                        <th>Feedback Category</th>
                        <th>Comments</th>
                        <th>DateTime</th>
                    </thead>
                    <tbody>
                        <tr th:each="feedback, iterStat : ${feedbackList}">
                            <td th:text="${iterStat.index + 1}">1</td>
                            <td th:text="${feedback.fullName}">User Name</td>
                            <td th:text="${feedback.email}">Email</td>
                            <td th:text="${feedback.category}">Feedback Category</td>
                            <td th:text="${feedback.message}">Comments</td>
                            <td th:text="${feedback.date}">DateTime</td>
                        </tr>
                        <tr th:if="${#lists.isEmpty(feedbackList)}">
                            <td colspan="6" class="text text-center text-dark">No Data Available</td>
                        </tr>
                    </tbody>
                </table>
            </div>

            <div class="analysis mt-5 mb-4 p-5" style="background-color: rgb(192, 252, 192);">
            <h4 id="text_analysis" class="text text-center p-2 text-success mb-4">Feedback Analysis</h4>
                <div class="row row-cols-1 row-cols-md-5 g-4">
                    <div class="col">
                        <div class="card">
                            <div class="card-body text-center text-light">
                                <h6 style="color: white;">Total Feedbacks</h6>
                                <h2 th:text="${totalFeedbacks}"></h2>
                            </div>
                        </div>
                    </div>
                    <div class="col">
                        <div class="card">
                            <div class="card-body text-center text-light">
                                <h6 style="color: white;">Product Feedbacks</h6>
                                <h2 th:text="${totalProductFeedbacks}"></h2>
                            </div>
                        </div>
                    </div>
                    <div class="col">
                        <div class="card">
                            <div class="card-body text-center text-light">
                                <h6 style="color: white;">Customer Feedbacks</h6>
                                <h2 th:text="${totalCustomerFeedbacks}"></h2>
                            </div>
                        </div>
                    </div>
                    <div class="col">
                        <div class="card">
                            <div class="card-body text-center text-light">
                                <h6 style="color: white;">Review Feedbacks</h6>
                                <h2 th:text="${totalReviewFeedbacks}"></h2>
                            </div>
                        </div>
                    </div>
                    <div class="col">
                        <div class="card">
                            <div class="card-body text-center text-light">
                                <h6 style="color: white;">Other Feedbacks</h6>
                                <h2 th:text="${totalOtherFeedbacks}"></h2>
                            </div>
                        </div>
                    </div>
                </div>
            </div>
        </div>
    </main>
</body>

</html>
Output:Below is the Dashboard Screen.

Control LayerRepositoryHere we created an interface for performing database-related operations such as insert and retrieve by extending the Repository interface. This Repository takes input arguments: the domain class and the ID data type of the domain class.
FeedBackRepo.java:
Java
package com.app;

import org.springframework.data.mongodb.repository.MongoRepository;
import org.springframework.stereotype.Repository;

@Repository
public interface FeedBackRepo extends MongoRepository<FeedBack, String> {
    long countByCategory(String category);
}
Service LayerHere we have developed a business logic based on our requirements. Below, we have created a service class using the @Service annotation, where we have implemented the necessary business logic.
FeedBackService.java:
Java
package com.app;

import java.util.List;

import org.springframework.beans.factory.annotation.Autowired;
import org.springframework.stereotype.Service;

@Service
public class FeedBackService {
    @Autowired
    private FeedBackRepo feedBackRepo;

    public boolean saveData(FeedBack feedBack) {
        feedBackRepo.save(feedBack);
        return true;
    }

    public List<FeedBack> getAllData() {
        List<FeedBack> feedbackList = feedBackRepo.findAll();
        return feedbackList;
    }
}
ControllerHere we define the API endpoints to enable the application functionality. We’ve created a controller class using the @Controller annotation. After this, we autowired the service class to access the business logic, and then we render that information into the view layer using Thymeleaf.
FeedBackController.java:
Java
package com.app;

import java.time.LocalDateTime;
import java.util.List;

import org.springframework.beans.factory.annotation.Autowired;
import org.springframework.stereotype.Controller;
import org.springframework.ui.Model;
import org.springframework.web.bind.annotation.GetMapping;
import org.springframework.web.bind.annotation.ModelAttribute;
import org.springframework.web.bind.annotation.PostMapping;


@Controller
public class FeedBackController {

    @Autowired
    private FeedBackService feedBackService;

    @Autowired
    private FeedBackRepo feedBackRepo;

    @GetMapping("/")
    public String getIndex(Model model) {
        model.addAttribute("feedback", new FeedBack());
        return "index";
    }

    @PostMapping("/")
    public String saveData(Model model, @ModelAttribute FeedBack feedBack) {
        feedBack.setDate(LocalDateTime.now());
        if (feedBackService.saveData(feedBack)) {
            model.addAttribute("success","Feedback Received Successfully");
        }
        else {
            model.addAttribute("error","Something Went Wrong");
        }
        return "index";
    }

    @GetMapping("/feedbacks")
    public String getDashboard(Model model) {
        model.addAttribute("feedbackList", feedBackService.getAllData());
        model.addAttribute("totalFeedbacks", feedBackRepo.count());
        model.addAttribute("totalProductFeedbacks", feedBackRepo.countByCategory("Product feedback"));
        model.addAttribute("totalCustomerFeedbacks", feedBackRepo.countByCategory("Customer feedback"));
        model.addAttribute("totalReviewFeedbacks", feedBackRepo.countByCategory("Review feedback"));
        model.addAttribute("totalOtherFeedbacks", feedBackRepo.countByCategory("others"));
        return "dashboard";
    }
}
APIs InformationBelow, we provide detailed information about each API in the Controller layer.
Display Index PageThis API is used to display the Home page by default to the end user, and it supports GET HTTP Requests.
http://localhost:8080/ @GetMapping("")
public String getIndex(Model model) {
model.addAttribute("feedback", new FeedBack());
return "index";
}
Output:After hitting the above URL, we can see the index page as below.
Save Feedback DataThis API is used to save feedback information collected by the end user, and it supports POST HTTP Requests. Upon successful submission of feedback, a confirmation alert is received. Below, we provide images for your reference when this API is accessed.
http://localhost:8080/ @PostMapping("")
public String saveData(Model model, @ModelAttribute FeedBack feedBack) {
feedBack.setDate(LocalDateTime.now());
if (feedBackService.saveData(feedBack)) {
model.addAttribute("success","Feedback Received Successfully");
}
else {
model.addAttribute("error","Something Went Wrong");
}
return "index";
}
Output:
Feedback Received Message:

Display Dashboard PageThis API is utilized to present the dashboard page to the end user, supporting POST HTTP requests. It showcases available feedback information in a tabular format and offers detailed insights into feedback categorization.
http://localhost:8080/feedbacks @GetMapping("/feedbacks")
public String getDashboard(Model model) {
model.addAttribute("feedbackList", feedBackService.getAllData());
model.addAttribute("totalFeedbacks", feedBackRepo.count());
model.addAttribute("totalProductFeedbacks", feedBackRepo.countByCategory("Product feedback"));
model.addAttribute("totalCustomerFeedbacks", feedBackRepo.countByCategory("Customer feedback"));
model.addAttribute("totalReviewFeedbacks", feedBackRepo.countByCategory("Review feedback"));
model.addAttribute("totalOtherFeedbacks", feedBackRepo.countByCategory("others"));
return "dashboard";
}
Output:

Download the Project:
To download the entire project, here we have attached the project GitHub link – Feedback Collection System using Spring Boot
|